Building a Custom E-Ink Personal Digital Assistant (PDA) for Distraction-Free Productivity
This video details the creation of a custom e-ink Personal Digital Assistant (PDA) designed for distraction-free productivity, focusing on note-taking, scheduling, and general organization.
- The device features a hybrid e-ink and OLED display, a custom-designed quiet keyboard, and an ESP32 S3 microcontroller with Wi-Fi and Bluetooth.
- It includes a USB-C charging port and an interchangeable battery for repairability and extended life due to low power consumption.
- The build process involved extensive CAD design in Autodesk Fusion, followed by 3D printing clear resin parts for the casing.
- Custom silicone buttons were cast using a 3D-printed mold, ensuring a quiet and tactile typing experience.
- The software, written in C++ using the Arduino IDE, includes a home screen, a text editor, and a basic file system, with future plans for a task scheduler, calendar, and computer connectivity.
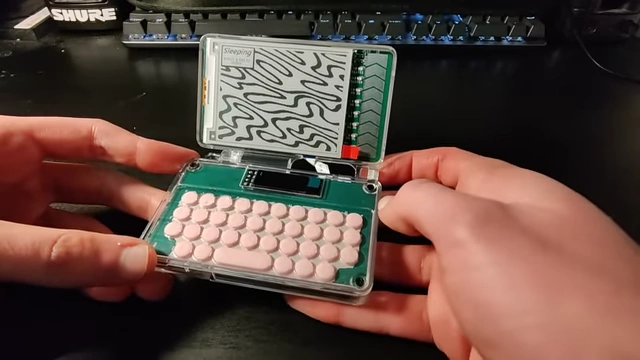
The completed e-ink PDA with its screen open and keyboard visible [ 00:00:10 ]
Intro [0:00]
The creator introduces their latest project: a personal digital assistant (PDA) designed for notes, scheduling, and productivity.
- The philosophy behind the device is to simplify technology use by employing dedicated, distraction-free electronic devices.
- The creator personally uses a flip phone and wanted a dedicated notebook device for quick thoughts and notes.
Features [0:50]
The video showcases the core functionalities and hardware components of the custom-built PDA.
- Main Functionality: The device wakes from sleep to a menu of apps, with the primary function being a text editor for note-taking.
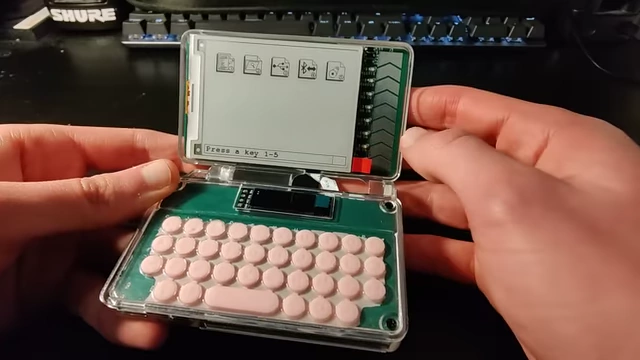
The PDA's home screen displaying app icons [ 00:00:26 ] - Display Technology: It features a hybrid e-ink and OLED display system, which the creator has been developing for months.
- Sleep Mode: Leaving the device on for a while activates a low-power sleep mode for the ESP32, OLED, and e-ink display, conserving battery life.
- A warning appears on the OLED before the device shuts down, displaying a static image on the e-ink screen.
- Processing Unit: Powered by an ESP32 S3, which is sufficient for the device's tasks and includes onboard Wi-Fi and Bluetooth.
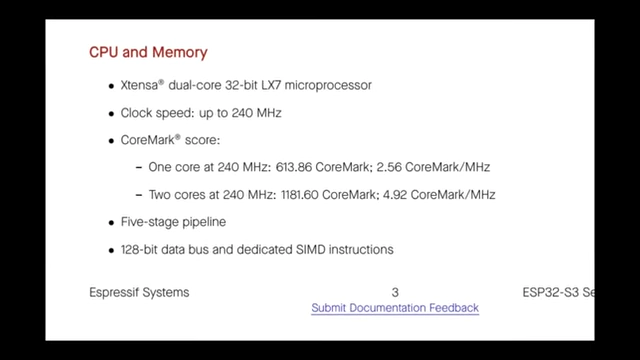
Technical specifications for the ESP32 S3 microcontroller [ 00:01:25 ] - Power Management:
- A power button is located on the side.
- A USB-C charging port is on the bottom.
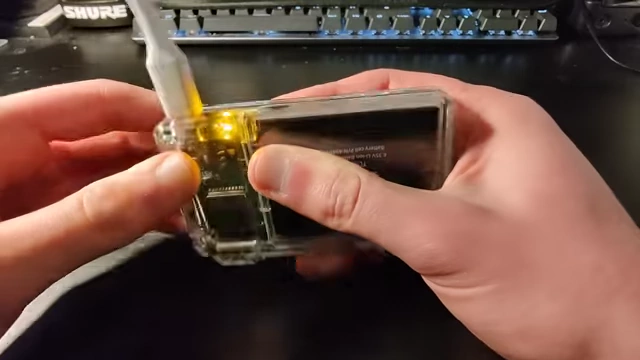
The amber charging indicator lit while the device is plugged in via USB-C [ 00:01:51 ] - Features an interchangeable, non-proprietary battery for repairability, which is expected to last a long time due to low power consumption.
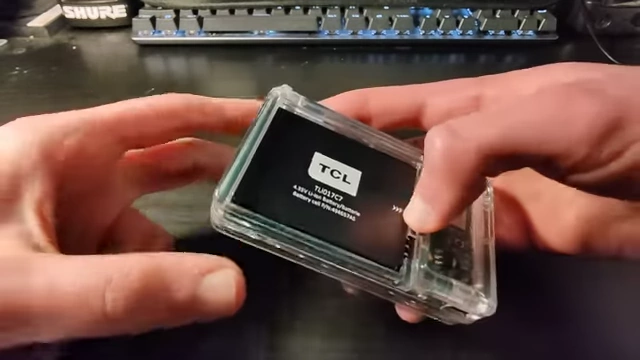
The clear resin casing revealing the interchangeable battery [ 00:01:37 ] - An amber charging indicator turns off when the device is fully charged, and it works seamlessly on both battery and wall power.
- Keyboard:
- Text input is through a built-in keyboard with keys sized for comfortable handheld typing, avoiding cramping.
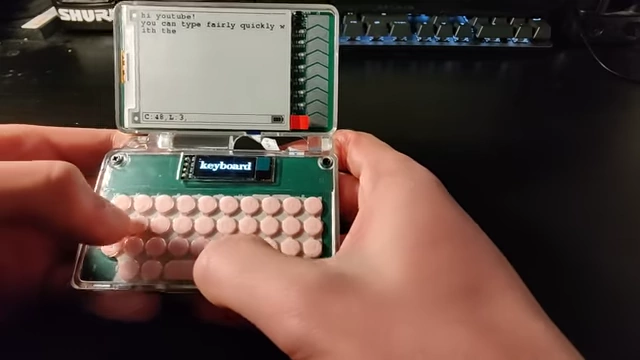
Hands demonstrating typing on the custom-designed, quiet keyboard [ 00:02:20 ] - The custom keyboard design is extremely quiet, allowing the device to be used almost anywhere.
- Text input is through a built-in keyboard with keys sized for comfortable handheld typing, avoiding cramping.
- Software Features:
- FN and Shift indicators on the OLED screen.
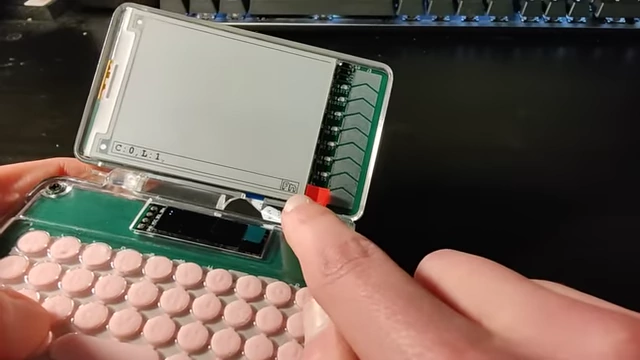
The small OLED screen displaying FN and Shift indicators [ 00:02:33 ] - A "File Wizard" program for saving and loading text documents.
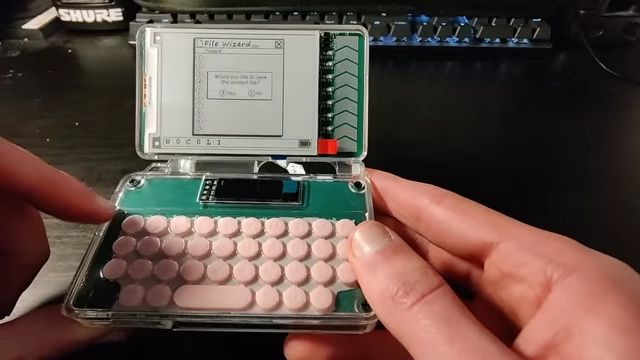
The 'File Wizard' interface prompting the user to save the current document [ 00:02:49 ] - Users can view a list of files, load them for editing, and are prompted to save current documents before loading new ones.
- New files can be created by selecting an empty slot and entering a name.
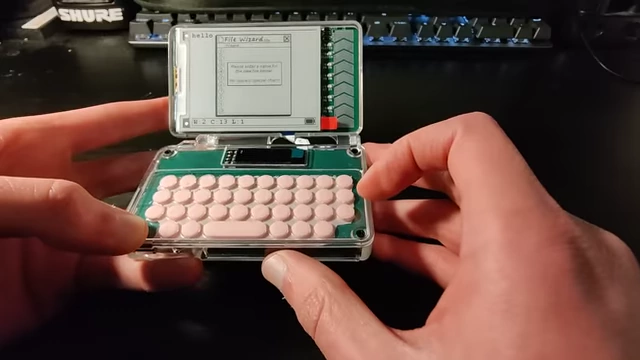
The 'File Wizard' interface prompting for a new file name [ 00:03:04 ] 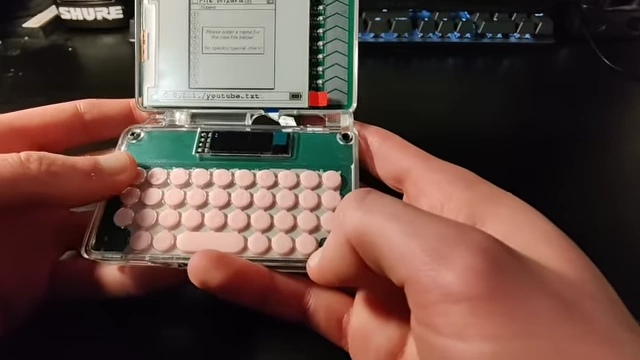
The 'File Wizard' interface displaying a newly created file, "youtube.txt" [ 00:03:17 ]
- FN and Shift indicators on the OLED screen.
- Software Availability: The code for the project is available on GitHub.
CAD Design [4:18]
The physical design of the device began with Computer-Aided Design (CAD).
- Software Used: Autodesk Fusion was utilized to develop the shell parts.
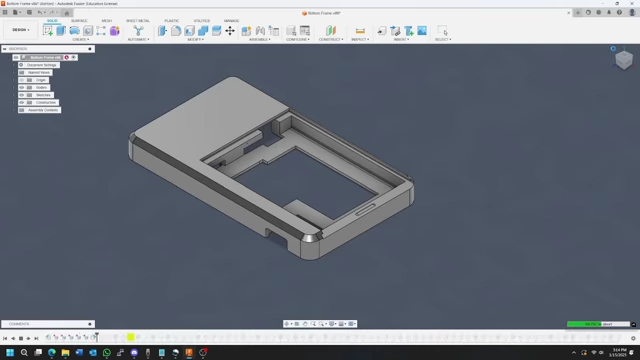
Autodesk Fusion 360 CAD model of the PDA's bottom frame [ 00:04:27 ] - Iterative Process: The design involved significant iteration, especially for the bottom frame that holds all components.
- Assembly Testing: Individual parts were designed, then assembled in CAD to test their fit.
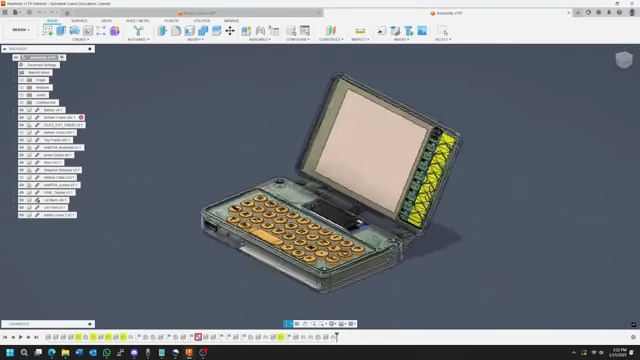
Full CAD assembly view of the PDA, showing internal components and their fit [ 00:04:39 ] - A 3D model export tool allowed importing the PCB design into Fusion for precise fit testing with the plastic parts.
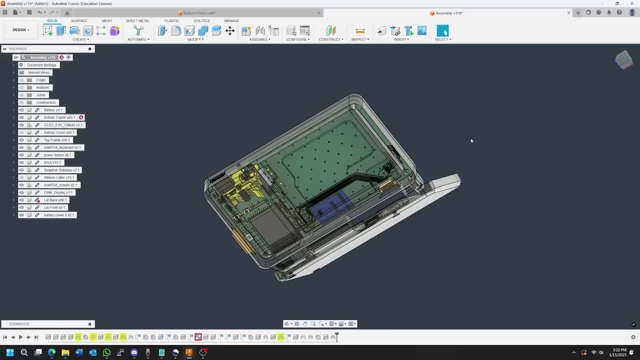
CAD model showing how the PCB fits precisely within the plastic casing [ 00:04:55 ]
- A 3D model export tool allowed importing the PCB design into Fusion for precise fit testing with the plastic parts.
Resin Parts [5:20]
The physical casing components were manufactured using clear resin.
- Manufacturing Method: Parts were ordered in clear resin.
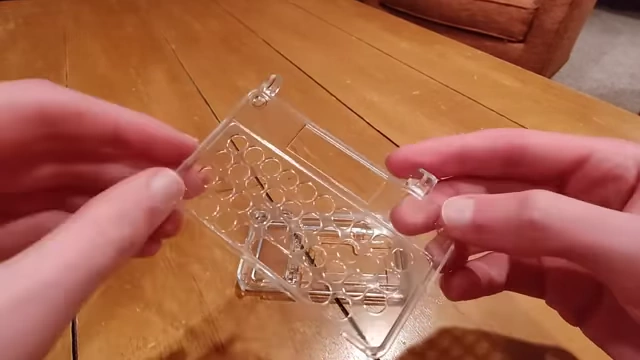
A clear resin casing part, showcasing its transparency and quality [ 00:05:19 ] - Quality: The resin parts turned out well, with no noticeable air bubbles or blemishes despite warnings from the website.
- Assembly Adjustments: Some sanding was required on the hinge parts for proper fit.
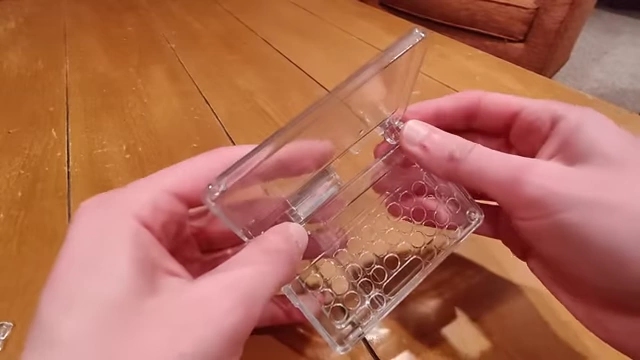
A clear resin hinge component demonstrating its fit [ 00:05:28 ] - Aesthetic: The clear resin design evokes a nostalgic feeling, reminiscent of 90s and early 2000s game consoles that showcased their internal workings.
- Battery Door: The battery door's tolerancing was precise, allowing the battery to fit perfectly with a satisfying "click."
- PCB and Screen Assembly: The e-ink screen was attached with double-sided tape, and the PCB was secured between a backing plate and screw spacers with M2 screws.
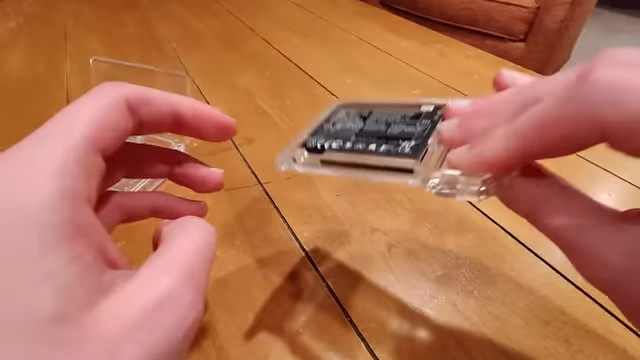
The e-ink screen being attached and the PCB assembly in progress [ 00:05:52 ]
The Buttons [6:02]
A custom solution was devised for the device's keyboard buttons.
- Requirement: Buttons needed to be flexible and highly detailed for embossed letters.
- Initial Idea: 3D printing with flexible filament was considered, but flexible resin printing was not offered, and FDM printing lacked the necessary detail.
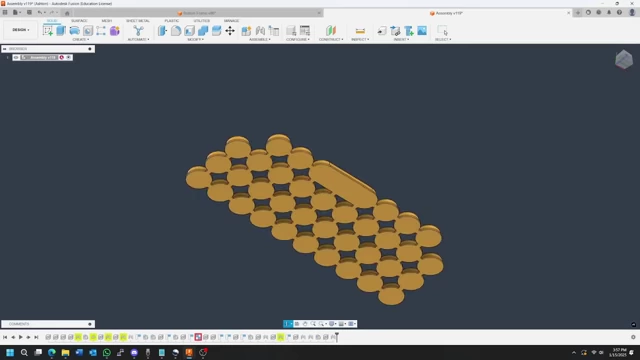
CAD model of the individual keyboard buttons before molding [ 00:06:07 ] - Chosen Method: A resin 3D-printed mold was designed in Fusion (by cutting the button model from a solid block) to cast silicone buttons in a membrane pattern.
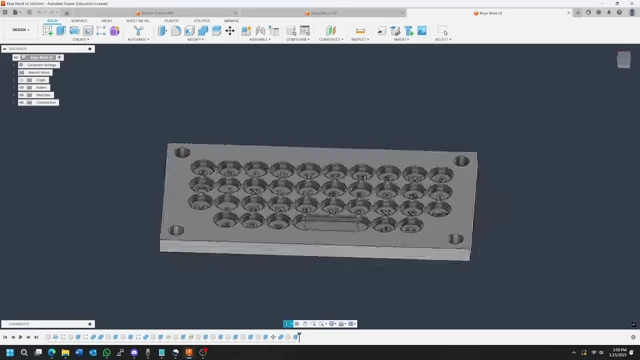
CAD design of the resin mold used for casting silicone buttons [ 00:06:37 ] - Silicone Trials:
- Elmer's Silicone: Easy to mix and pour with quick setting time, but produced bubbly buttons that were too soft to remove in one piece.
- Two-Part Amazon Silicone: Worked much better, with a longer working time (4 hours to set) and a stiffer consistency, allowing for clean removal from the mold.
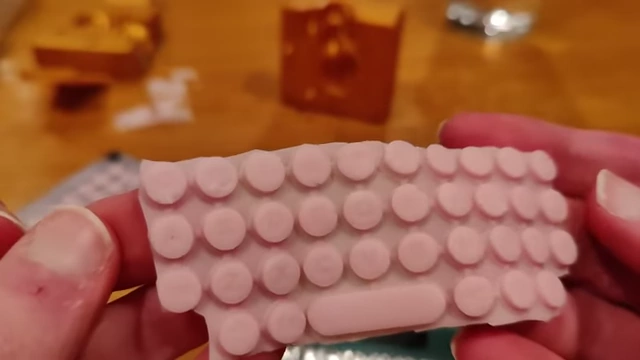
The successfully cast pink silicone keyboard membrane [ 00:07:13 ]
- The Amazon silicone also had a pleasant pink color.
Final Assembly [7:30]
With all components ready, the final assembly of the PDA was completed.
- The button membrane was placed, and the device was secured with M2.5 screws.
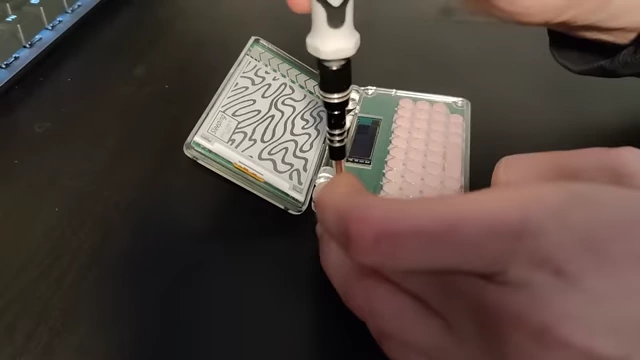
Screws being tightened during the final assembly of the PDA [ 00:07:33 ]
Software & Future Plans [7:50]
Software development occurred concurrently with hardware production, and future enhancements are planned.
- Current Software Features:
- Home screen for app selection.
- Text document editor.
- Basic file system.
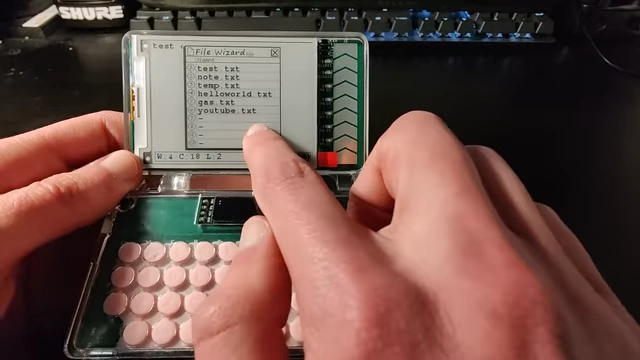
The e-ink PDA displaying a list of files in its basic file system [ 00:08:38 ]
- Programming Language and IDE: The entire project is written in C++ using the Arduino IDE.
- Future Software Features: The creator plans to add more features soon, as the current software is basic.
- A task scheduler or calendar.
- Connectivity to a computer for file transfer (uploading and downloading).