A Simple and Efficient DaVinci Resolve Workflow for YouTube Video Production
This video outlines a simplified DaVinci Resolve workflow for creating YouTube videos, focusing on efficiency and consistent results.
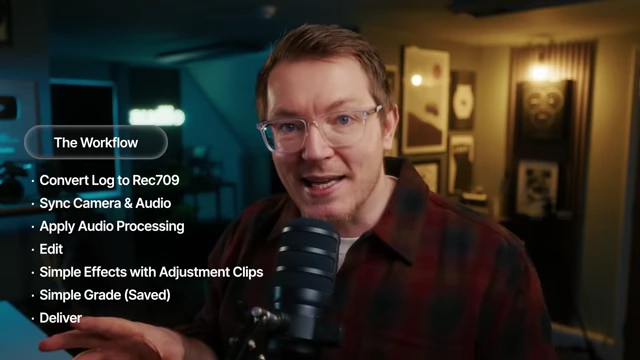
- Color Management: Footage shot in VLOG is automatically converted to Rec. 709 using DaVinci Resolve's color management settings, utilizing a wide gamut color space for flexible grading.
- Audio Sync & Processing: External audio recorded with a USB mic is automatically synced with camera footage using waveform analysis. Audio is then normalized for YouTube and enhanced with the AI Dialogue Leveler and a male lav finisher EQ preset.
- Editing Efficiency: Custom keyboard shortcuts for splitting clips, and ripple trimming to the left and right of the playhead, significantly speed up the editing process by removing gaps.
- Adjustment Clips & Power Bins: Adjustment clips are used for repeatable effects like punch-ins, named, color-coded, and saved to power bins for easy access across projects.
- Color Grading Workflow: Clips are color-coded in the media pool to identify A-roll footage, allowing for efficient filtering and bulk application of a custom power grade that includes exposure, balance, contrast, saturation, and a film look.
- Delivery Settings: A custom render preset for YouTube is created, using H.265 codec, QuickTime format, Nvidia GPU encoding, Rec. 709 scene color space, and linear PCM audio, with final audio normalization.
Simplified DaVinci Resolve Workflow Introduction [00:00]
The video presents a straightforward DaVinci Resolve workflow designed for YouTube video creation, emphasizing speed, ease of use, and consistent, high-quality results. The speaker highlights features that streamline the editing process, from initial footage import to final delivery.
Color Management [01:08]
This section details how to set up DaVinci Resolve for automatic color management when working with log footage.
- Shooting in VLOG [01:11]
- The speaker uses a Panasonic Lumix S5 Mark II and shoots in VLOG, a flat color profile, to maximize image data for later grading.
- Enabling DaVinci Resolve Color Management [01:43]
- Access project settings by clicking the cog icon in the bottom right corner [01:58].
- In "Color Management," change "Color Science" from "DaVinci YRGB" to "YRGB Color Managed" [02:10].
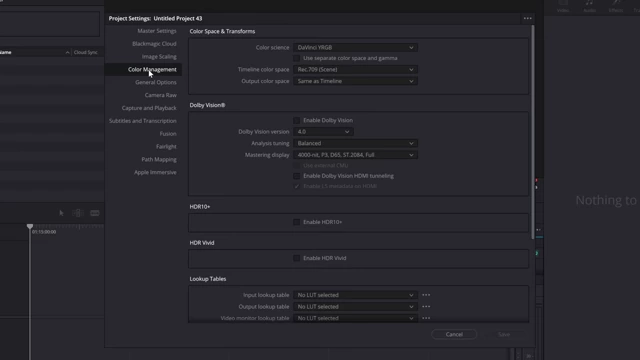
DaVinci Resolve Project Settings for Color Management [ 00:02:10 ] - Untick the option "Use separate color space and gamma for primaries and output."
- Set the "Timeline Color Space" to "HDR DaVinci Wide Gamut Intermediate" [02:16].
- This large color space allows for greater flexibility in pushing highlights and shadows during grading without clipping [02:31].
- Keep "Output Color Space" as "Rec. 709 Scene" for standard computer monitors and web deliverables [02:45].
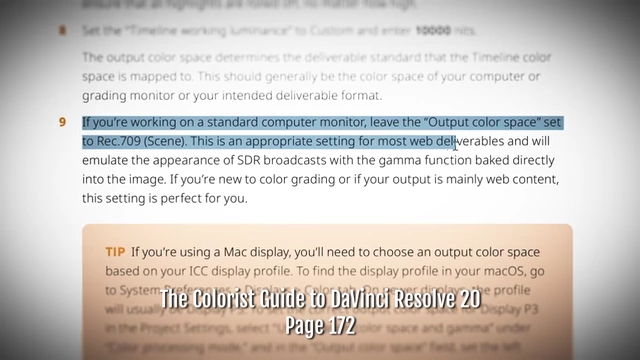
Recommendation to use Rec.709 (Scene) for web content output from "The Colorist Guide to DaVinci Resolve 20" [ 00:02:59 ] - Save these settings as the default preset for new projects [03:43].
- Applying Input Color Space to Footage [03:53]
- After importing flat VLOG footage, right-click it in the media pool.
- Go to "Input Color Space" and select the appropriate profile (e.g., "Panasonic VG gamut VLOG") [04:04].
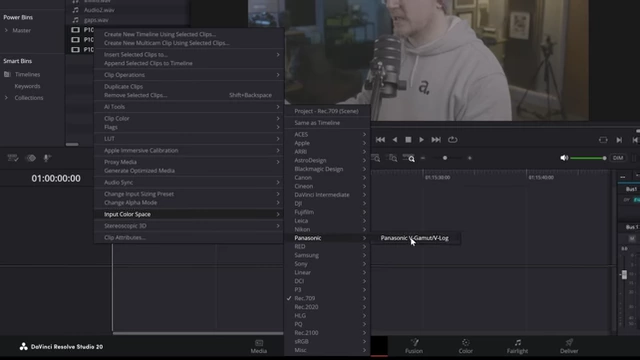
Applying the correct Input Color Space for Panasonic V-Log footage [ 00:04:13 ] - This automatically converts the flat log footage to Rec. 709 for a good starting point [04:20].
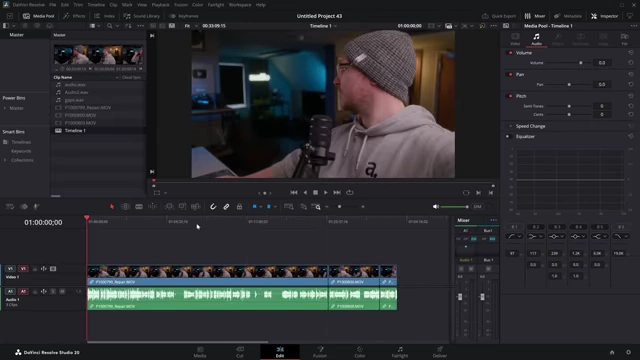
V-Log footage automatically converted to Rec.709 on the timeline [ 00:04:20 ] - Other footage types (like OBS recordings) do not require input color space changes and will display normally [04:27].
Audio Sync [04:40]
This segment covers the process of syncing external audio with camera footage using DaVinci Resolve's automatic sync features.
- Audio Recording Setup [04:45]
- Camera audio is recorded directly into the camera (without an external microphone).
- Primary audio is recorded separately using a USB microphone (Rode Podmic USB) into OBS or Audacity as a WAV file [04:53].
- Automatic Audio Synchronization [05:20]
- In the media pool, ensure no clips are selected. Right-click within the bin [05:31].
- Select "Auto Sync Audio" and choose "Synchronize using: Waveform" [05:37].
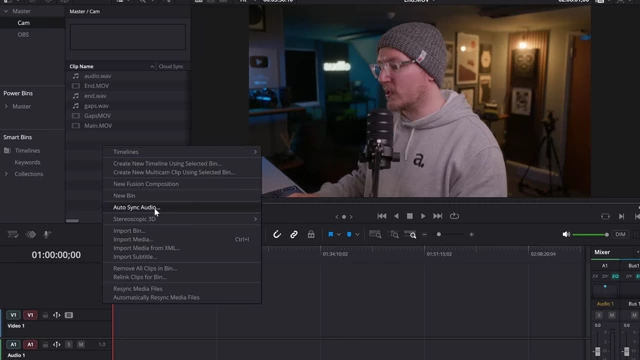
Auto Sync Audio dialog set to synchronize using Waveform [ 00:05:40 ] - Click "Sync" to automatically align all video and audio files [05:43].
- Aligning Timeline Clips [06:29]
- For clips already on the timeline (e.g., main camera footage and OBS recordings), select all clips.
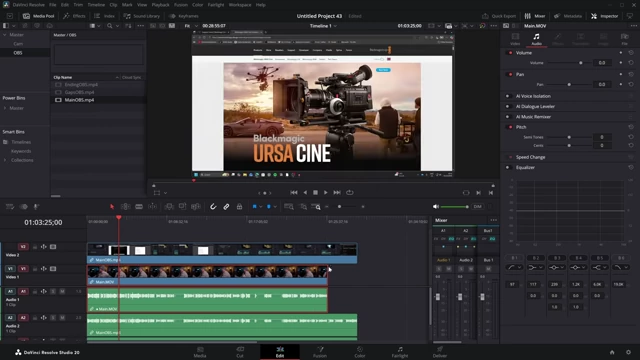
Unaligned camera and OBS audio tracks on the timeline before synchronization [ 00:06:25 ] - Right-click and choose "Auto Align Clips," then select "Waveform" and "Sync" [06:37].
- After alignment, link the synchronized video and audio clips to prevent them from falling out of sync [06:57].
- Use Alt + D (or Option + D) to quickly enable or disable clips on the timeline, facilitating switches between camera and OBS footage [07:04].
- For clips already on the timeline (e.g., main camera footage and OBS recordings), select all clips.
Audio Processing [07:22]
This section details the speaker's simple yet effective audio processing steps in DaVinci Resolve.
- Voice Over Track Organization [07:39]
- Normalize Audio Levels [07:49]
- Highlight all audio clips on the voice-over track.
- Right-click and select "Normalize Audio Levels."
- Set "Normalization Mode" to "YouTube" to optimize for YouTube's loudness standards [07:58].
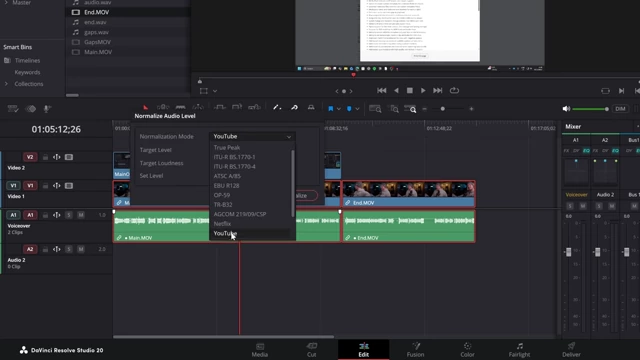
Normalizing audio levels to YouTube's target loudness [ 00:08:00 ] - Choose "Independent" for normalization if clips are already cut, ensuring each clip is processed individually [08:10].
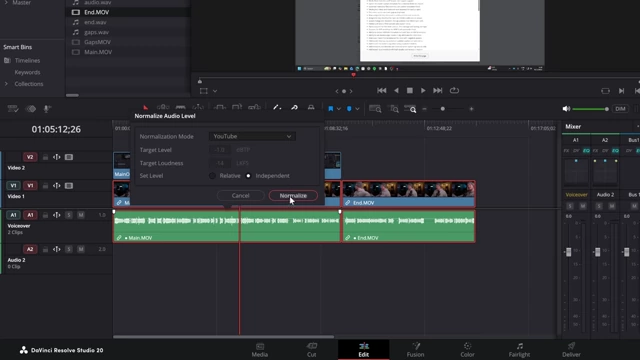
Normalizing individual audio clips independently for consistent levels [ 00:08:17 ]
- AI Dialogue Leveler [08:32]
- Select the voice-over track in the inspector.
- Toggle on the "AI Dialogue Leveler."
- This feature automatically adjusts dynamic range, reducing loud dialogue and lifting soft dialogue, and offers background noise reduction [08:35].
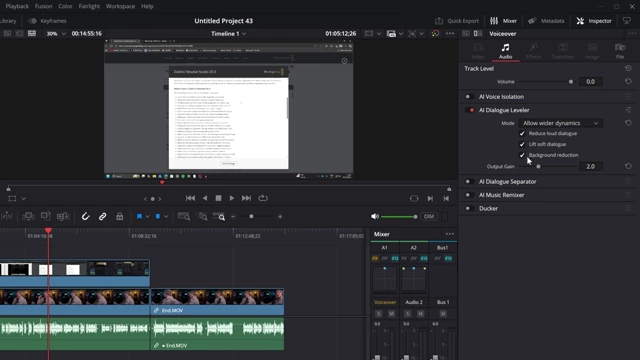
AI Dialogue Leveler settings for dynamic range adjustment and background noise reduction [ 00:08:40 ] - Options like "Allow wider dynamics," "Optimize moderate levels," "More lift for low levels," and "Lift soft whispery sources" are available; the speaker typically uses "Allow wider dynamics" [08:46].
- Equalization (EQ) [09:31]
- Open the mixer (top-right corner) and double-click on "EQ" for the voice-over track [09:35].
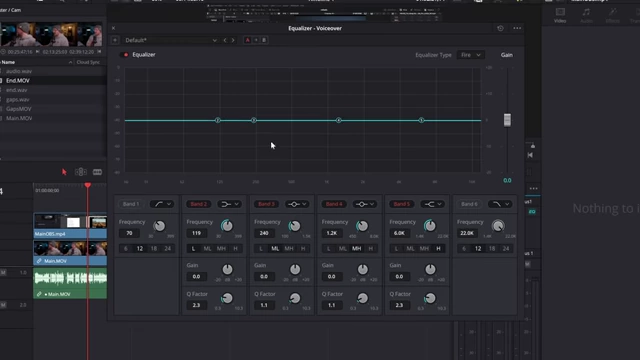
Default Equalizer curve before applying a preset [ 00:09:46 ] - From the presets, select "Male Lav Finisher" to reduce low-end rumble and boost high frequencies for a clearer sound [09:51].
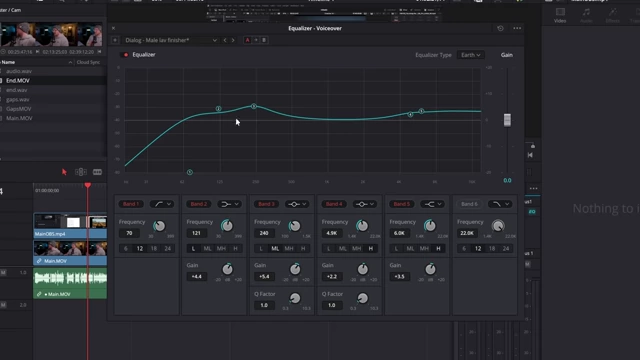
Equalizer with "Male Lav Finisher" preset applied to enhance voice-over audio [ 00:10:00 ]
- Open the mixer (top-right corner) and double-click on "EQ" for the voice-over track [09:35].
- Mono Tracks [10:17]
- The speaker recommends using mono tracks for simple voice-overs to simplify the audio workflow.
Shortcuts! [11:50]
This part focuses on custom keyboard shortcuts for efficient editing.
- Custom Keyboard Shortcuts for Cutting and Trimming [12:04]
- Split Clip (Razor/Cut): Set a shortcut (e.g., number 2) to quickly cut clips at the playhead [12:09].
- Ripple Delete Start to Playhead: Set a shortcut (e.g., number 1) to delete everything from the start of a clip to the playhead and close the gap (shift everything to the left) [12:21].
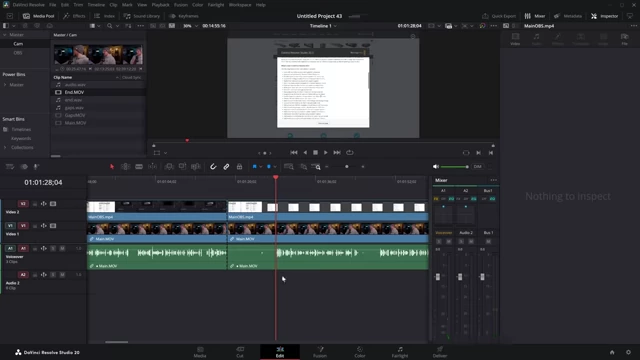
Timeline view demonstrating large gaps between edited dialogue sections [ 00:12:20 ] - Ripple Delete End to Playhead: Set a shortcut (e.g., number 3) to delete everything from the playhead to the end of a clip and close the gap (shift everything to the left) [12:54].
- Setting Up Keyboard Customization [13:08]
- Go to "DaVinci Resolve" -> "Keyboard Customization" [13:08].
- Search for "split clips" to assign a key (e.g., 2) [13:14].
- Search for "ripple" and find "Trim and then ripple." Expand to assign keys for "End to Playhead" (e.g., 3) and "Start to Playhead" (e.g., 1) [13:37].
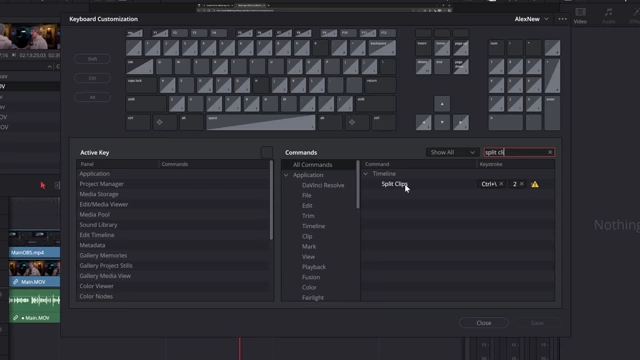
Keyboard Customization settings for "Split Clips," "Ripple Delete Start to Playhead," and "Ripple Delete End to Playhead." [ 00:13:19 ] - Save the custom preset (e.g., "Alex new") [13:56].
Adjustment Clips [14:12]
This section covers using adjustment clips and power bins for reusable effects and transforms.
- Creating and Using Adjustment Clips [14:15]
- Drag an "Adjustment Clip" from the "Effects Library" (Effects > Effects) onto the timeline above other clips [14:29].
- Any transforms or effects applied to the adjustment clip will affect all clips underneath it [14:45].
- Useful for punch-ins or zooms, where a single adjustment clip can control the zoom level for multiple underlying video clips [15:00].
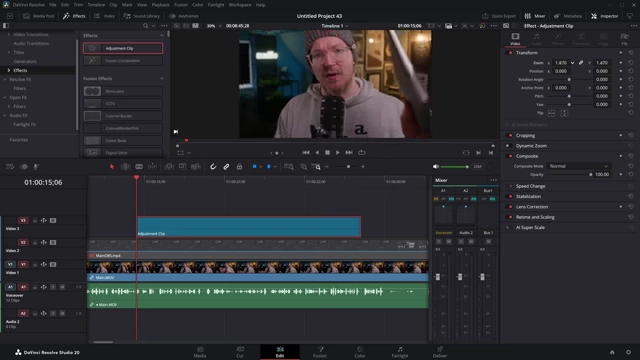
An adjustment clip applied above footage, demonstrating a zoom effect on the underlying clips [ 00:14:59 ] - Name adjustment clips (e.g., "zooi" for zoom) and change their color on the timeline for quick visual identification [15:19].
- Power Bins for Reusability [14:20]
- Enable "Show Power Bins" from the three-dot menu in the media pool [15:42].
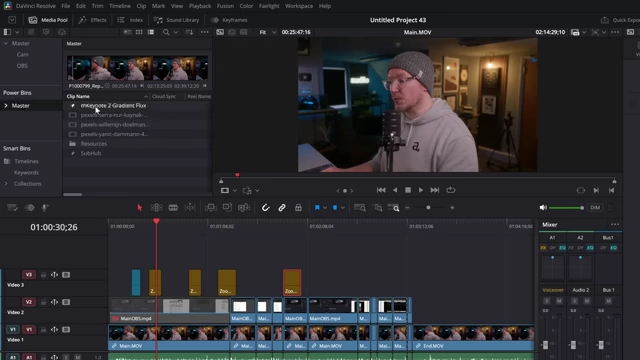
Power Bins enabled in the Media Pool for saving reusable assets across projects [ 00:15:49 ] - Drag created adjustment clips (e.g., a "zooi" punch-in) into a power bin [15:50].
- Power bins make these assets available across all DaVinci Resolve projects, old and new, for consistent and fast application [16:01].
- Effects (e.g., mosaic blur from Resolve FX) can also be applied to adjustment clips and saved in power bins [16:12].
- Enable "Show Power Bins" from the three-dot menu in the media pool [15:42].
Color Grade [16:35]
This part explains an efficient method for color grading, particularly for A-roll footage.
- Clip Colors for Organization [16:50]
- In the media pool, select all original camera footage clips (A-roll) [17:15].
- In the inspector, under "File," change the "Clip Color" (e.g., to orange) [17:26].
- This changes the color of all instances of those clips on the timeline, providing an easy visual cue [17:31].
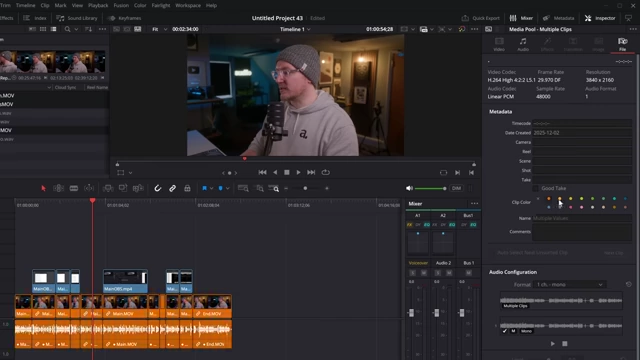
Timeline with A-roll footage color-coded orange for visual organization and filtering [ 00:17:29 ]
- Grading with Clip Color Filter [17:49]
- On the Color page, click "Clips" in the top-left corner, then "Clip Color," and filter by the assigned color (e.g., "Orange") [17:59].
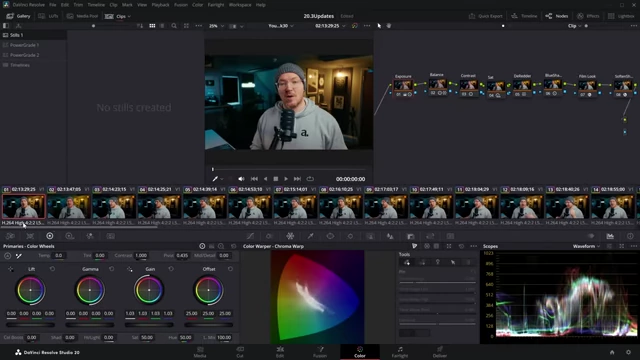
Color page interface filtered to display only orange-coded A-roll clips for efficient batch grading [ 00:18:09 ] - This displays only the A-roll clips, allowing for efficient batch grading [18:08].
- On the Color page, click "Clips" in the top-left corner, then "Clip Color," and filter by the assigned color (e.g., "Orange") [17:59].
- Using Power Grades [18:34]
- The "Power Grade" section in the Gallery (Color page) functions like a power bin for color grades, making them accessible across all projects [18:39].
- The speaker's personal grade includes nodes for:
- Exposure (offset) [18:56]
- Balance (gain and lift for shadows) [19:02]
- Contrast [19:07]
- Saturation [19:08]
- "Dredder" (to remove pinkish tones from Lumix footage) [19:10]
- Film Look Creator (a paid Studio version feature) [19:18]
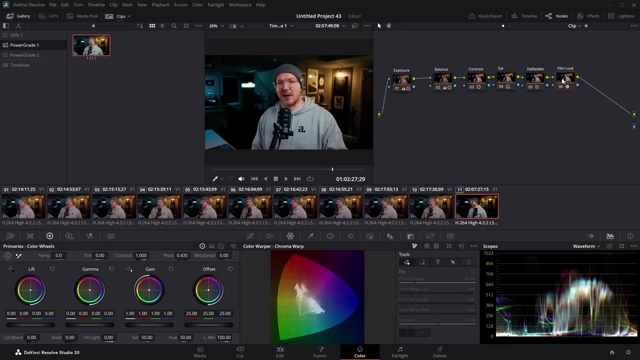
Custom Power Grade node tree including adjustments for exposure, balance, contrast, saturation, and a film look [ 00:19:19 ]
- To create a power grade: select a power grade bin, perform the desired grade, then right-click on the preview screen and select "Grab Still" [19:32]. This "still" saves all node information [19:50].
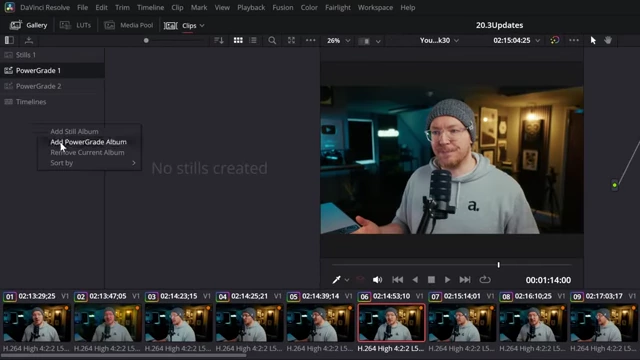
Context menu in the Gallery to add a new PowerGrade Album for organizing custom color grades [ 00:19:38 ] - Apply a saved power grade by right-clicking it and selecting "Apply Grade," or by middle-mouse clicking on it [18:46].
- To apply a grade to multiple clips, select them in the "Clips" area on the Color page and middle-mouse click on a clip that already has the desired grade applied [20:06].
Deliver [20:28]
This final section details the export settings used for YouTube videos.
- YouTube Render Settings [20:40]
- The speaker uses a custom preset called "YouTube 30" (for 30 frames per second).
- Format: QuickTime [21:06]
- Codec: H.265 (for efficient file size and quality) [21:08].
- Encoder: Nvidia (if GPU is available) [21:10].
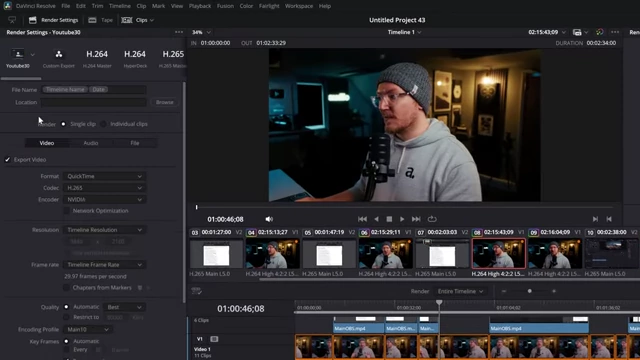
YouTube export settings configured with QuickTime format, H.265 codec, and Nvidia encoder [ 00:20:49 ] - Resolution/Frame Rate: Match timeline settings [21:15].
- Quality: Can be left at default or set to "Very Fast" preset [21:20].
- Advanced Settings: Ensure "Color Space" and "Gamma" are set to "Same as Project" (which is Rec. 709 Scene) [21:26].
- Audio Settings for Delivery [21:46]
- Final Audio Normalization [22:21]
- Tick "Audio Normalization" and set "Optimize to" as "Standard" and the "Standard" to "YouTube" [22:23]. This ensures the final exported audio levels are correctly set for YouTube.
- Saving and Using Render Presets [22:47]
- Click the three-dot menu in the top-right of the render settings, select "Save as New Preset" [22:49].
- Name the preset, add an icon, and optionally add it to "Quick Export" [22:53].
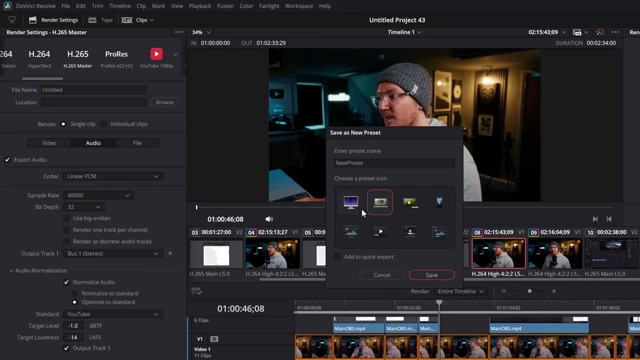
Dialog box for saving a custom render preset, allowing for name, icon, and quick export option [ 00:22:59 ] - This allows for quick exports directly from the edit page via the "Quick Export" menu [23:16].