DaVinci Resolve Saturation Tools: The Best and Worst Techniques for Cinematic Color Grading
This video explains how to achieve filmic saturation in DaVinci Resolve by identifying and avoiding ineffective tools, while embracing advanced techniques.
- The Primary Saturation slider and Color Boost are identified as the worst tools due to their outdated color models and simplistic gain operations, which often lead to artificial-looking results where colors appear emissive.
- HDR Global Saturation is a decent option, introducing the concept of "physically plausible" or "subtractive" saturation, where increasing color naturally darkens the image.
- The HSV node setup is highly recommended for its superior color model and ability to create a custom saturation curve using gamma and gain, allowing precise control over low, mid, and high saturations.
- The Color Slice tool offers the best underlying saturation color model in Resolve and provides specific hue vector adjustments, though its primary operation is still gain.
- Understanding saturation as a multi-dimensional concept, rather than a single slider, is crucial for sophisticated color grading.

DaVinci Resolve Color Slice tool interface displaying global and hue-specific saturation controls [ 00:19:20 ]
Introduction to Saturation Tools in Resolve [00:00]
Saturation is a critical but often misunderstood aspect of color grading. The video aims to demystify saturation by explaining the underlying principles and evaluating various tools in DaVinci Resolve.
- Two problematic popular tools - The two most commonly used saturation tools in Resolve, the primary saturation slider and the color boost, are highlighted as ones to avoid for crafting beautiful images.
- Saturation as a Derived Component [01:15] - Saturation has no specific physical definition in motion imaging; cameras and displays inherently work with Red, Green, and Blue. - Saturation is a "derived component," meaning it requires mathematical models to create a saturation channel.
- Two Key Evaluation Criteria [02:45]
- The effectiveness of any saturation tool depends on two factors:
- The color model used: How the saturation channel is derived.
- The operation performed: What adjustment is applied to the derived saturation channel (e.g., gain, gamma).
1st Saturation Tool to Avoid: Primary Saturation Slider [00:29]
The saturation slider found in the primaries tab is the first tool beginners often encounter but should be avoided.

- Outdated Design and Purpose [01:52] - This tool was not designed for creative color grading or operating on log images. - Its original purpose was to make small adjustments to broadcast video before airing.
- Problematic Color Model and Operation [02:45]
- The color model used is not robust, resulting in an undesirable aesthetic.
- The operation applies "gain" to the saturation channel, meaning:
- Areas already highly saturated are affected the most.
- Areas with low saturation are affected the least. - This can make highly saturated colors appear "emissive" or unnatural, like they are light sources rather than reflective surfaces.
2nd Saturation Tool to Avoid: Color Boost [03:33]
The color boost slider in the primaries tab, introduced after the primary saturation slider, aims to improve saturation control but still falls short.
- Attempt to Address Primary Saturation Flaws [04:00] - Color boost was designed to mitigate the issue of the primary saturation slider over-affecting already saturated areas. - It applies more effect to low saturations and less to high saturations.
- Same Flawed Color Model [05:13] - Despite its improved operation, the color boost uses the exact same underlying color model as the primary saturation slider, which is not robust or convincing. - This results in similar undesirable visual qualities, making it also a "no-fly" tool for professional grading.
Understanding "Good" Saturation: Physical Plausibility [08:32]
The concept of "good" saturation relates to how closely the digital adjustment mimics physical reality.
- Subtractive Saturation (Physical Plausibility) [09:12] - In the physical world, an object becomes more saturated (reflects a narrower band of light) by absorbing more other wavelengths, which inherently makes it darker. - This is termed "subtractive saturation" or, more simply, "physically plausible saturation."
- Avoiding Emissive Appearance [09:42] - Tools that disregard physical plausibility can make reflective surface colors appear "emissive" (like they are emitting light), leading to an artificial, "videoy" look. - "Good" saturation tools aim to prevent this by implicitly or explicitly making objects darker as their saturation increases.
Decent Saturation Tool: HDR Global Saturation [06:38]
The HDR palette's global saturation control represents a step up in sophistication.
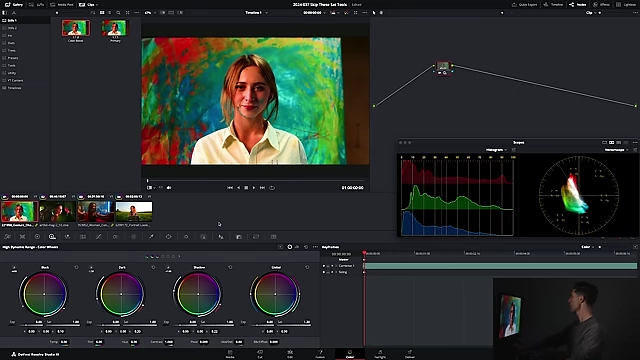
- Improved Aesthetic [07:37] - Compared to the primary saturation, HDR global saturation yields a more organic, filmic, and less garish result. - It begins to incorporate the principle of physical plausibility, making colors feel more natural.
- "Black Box" Operation [11:11] - The specific model and operation behind HDR global saturation are not fully documented in Resolve, making it a "black box." - However, judging by its visual results, the underlying model and operation are functional and provide better control than earlier tools.
Favorite Way to Get Great Saturation: HSV Node Setup [11:45]
Using an HSV (Hue, Saturation, Value) node setup is one of the most effective ways to control saturation in Resolve.
- Node Setup for Saturation Control [11:50]
- Create a new node.
- Right-click on the node and change its color space to HSV.
- Right-click again and turn off channels 1 (Hue) and 3 (Value) to isolate the saturation (S) channel.

DaVinci Resolve node editor showing an HSV node setup with channels 1 and 3 disabled [ 00:12:34 ] - Shaping a Saturation Curve with Gamma and Gain [14:04]
- In this HSV-only saturation node, the primary wheels (Gain, Gamma, Lift) now affect the saturation curve.
- Gain: Primarily affects the highest saturations.
- Gamma: Affects the mid-range saturations, pinning blacks (low saturations) and whites (high saturations).
- By using gamma to boost mid-saturations and gain to control peak saturations, a custom saturation curve can be effectively shaped.
- This method allows for physically plausible saturation where adding color makes areas heavier/darker.

Adjusting the gamma wheel in an HSV-enabled node to shape the saturation curve [ 00:15:00 ] - Bonus: Advanced Saturation Technique with Custom Curves [15:23] - Within the HSV node setup, custom curves can be used to exert even more precise control over the saturation response. - This allows for aggressive takeoffs in low saturations and gradual fall-offs in high saturations, providing unparalleled control over the entire saturation journey. - This is the only way to finely control saturation curves in Resolve, with one exception (HSL curves, which have their own issues).
Why to Skip HSL Saturation Curve Tools [16:45]
Despite offering curve-based control, the HSL (Hue, Saturation, Luminance) curves for saturation (Hue vs Sat, Lum vs Sat, Sat vs Sat, Sat vs Lum) are generally not recommended for adding saturation.
- Flawed Underlying Model [16:56] - The saturation model used in these HSL curves is fundamentally the same problematic model found in the primary saturation slider. - This leads to similar "wonky" and undesirable results, especially when boosting saturation.
- Preference for HSV Setup [17:39] - The HSV node setup with custom curves is a far superior alternative for controlling the saturation curve due to its better color model.
Best Color Model Tool: Color Slice [18:06]
The Color Slice tool is a newer addition to Resolve that offers the best saturation color model available.
- Superior Saturation Model [18:42] - The color model within Color Slice is considered the best for deriving and creating a convincing saturation channel, leading to filmic and organic adjustments.
- Hue-Specific Saturation Control [20:17] - Beyond global saturation, Color Slice provides individual sliders for Red, Green, Blue, Cyan, Magenta, and Yellow vectors. - This allows for targeted saturation adjustments at specific hue angles, a functionality unmatched in ease and quality by other Resolve tools.
- Downsides [19:55] - The primary operation applied by Color Slice is "gain," meaning it lacks the sophisticated curve shaping capabilities of the HSV node. - The "skin" vector specifically is noted as being too narrow and prone to producing noisy artifacts, and its use is highly discouraged.
Comparing Best Options: HSV Node vs. Color Slice [21:30]
For optimal saturation control, colorists should divide their time between the HSV node setup and the Color Slice tool, leveraging their respective strengths.
HSV Node Setup Pros and Cons - Pros: Offers the most comprehensive control over the overall saturation curve (low, medium, and high saturations) by manipulating gamma and gain. Uses a good HSV color model. - Cons: Does not allow for direct targeting of saturation at specific hue angles.
Color Slice Tool Pros and Cons - Pros: Features the best underlying saturation color model in Resolve. Excels at controlling saturation at specific hue angles (Red, Green, Blue, Cyan, Magenta, Yellow). - Cons: Primarily applies "gain" for saturation adjustments, offering limited control over the saturation curve.
Combined Approach for Comprehensive Control [22:26] - Together, these two tools provide a powerful arsenal for shaping saturation across different ranges and at precise hue angles, enabling nuanced and high-quality results.
The Multidimensionality of Saturation [23:51]
Viewing saturation as a multi-dimensional concept, rather than a single linear slider, is fundamental to advanced color grading.
- Beyond a Single Axis [23:52]
- Similar to contrast, saturation is not merely a single "low to high" axis.
- It involves numerous dimensions of control, including:
- Low, medium, and high saturation ranges.
- Specific hue angles.
- Different underlying color models.
- Unlocking Creative Freedom [24:26] - Recognizing this multidimensionality empowers colorists with immense creative freedom and expressiveness. - Moving away from simplistic tools like the primary saturation slider is the first step to harnessing this advanced control.