Mino Lee's 7-Day Personal Brand Building Course for Beginners
This 7-day course details the process of starting and growing a personal brand through short-form video content on platforms like Instagram and TikTok, leveraging daily posting for exponential growth. The course, previously paid, is now free, offering practical guidance on scripting, filming, editing, and posting for beginners.
- Day 1: First Video Creation - Learn to script, film, and edit your initial video using CapCut, focusing on an introductory self-statement to overcome anxiety.
- Day 2: Personal Story Content - Develop relatable video ideas by reflecting on recent emotions, crafting a narrative, and incorporating B-roll and custom thumbnails.
- Pro Tip: Mindset - Address common fears like imposter syndrome and the fear of being seen by setting realistic expectations and focusing on consistent daily action rather than immediate viral success.
- Day 3: Message to Past Self - Create content by reflecting on your past self's challenges and offering advice, enhancing engagement with B-roll and background music.
- Pro Tip: B-roll - Understand different B-roll shots (0.5x, 1x, time-lapse) and how to strategically use them to add visual interest and authenticity without over-planning.
- Day 4: Building a Life Brand - Define your brand's purpose and mission (e.g., documenting a specific goal), optimize social media bios, and integrate personal stories to build audience connection.
- Pro Tip: Editing - Master fine-tuning video cuts for optimal pacing, especially using CapCut's transcript-based editing, to enhance clarity and speed.
- Day 5: Unscripted Videos - Learn to create authentic unscripted content by structuring hooks around unique lessons and events, practicing natural delivery, and focusing on viewer engagement.
- Day 6: Optimizing for Virality - Understand the keys to viral content: clear, concise hooks, valuable insights, and visual familiarity, emphasizing strategic scripting for platforms like TikTok.
- Day 7: Recap & Next Steps - Review all modules and emphasize the importance of continuous learning and community engagement for long-term growth and monetization in content creation.

Overview of the speaker's Instagram growth from Day 1 to Day 57, showing followers increasing from 50K to 102K. [ 00:00:21 ]
How to Watch This Course [0:00]
The speaker introduces a 3-hour course on starting a personal brand through daily short-form video content on platforms like Instagram and TikTok.
- Personal Journey and Results
- The speaker shares his experience starting as a broke college student and posting one reel daily, which led to:
- Doubling his Instagram following to 100K in 60 days.
- Launching a business that generated $10K/month in 15 days.

A screenshot of an online dashboard showing total revenue nearing $9K by Day 12. [ 00:00:25 ]
- He emphasizes that consistent posting was key to these results.
- The speaker shares his experience starting as a broke college student and posting one reel daily, which led to:
- Course Access and Value
- This course, previously paid for by over 1,500 students who achieved similar growth (0 to 10K followers, first dollar from content, etc.), is now available for free.
-
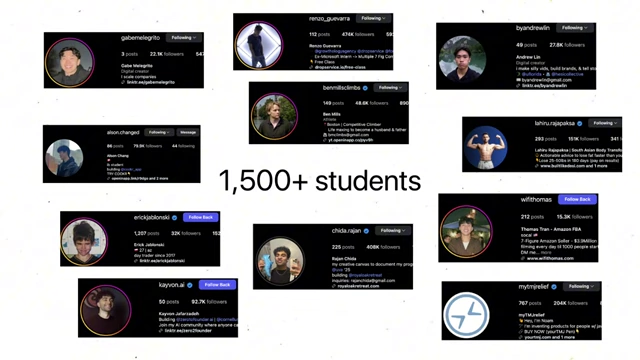
A collage of Instagram profile screenshots from over 1,500 students who used the course to grow their following. [ 00:00:48 ] -
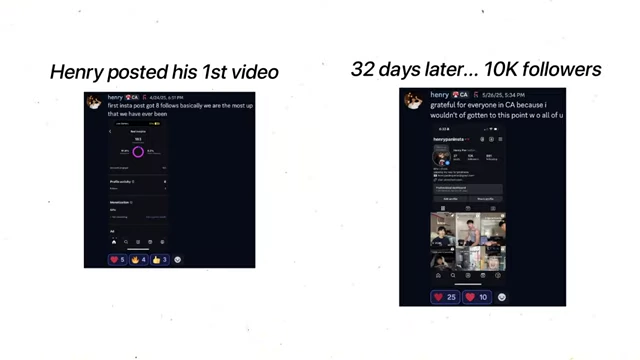
Side-by-side screenshots showing a student's Instagram post with 8 followers increasing to 10K followers in 32 days. [ 00:00:53 ] -
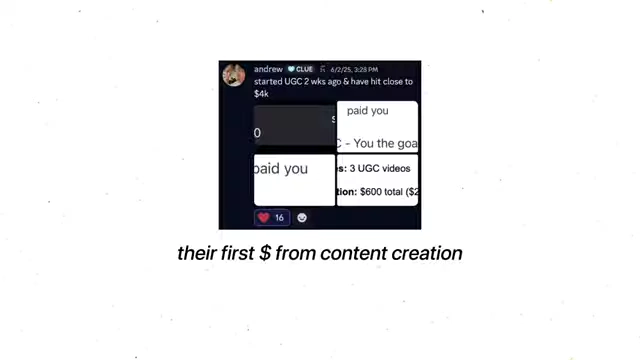
A screenshot showing a student's initial earnings from content creation. [ 00:00:55 ] - It includes the first seven modules, covering scripting, filming, editing, and posting for beginners.
- Viewers are encouraged to take action and bookmark the video, treating content creation as a habit before it becomes a skill or income source.
- Getting Started
- Access a free cheat sheet in the description to follow along with the 7-day course.
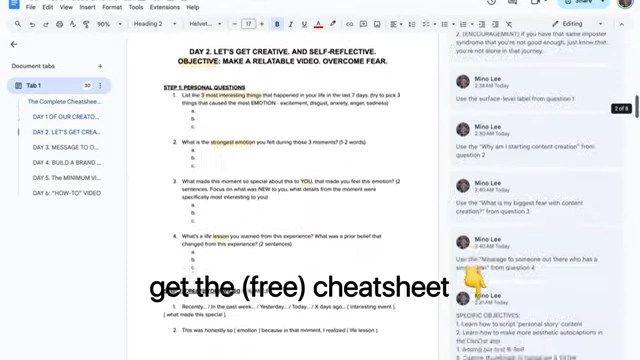
A screenshot of the course cheat sheet, detailing personal questions for video scripting. [ 00:01:59 ] - The first module focuses on creating your first video for TikTok and Instagram Reels, covering scripting, filming, and editing basics.
- Access a free cheat sheet in the description to follow along with the 7-day course.
Day 1: Creating Your First Video [2:04]
This module guides beginners through creating their very first short-form video for TikTok and Instagram Reels.
- Self-Reflective Questions for Scripting (Step 1)
- Answer four simple questions to build the foundation of your first video script.

A Google Docs screenshot showing the four self-reflective questions for Day 1's video script. [ 00:02:39 ] - The intention of this first week is not to get views, but to build the habit of posting.
- Answer four simple questions to build the foundation of your first video script.
- Connecting with Others (Step 2)
- After writing your answers, share them in the Discord chat.
- Send a message to one person in the chat who recently shared their intro message, and try to connect with them on a 15-minute call.
-
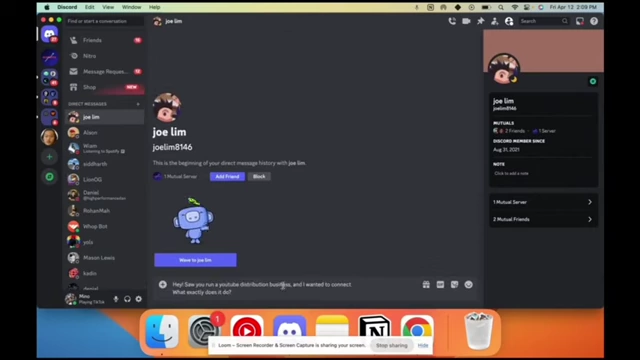
A Discord chat showing direct messages to a fellow creator, emphasizing community building. [ 00:06:46 ] - This helps build a supportive community, which is crucial for motivation.
- Video Script Formulation (Step 3)
- Use your answers from Step 1 to create a simple video script in a "Mad Lib" style.
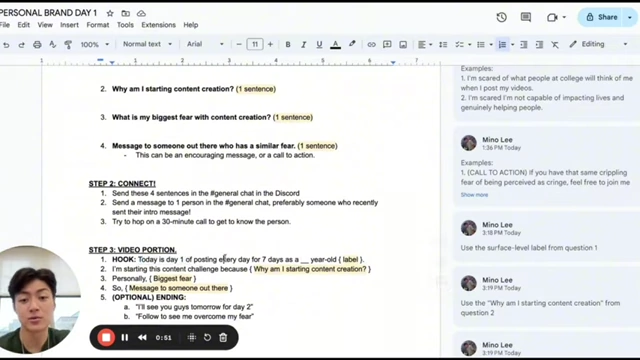
A Google Docs screenshot displaying the Mad Libs-style video script template for Day 1. [ 00:08:19 ] - The goal is simply to get out there and post, regardless of video quality.
- Use your answers from Step 1 to create a simple video script in a "Mad Lib" style.
- Filming with CapCut (Mobile)
- Preparation:
- Open Google Docs on your phone, copy your script.
- Download and open the CapCut app.
- In CapCut, tap "Expand" in the top right, then "Camera."
- Set the camera to "3 minutes" recording time.
- Tap the teleprompter icon, "Edit," "Clear All," and paste your script.
- Adjust teleprompter settings (speed, font size) for comfortable reading while maintaining eye contact with the camera.
- Lighting:
- Position yourself in front of your main light source for optimal front lighting. Avoid backlighting.
- Recording:
- Take a deep breath (inhale 4, hold 6, exhale 8) to calm nerves before recording.
- Press the record button. If you make a mistake, simply press record again to create a new clip that you can later cut.
- Preparation:
- Basic Editing in CapCut
- Clip Cutting:
- After recording, press the "Check" mark, then "Edit" (scissor icon).
- Play the clip to identify dead space at the beginning or end of sentences.
- Use "Split" to cut unwanted sections, then delete them.
- Zoom into the timeline with two fingers for precise cuts, aiming for snappy transitions between sentences.
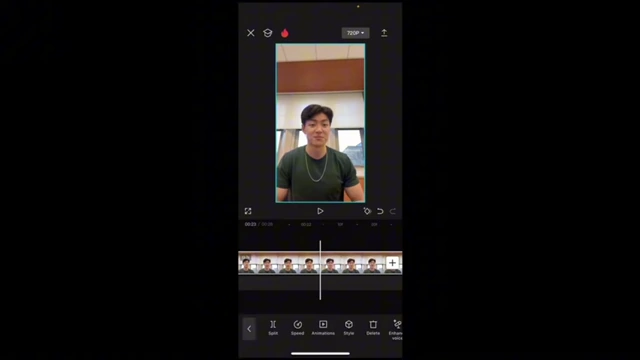
The CapCut editing interface showing video clips in the timeline, with controls for splitting and trimming. [ 00:17:20 ]
- Auto-Captions:
- Tap "Text" then "Auto Captions." Use default settings (Video source, no template, no bilingual captions, identify filler words off).
- Adjust the last text box to end before the video clip to avoid black space.
- Review captions for typos and correct them in "Edit Captions."
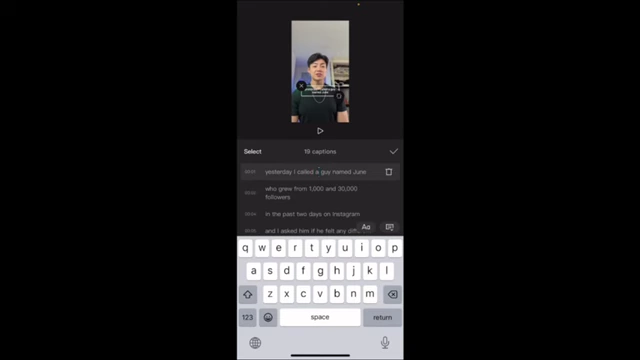
A CapCut screenshot showing the 'Edit Captions' interface where captions can be reviewed and corrected. [ 00:43:01 ] - Ensure each sentence is on a single line by pressing "Return" in the "Edit Captions" menu.
- Resize captions with two fingers and move them slightly up (around 30% from the bottom) to avoid being covered by app UI (username, likes, comments).
- Volume Adjustment:
- Select any clip, tap "Volume," and increase it to 200% (or higher if needed) using "Loudness adjustment" to ensure audibility.
- Clip Cutting:
- Export and Posting
- Export Settings:
- Tap the export settings (e.g., 720p/1080p) in the top right.
- Set resolution to 4K (if available) for better quality, even if platforms downscale it.
- Set frame rate to 30fps (avoid 60fps for short-form content due to choppiness on some platforms).
- Select "Recommended code rate."
- Export the video.
- Posting on TikTok/Instagram:
- Close CapCut and open TikTok/Instagram.
- Tap the "+" button to upload the video from your camera roll.
- Add a short, simple caption and a niche-specific hashtag (e.g., #contentcreation).
- On TikTok, add text for a thumbnail. On Instagram, you can add a custom thumbnail from your camera roll.
- Post the video.
- Export Settings:
Day 2: Crafting Relatable Personal Stories [25:31]
This module focuses on creating compelling, self-reflective videos that resonate with viewers.
- Brainstorming Relatable Content
- The objective is to make a relatable video and overcome the ego often associated with opening up online.
- Viewers connect with content that resonates with their own experiences or offers new perspectives.
- The process starts by forgetting about "making content" and focusing on genuine self-reflection.
- Four Self-Reflective Questions:
- List 3 most interesting things that happened in your life in the last 7 days. (Focus on things that caused strong emotions like excitement, disgust, anxiety, anger, or sadness.)
- What is the strongest emotion you felt during those 3 moments? (1-2 words per moment)
- What made this moment so special to you that made you feel this emotion? (2 sentences, focusing on what was new/specifically interesting to you about each moment)
- What's a life lesson you learned from this experience? What was a prior belief that changed from this experience? (2 sentences)
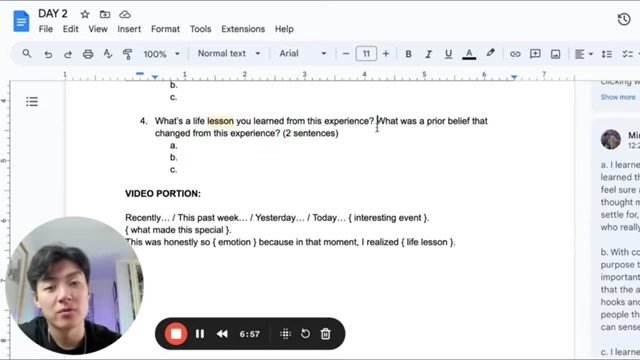
A Google Docs screenshot showing the four self-reflective questions for Day 2, including the prompt for 'life lesson'. [ 00:31:05 ]
- Video Scripting (Mad Lib Style)
- Use the answers from the self-reflective questions to populate a video script structure:
- "Recently / This past week / Yesterday / Today / X days ago, [interesting event from Q1]."
- "[What made this special from Q3]."
- "This was honestly so [emotion from Q2] because in that moment, I realized [life lesson from Q4]."
- Briefly revise the script for flow and concision, especially the first three sentences. Avoid greetings like "Hey guys" for broader audience appeal.
- Use the answers from the self-reflective questions to populate a video script structure:
- Adding a Call to Action/Positive Note
- End your video with a positive note, motivational affirmation, or a call to action to create a positive psychological effect on viewers.
- Tailor the message to a specific relatable audience (e.g., content creators, business owners, people interested in love).
- Filming and Editing (CapCut Mobile)
- Filming:
- Copy the chosen script from Google Docs to CapCut's teleprompter.
- Ensure good lighting (e.g., ring light with colorful background lights). Position close to the light source.
- Perform pre-filming warm-ups and take deep breaths.
- Record sentences one or two at a time to maintain breath and clarity.
- Editing:
- Cut out dead space and redundant takes for snappy pacing.
- Adjust audio volume to 200% and apply "Loudness adjustment."
- Generate auto-captions, resize, and move them up the screen (around 30% from the bottom).
- Correct typos and ensure each sentence is on a single line.
- Optional: Adding B-roll:
- Use the "Overlay" feature to add B-roll clips. Mute the B-roll audio.
- Pinch to resize and position the B-roll as an overlay.
- Cut the B-roll to match specific points in your narration. B-roll doesn't need to perfectly correlate but should add visual interest.
- Filming:
- Export and Posting
- Export the video in 4K resolution at 30fps.
- Upload to Instagram and TikTok.
- Create a custom thumbnail for Instagram from a screenshot of the video with added text (e.g., "Day 105").
- Write a short, relevant caption with a niche-specific hashtag.
- On TikTok, use the in-app text tool to add a thumbnail title.
- Profile Optimization Hack: On Instagram, you can remove posted videos from your profile grid to maintain a curated aesthetic by using the "Remove from profile grid" option.
- Viewers are encouraged to provide positive feedback to other creators in the Discord "content reviews" section.
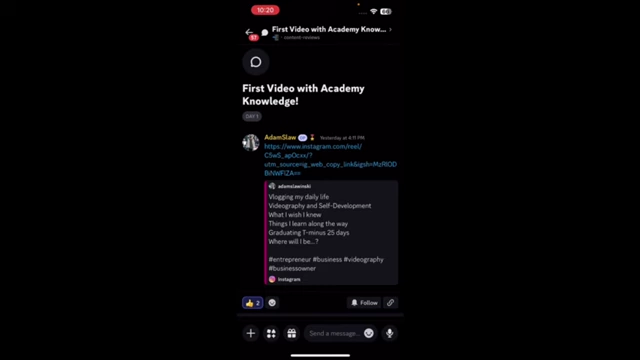
A screenshot of the Discord 'content-reviews' channel, where a user has posted a video for feedback. [ 00:51:26 ]
Pro Tip: Mindset for Creators [51:56]
This module focuses on the crucial mindset shifts needed to succeed in content creation.
- Overcoming Mental Blocks
- The speaker emphasizes that mindset is more important than technical skills (scripting, editing, posting times) once a minimum quality threshold is met.
- He shares three key fears he had to overcome:
- Fear of being seen: Not feeling worthy or capable of impacting lives.
- Imposter syndrome: Believing one isn't qualified enough.
- Lack of faith and discipline: Losing motivation over time.
- Addressing the Fear of Being Seen/Imposter Syndrome
- Even if you're only a few steps ahead in your journey, there are "hundreds of thousands of people stuck on step one" who need your specific guidance.
- You are the best person to help your "former self" because you understand their unique problems and limiting beliefs.
- The goal is not to create content like famous YouTubers but to build a brand around you helping people you know how to help best.
- You only need a thousand true fans who genuinely connect with your journey; virality (100K+ followers) is not a prerequisite for success.
- Focus on guiding people to take one step in their journey (e.g., encouraging someone to step into the gym).
- Embrace being "embarrassingly, humiliatingly, terrifyingly yourself online" to attract genuine followers.
- Maintaining Motivation and Discipline (3 Systems)
- 1. Define and Visualize Goals:
- Write down your 6-month goals for followers, income, and daily posting frequency.
- Place these goals somewhere visible daily (e.g., phone wallpaper, notebook, bedroom wall).
- Focus on the action-based goal (e.g., "one post a day") to celebrate consistency, detaching from immediate results.
- 2. Consistent Daily Action:
- Commit to posting once every single day.
- Only congratulate yourself for showing up, not for the number of views or immediate success.
- Consistency transforms you into an unrecognizable creator and communicator.
- 3. Lower View Expectations:
- Don't expect crazy views in the first month.
- Celebrate small wins (e.g., 1,000 views, two comments) as significant achievements.
- Understand that building a personal brand is a long-term exponential growth process.
- From a business perspective, even a small audience (e.g., 10,000 views) can generate significant income through conversions (e.g., $1,000 from a $100 product).
- Focus on authentic, heartfelt content to genuinely impact people, as this drives deep engagement that algorithms reward.
- The science of audience building is about being your authentic self, which leads to genuine connection and organic reach.
- 1. Define and Visualize Goals:
Day 3: Messages to Your Past Self [1:02:25]
This module introduces a powerful content strategy: creating videos that offer advice to your younger self.
- Content Strategy: Message to Younger Self
- This format is highly effective for viral content because many users share similar past struggles.
- It provides value by offering insights that resonate with people who are at an earlier stage of a journey.
- Collect 5-10 B-roll clips for this video to enhance engagement.
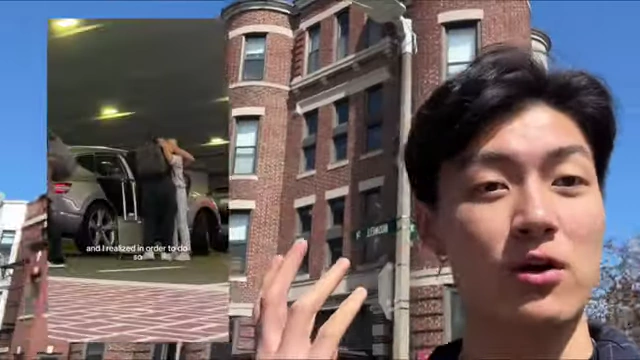
The speaker walking outside with B-roll clips playing in an overlay, demonstrating the 'message to younger self' video format. [ 01:02:52 ] 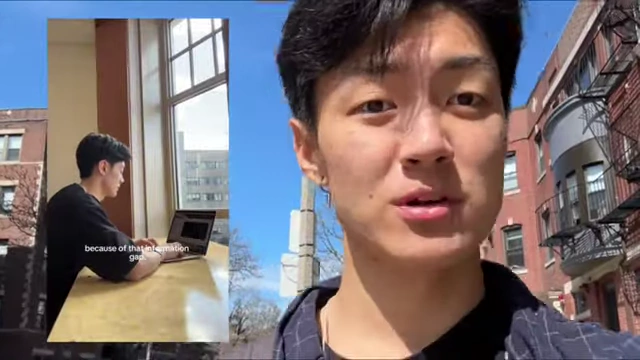
The speaker outside with a B-roll clip playing in an overlay, showing someone working on a laptop. [ 01:03:15 ] 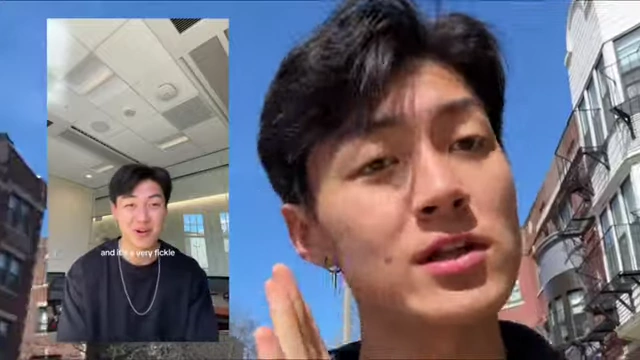
The speaker outside with a B-roll clip playing in an overlay, demonstrating a concept related to motivation. [ 01:03:23 ] 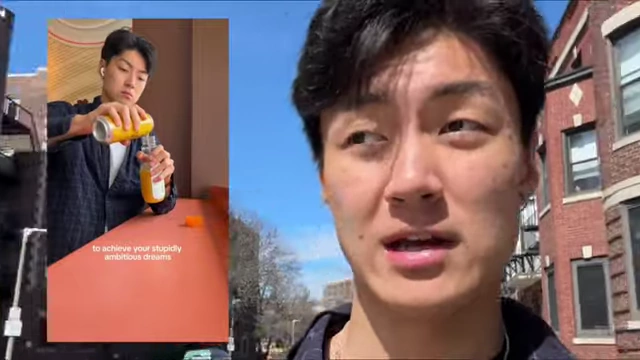
The speaker outside with a B-roll clip playing in an overlay, showing someone pouring a drink. [ 01:03:33 ]
- Brainstorming Questions for Scripting
- The process involves deeply reflecting on your past self from exactly one year ago.
- Step 1: Reflect on Your Past Self (1 year ago):
- Close your eyes for 20 seconds and recall what your past self wanted, thought about, and worried about (e.g., career, relationships, finances).
- List 5 specific things that have happened in your life in the past year that your younger self would have been excited about (1 sentence each). (e.g., running a business, hitting 10K months, parental approval for dropping out, hitting 100K Instagram followers for lifestyle content, traveling with creators).
- Step 2: Identify Key Changes/Actions:
- For each of the 5 exciting things, state one specific change (action or mindset shift) your younger self needed to make to achieve it (1-2 sentences).
- Focus on unique, unexpected changes rather than generic advice (e.g., "put down impatience for quick money," "let go of egocentric obsession with results," "detach from mom's approval").
- Step 3: Anticipate Younger Self's Doubts:
- For each specific change identified in Step 2, imagine your younger self's immediate doubt or objection (1-2 sentences, worded as your younger self would say it).
- This helps create a natural dialogue and addresses common audience concerns (e.g., "But why does that correlate with hitting a 10K a month?").
- Step 4: Convince Your Younger Self (the "Sizzle"):
- For each of the younger self's doubts from Step 3, craft a detailed response that convinces them of your point (3-4 sentences), using specific numbers or examples where possible.
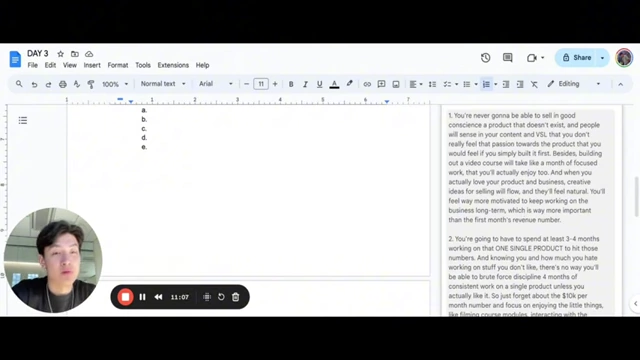
A Google Docs screenshot showing an example of a detailed response to a younger self's doubt, part of the Day 3 scripting process. [ 01:11:01 ] - The goal is to provide a compelling counter-argument, highlighting how the change led to the desired outcome.
- For each of the younger self's doubts from Step 3, craft a detailed response that convinces them of your point (3-4 sentences), using specific numbers or examples where possible.
- Step 5: Final Short Message:
- Give a final, direct message of encouragement, reassurance, or a call to action to your younger self (1-2 sentences). (e.g., "Trust that you'll sell after you've built your product and go build the most beautiful product you possibly can.")
- Script Refinement
- Copy your answers into a cohesive script.
- Refine the script to ensure grammatical sense, flow, and concision, especially the hook and first few sentences. Eliminate redundant words.
- Make the hook as specific and niche as possible (e.g., "I finally convinced my Korean mom..."), as this increases relatability and initial engagement.
- Ensure the script sounds natural when read aloud, as milliseconds of dead air or awkward phrasing can cause viewers to scroll.
- Filming and Editing (CapCut Mobile)
- Filming:
- Copy the revised script to the CapCut teleprompter.
- Position yourself with good front lighting, ideally from a window.
- Perform pre-filming warm-ups (tongue twisters, deep breaths).
- Incorporate hand gestures to appear more conversational.
- Visualize talking to your younger self or a trusted friend to maintain a natural flow.
- Editing with B-roll and Music:
- Cut dead space for quick pacing.
- Aggressive B-roll Integration: Add B-roll clips (mute their volume) every few seconds, ideally matching key phrases or sentences in your voiceover. Aim for dynamic, non-static shots.
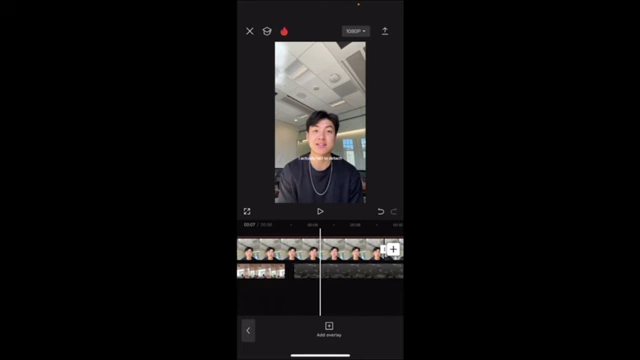
CapCut interface showing video clips in the timeline with B-roll overlays added to the main talking head footage. [ 01:24:15 ] - Background Music: Download a familiar, non-lyrical song from YouTube using a converter (e.g., YTMP3).
-
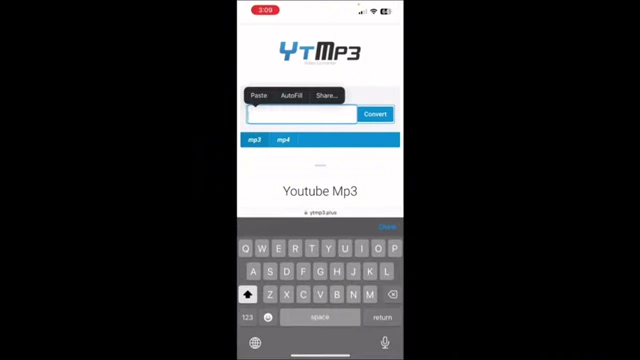
A phone screen showing the YTMP3 website, used for converting YouTube videos to MP3 audio files. [ 01:30:10 ] - Add the music to CapCut (Audio > Sounds > Device).
- Trim the music to match the video length.
- Adjust music volume to around 60-70% to avoid overpowering your voice.
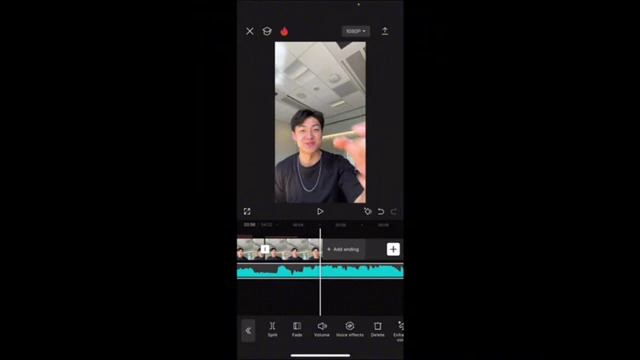
A CapCut screenshot showing the audio track for background music, trimmed to match the video length. [ 01:32:50 ]
-
- Captions:
- Add auto-captions, resize, position, and correct typos as learned in Day 1.
- Filming:
- Export and Posting
- Export the video in 4K 30fps.
- Upload to social media platforms.
- Copy the link and share it in the Discord "content reviews" section, and provide encouraging feedback to at least one other creator.
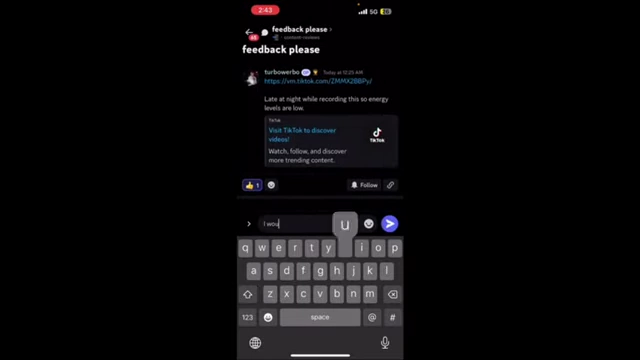
A Discord chat interface showing a user providing feedback on another creator's video. [ 01:35:37 ]
Pro Tip: B-Roll [1:36:28]
This module provides practical tips for collecting and using B-roll footage.
- B-roll Strategy: Spontaneous Collection
- B-roll should generally not be pre-planned with a shot list, as this adds unnecessary work and can hinder authenticity.
- Instead, collect B-roll spontaneously throughout your day.
- The speaker has a "list of shots" he frequently takes, but it's not a rigid plan.
- Types of B-roll Shots
- 1. 0.5x Shots (Wide Angle):
- Static: Set your phone down (e.g., on a table) at 0.5x and record yourself performing daily actions (working, journaling, reading, exercising). Aim for at least 30 seconds of footage.
- Handheld/Walking: Use 0.5x while walking to school or a building, holding the camera visibly in your hand. This wider angle captures more surroundings.
- 2. 1x Shots (Standard Zoom):
- Laptop Screen: Record your laptop screen (e.g., showing revenue numbers, stats) at 1x. This looks more cinematic than a screenshot or overlay.
- Screenshots/Google Images: If using external visuals, film your screen displaying them rather than using static image overlays.
- 3. Time-Lapse:
- Set your phone to time-lapse (often at 0.5x for a wider angle) and record yourself eating, doing your morning routine, or working.
- These clips are usually 10-30 minutes long in real-time.
- 1. 0.5x Shots (Wide Angle):
- Filming Best Practices for B-roll
- Length:
- Static/action shots (working, exercising, reading): at least 30 seconds to allow for flexibility in editing and avoid "stupid" moments.
- Laptop screen videos: around 10 seconds.
- Walking handheld videos: around 10 seconds.
- Time-lapses: 10-30 minutes of real-time recording.
- Flexibility: Longer clips allow you to cut out unwanted moments and ensure you have usable footage.
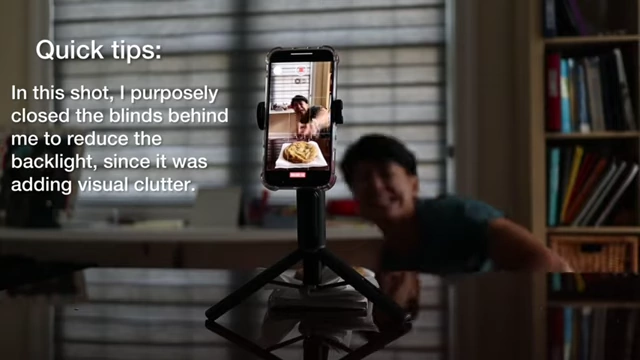
Quick tips for B-roll filming, showing the speaker filming a cookie with blinds closed to reduce backlight. [ 02:53:26 ] 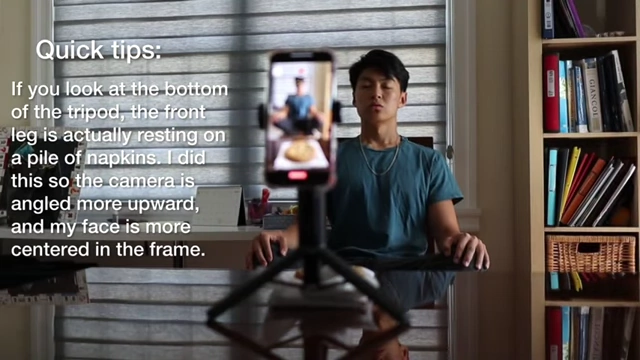
Quick tips for B-roll filming, showing the tripod elevated with napkins to center the face in the frame. [ 02:53:32 ] 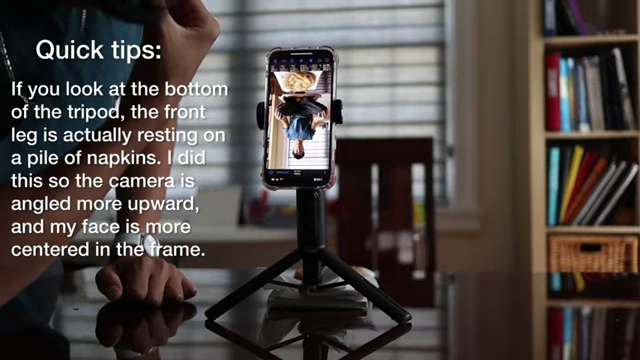
Quick tips for B-roll filming, showing the camera angled upward. [ 02:53:36 ] 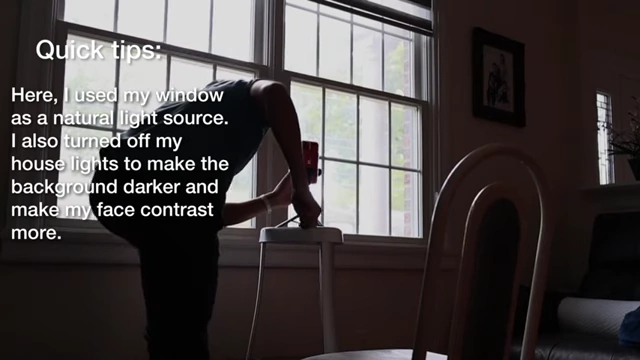
Quick tips for B-roll filming, demonstrating natural light usage from a window and turning off house lights for better contrast. [ 02:53:45 ] 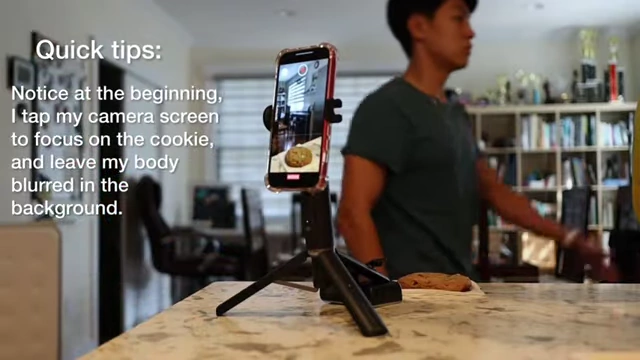
Quick tips for B-roll filming, showing how to tap the camera screen to focus on an object (a cookie) while blurring the background. [ 02:53:54 ]
- Length:
Day 4: Building a Life Brand [1:40:24]
This module guides you on establishing a "life brand" around your personal journey and optimizing your social media profiles.
- Defining Your Life Brand's Purpose
- The primary mission is to build a brand around your life story and current goals.
- Step 1: How do you want to help people with your transformation? (1 sentence)
- Focus on the outcome you want to provide to viewers, not your personal gain (e.g., "inspire people to chase ambitious dreams," "help people eat healthier").
- This purpose grounds you during moments of resistance and low views.
- Setting a Goal-Oriented Mission
- Step 2: What is a SMART (Specific, Measurable, Achievable, Relevant, Time-bound) goal/mission you have right now? (1 sentence)
- Your goal should be binary (yes/no, hit/not hit) for clear progress tracking (e.g., "grow my business to $100,000 a month in revenue").
- People follow specific goals they can live vicariously through. Vague goals (e.g., "become a better person") are less engaging.
- You can always create new goals or adjust existing ones as you progress.
- This creates a clear, followable storyline for your content.
- Examples of "Life Brands"
- @junparking: Vlogging daily till end of college semester.

An Instagram profile screenshot for @junparking, showing "Vlogging daily till end of semester." [ 01:42:37 ] - @wherescalebshaw: Writing his 1st film in 30 days.
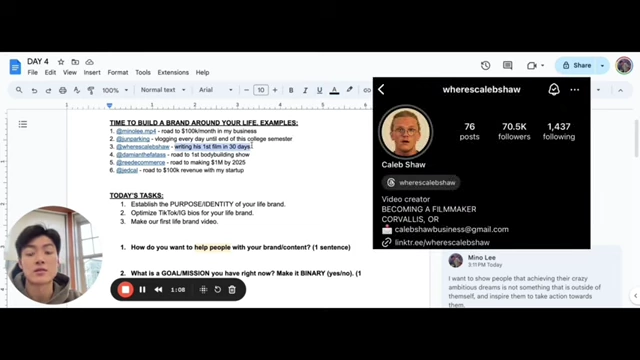
An Instagram profile screenshot for @wherescalebshaw, indicating "BECOMING A FILMMAKER" and "writing his 1st film in 30 days." [ 01:42:43 ] - @damianthefatass: Road to 1st bodybuilding show.
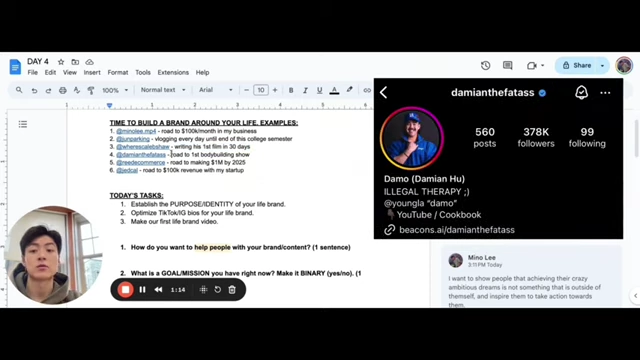
An Instagram profile screenshot for @damianthefatass, stating "Road to 1st bodybuilding show." [ 01:42:49 ] - @reedecommerce: Road to making $1M by 2025.
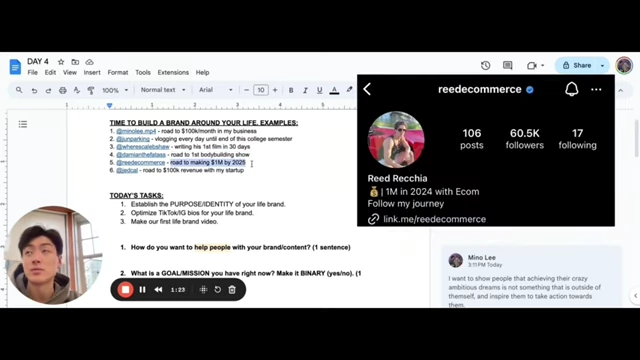
An Instagram profile screenshot for @reedecommerce, featuring "1M in 2024 with Ecom" and "Follow my journey." [ 01:42:54 ] - @jedcal: Road to $100K revenue with my startup.
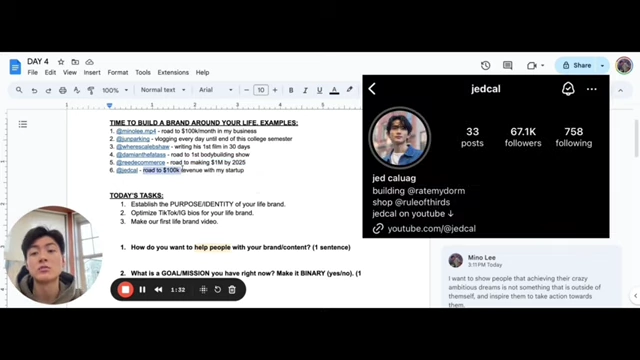
An Instagram profile screenshot for @jedcal, showing "building @ratemydorm" and "road to $100k revenue with my startup." [ 01:43:00 ]
- @junparking: Vlogging daily till end of college semester.
- Step 2: What is a SMART (Specific, Measurable, Achievable, Relevant, Time-bound) goal/mission you have right now? (1 sentence)
- Connecting Personal Story to Your Goal
- Step 3: Tell a personal story related to this goal and why it connects. (4-5 sentences)
- Share why you embarked on this goal, providing a deeper insight into your motivations.
- This helps viewers build a parasocial relationship with you by understanding the "why" behind your actions.
- Step 3: Tell a personal story related to this goal and why it connects. (4-5 sentences)
- Deepening Your Motivation
- Step 4: Why are you pursuing this goal? Why does it matter to you (HONEST)? (5-6 sentences)
- Articulate your genuine, often vulnerable, reasons for pursuing the goal (e.g., "to inspire others," acknowledging personal struggles like self-doubt).
- This transparent approach creates deeper connection and resonance with your audience.
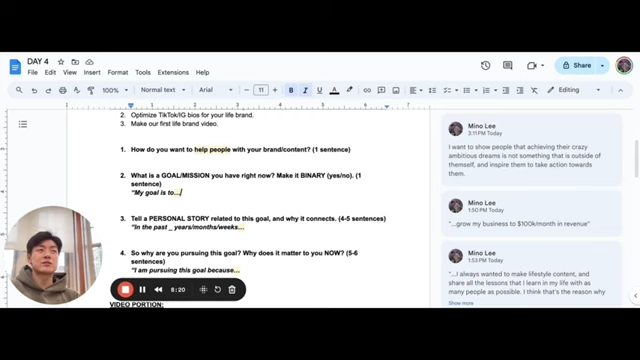
A Google Docs screenshot showing the questions for Day 4, including the personal story and deep motivation. [ 01:47:19 ]
- Step 4: Why are you pursuing this goal? Why does it matter to you (HONEST)? (5-6 sentences)
- Video Script Formulation
- Combine your answers into a cohesive script using a structure like:
- Hook: "Today is day [X] of road to [your goal]."
- Why the Goal: "Now, why [your goal]?" (Answer from Q2)
- Personal Story: (Answer from Q3)
- Deep Motivation: "I am pursuing this goal because..." (Answer from Q4)
- Conclusion: (Optional) Add a call to action (e.g., "Follow to stay tuned on the journey," "I'll see you guys tomorrow").
- Read the script aloud to check for flow and conciseness, removing any redundant phrases.
- Combine your answers into a cohesive script using a structure like:
- Optimizing Social Media Profiles (Instagram & TikTok Bios)
- Purpose: To reflect your brand image, convert for business, build following, and express yourself authentically.
- Instagram Bio Template:
- Line 1: Location/Heritage (e.g., "Boston | 🇰🇷"). Optional, but adds a personable vibe.
- Line 2: Life motto/tagline (e.g., "creating our best possible life path"). Quick intro to you as a person.
- Line 3: Your current mission/goal (e.g., "documenting every day till $100K/month"). Reinforces your content's storyline.
- Line 4: Call to Action (e.g., "start your personal brand").
- Link: Add your website/business link.
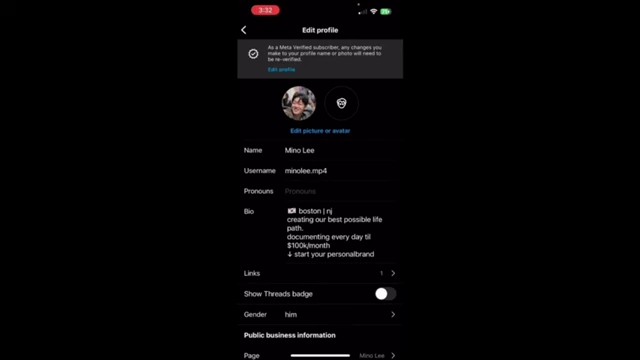
An Instagram 'Edit Profile' screen, showing the speaker's optimized bio with location, motto, mission, and call to action. [ 01:53:38 ]
- Profile Picture: Use a clear headshot (shoulder height) for easy recognition. Avoid vague or distant pictures.
- Username: Use your name without numbers at the end (e.g., minolee.mp4 is an exception). Numbers can seem unprofessional.
- TikTok Bio:
- Shorter than Instagram. Include your tagline and mission.
- Link your Instagram and/or YouTube (website link usually requires 1K+ followers).
- Filming with CapCut (Mobile)
- Copy your script to CapCut's teleprompter.
- Ensure good lighting (facing a window for natural light).
- Perform pre-filming warm-ups.
- Record sentences in segments for precision.
- Editing Process
- Clip Cutting: Cut out all dead space for quick, snappy pacing.
- Hyper-cutting the Hook: For the first 2-3 seconds (or first sentence), use very short B-roll clips (under 1 second each) that cut rapidly to create visual stimulation without being spammy.
- This can be achieved by splitting a B-roll clip into very short segments and reordering/repeating them, or by speeding up sections of existing B-roll.
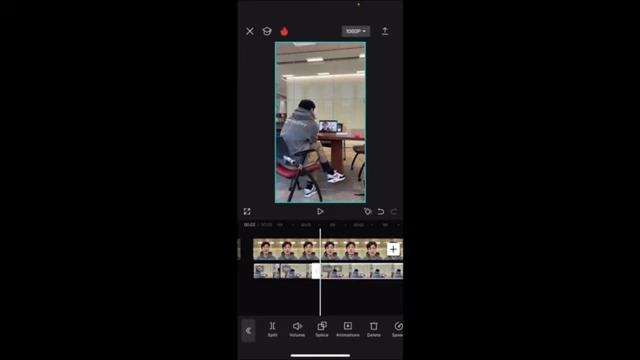
A CapCut screenshot demonstrating hyper-cutting B-roll, showing very short clips in the timeline for a fast-paced hook. [ 01:59:57 ]
- This can be achieved by splitting a B-roll clip into very short segments and reordering/repeating them, or by speeding up sections of existing B-roll.
- Regular B-roll: After the initial hook, transition to 1 B-roll clip every 3-5 seconds.
- Audio: Increase talking head volume to 200%, adjust music volume to 60-70%.
- Captions: Downsize, move up (30% from bottom), classic font, no black border, one line per sentence, correct typos.
- Export: 4K 30fps.
- Posting: Upload to TikTok/Instagram, add caption and thumbnail.
Pro Tip: Editing (The Clip Cutting Hack) [2:04:25]
This module focuses on the most crucial editing technique: fine clip cutting for optimal pacing.
- Importance of Fine Clip Cutting
- This is the "biggest hack" in editing, more important than fancy captions, sound effects, or visual effects.
- It significantly improves pacing and viewer engagement.
- Even milliseconds of dead air can cause viewers to scroll on short-form platforms like TikTok.
- Practical Application in CapCut
- Identifying Dead Space:
- Zoom into the timeline using two fingers (pinch outward) to view clips at a frame-by-frame level (e.g., 5 frames, 10 frames, 15 frames, etc., in a 30fps video).
-
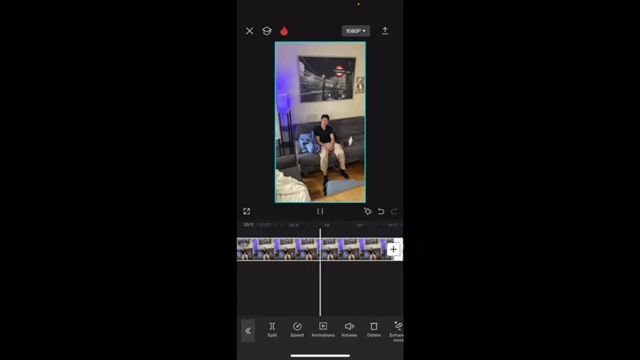
A CapCut screenshot showing a zoomed-in timeline, allowing for precise, frame-by-frame identification and trimming of dead space. [ 02:06:21 ] - This allows you to precisely see and identify even tiny segments of dead air (silence before/after speaking).
- Precise Cutting:
- Play the clip and pause exactly where you start/end speaking.
- Tap the clip and use the white sliders at the beginning/end to trim off unwanted milliseconds.
- Alternatively, use the "Split" function to create segments and delete unwanted parts.
- Pacing Improvement:
- By meticulously cutting out all dead space, your video's pacing becomes much faster and "snappier."
- This makes the content feel more engaging and dynamic, even if the total time cut from the video is only a few seconds.
- Identifying Dead Space:
Day 5: The Minimum Viable Vlog (Unscripted Videos) [2:07:50]
This module teaches how to create engaging unscripted videos, which offer authenticity and quicker production.
- Benefits of Unscripted Videos
- Portray more authentic energy and conversational flow.
- Feel less forced than scripted videos.
- Take significantly less time to prepare.
- Structure for Unscripted Content
- While unscripted, a clear structure is still needed to maintain coherence and engagement.
- Two Guiding Questions to Ask Yourself:
- What events happened today? (Simple list of 3 things, e.g., "ate lunch with parents," "worked on business.")
- What lesson did I learn today? (From those events, even the smallest realizations, e.g., "I learned I've grown," "things are starting to work out," "my business looks good.")
- Hook Structure (First Sentence - 1-2 Sentences)
- The hook is crucial for capturing attention; avoid generic or boring openings.
- Variation 1 (Contradictory/Unique Statement to Younger Self):
- Take a lesson learned and rephrase it to be unique or contradictory, directly addressing your "specific younger self."
- The goal is to "penetrate the noise" of countless other videos by being highly specific.
- Example: Instead of "It's okay to feel out of place," say "Because you feel demotivated in college doesn't mean you're a lazy bum." This immediately resonates with a niche audience.
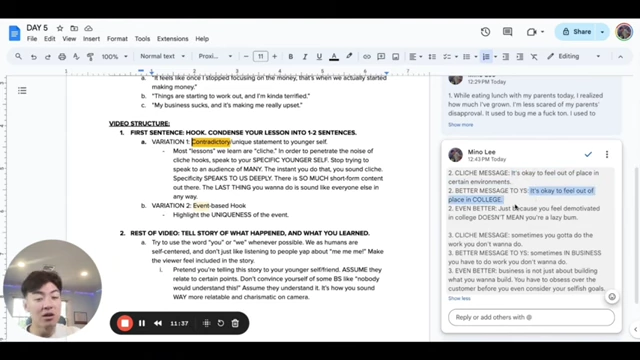
A Google Docs screenshot demonstrating how to refine a cliche hook into a specific, engaging statement for a younger self. [ 02:15:26 ] - Specificity is Key: The internet has millions of users who will deeply relate to even highly specific content. Avoid pandering to the masses; focus on hitting one person deeply.
- Variation 2 (Event-Based Hook - Highlight Uniqueness):
- Describe an event, but view it as a "reflection of a novel discovery" and highlight the emotion or new realization from it.
- Example: Instead of "Today I ate lunch with my parents," say "After 20 years of my life, I finally feel like I'm getting over my fear of my parents' judgment."
- If events are truly boring, gloss over them quickly to get to your interesting message.
- Body of Video: Tell Your Story (Rest of Video)
- Incorporate "You" or "We": Use "you" or "we" whenever possible to involve the viewer and make the story more relatable.
- Example: Instead of "I was insulted," say "You know that feeling when someone insults you and you can't get it off your mind?"
- This creates a conversational tone and makes you seem less narcissistic.
- Assume Relatability: Do not assume your specific experiences are too niche. Millions of people will relate.
- Incorporate "You" or "We": Use "you" or "we" whenever possible to involve the viewer and make the story more relatable.
- Filming Unscripted Videos
- Process: Practice delivering the hook and main points naturally.
- Delivery: Aim for a conversational flow state.
- Self-Correction: If you mess up, don't get mad; simply pause, regroup, and try again.
- Editing Unscripted Videos (Using CapCut Premium - Transcript-Based Editing)
- Transcript-Based Editing: This premium feature (around $8/month) is a game-changer.
- It automatically transcribes your video, allowing you to edit by simply highlighting and deleting text.
- This significantly cuts down editing time for raw cuts from 30 minutes to 5 minutes.
- Fine-tuning: Even with transcript-based editing, still do fine trimming for milliseconds of dead air.
- B-roll Integration: Add B-roll as usual, muting volume and cutting to match new sentences.
- Optional B-roll trick: Add keyframes at the beginning and end of a B-roll clip, zooming in the ending keyframe for an interesting zoom effect.
- Audio & Captions: Adjust speaking volume to 200%, music volume to 60%, and add auto-captions with standard formatting (downsized, moved up, classic font, no border, one line per sentence, corrected typos).
- Transcript-Based Editing: This premium feature (around $8/month) is a game-changer.
- Export & Upload
- Export the video and upload it to Instagram Reels and TikTok.
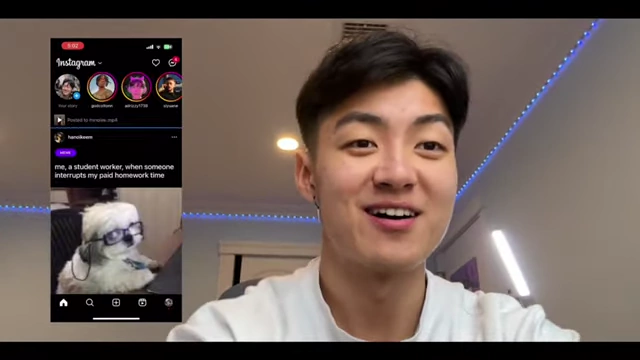
A student's Instagram post using a meme format to express a relatable feeling during study time. [ 02:26:23 ]
- Export the video and upload it to Instagram Reels and TikTok.
Day 6: Optimizing for Virality [2:26:34]
This module delves into strategies for making short-form videos go viral, focusing on clear hooks and valuable content.
- Key to Virality: Clear Hooks and Value
- Two essentials for viral TikTok videos:
- Strong, clear hook: Captivates attention by making the video's context immediately understandable. Avoid anything unclear or visually complex.
- Value for the viewer: Provides enough value to keep viewers watching until the end (this can be anything from entertainment to new knowledge).
- Two essentials for viral TikTok videos:
- Crafting Clear and Concise Hooks
- Rule 1: Make Context Clear:
- Don't just rely on "interesting" or "eye-catching" visuals.
- Verbally explain the video's context in the first 1-3 seconds.
- If not speaking, use text captions to explain the context (covered in editing module).
- Rule 2: Be Quick and Concise:
- Omit unnecessary details like "Hey guys" or self-introductions.
- Focus on getting straight to the point.
- This applies universally across all short-form platforms (TikTok, Instagram Reels, YouTube Shorts).
- Rule 1: Make Context Clear:
- Providing Unique Value
- Rule 1: Put Yourself in the Viewer's Shoes:
- Constantly question why a random person would be interested in your video.
- What unique value (entertainment, knowledge, curiosity) does your video offer?
- Rule 2: Avoid Overused Tropes/Cliches:
- Assume viewers are by default less interested in your video and have a short attention span.
- Study popular videos in your niche and identify common tropes.
- Innovate by spinning these tropes slightly to make them new and novel.
- Example: Instead of a "regular college day in the life," create a "productive college day in the life of a lazy student." This offers a unique value proposition.
- Rule 3: Specificity is Key (Counterintuitive but Effective):
- Don't try to appeal to everyone; aim for deep resonance with a specific audience.
- Even if your content is highly niche, there are millions of users on these platforms who will relate.
- Example: Instead of a generic "it's okay to feel out of place," say "because you feel demotivated in college doesn't mean you're a lazy bum." This specific wording directly targets and resonates with a particular segment of college students.
- Deeper connection with a niche audience leads to higher engagement, which algorithms reward.
- Rule 1: Put Yourself in the Viewer's Shoes:
- Scripting for Concision and Speed
- Rough Draft: Write a first draft of your script.
- Structural Template (for informational videos):
- One-sentence hook: Clear and captivating.
- Solution/Preview: Immediately offer the solution to the problem presented in the hook.
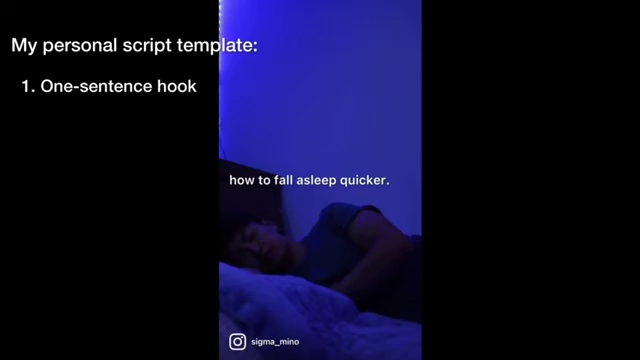
A video clip showing a clear, one-sentence hook for a video about falling asleep quicker. [ 02:39:33 ] - Address Objections: Anticipate and counter common objections viewers might have, establishing relatability.
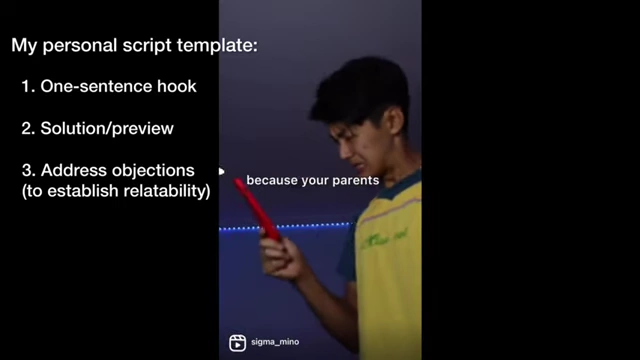
A video clip demonstrating how to address a common objection, "Now I know you don't want to hear this information cuz your parents told you." [ 02:40:05 ] - Information Portion (~60% of video length): Provide the main content and value.
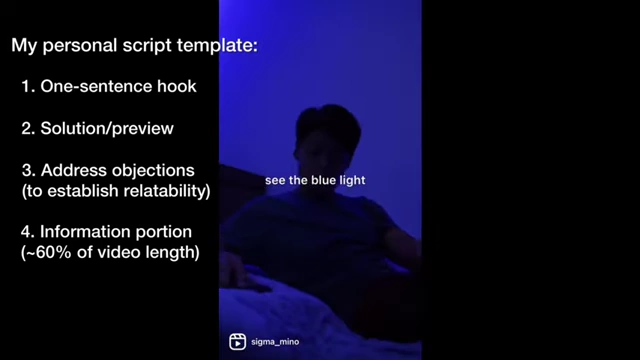
A video clip illustrating the information portion of a script, showing blue light affecting sleep. [ 02:40:31 ]
- Proofreading and Revision:
- Read your script aloud to identify awkward phrasing or slow pacing.
- Prioritize concision and speed, especially in the hook and opening sentences, where every millisecond counts.
- Continuously revise for clarity and flow.

A notebook showing the speaker's script with multiple revisions and cross-outs, demonstrating the iterative editing process. [ 02:44:27 ]
- Example Script (Self-Control Video):
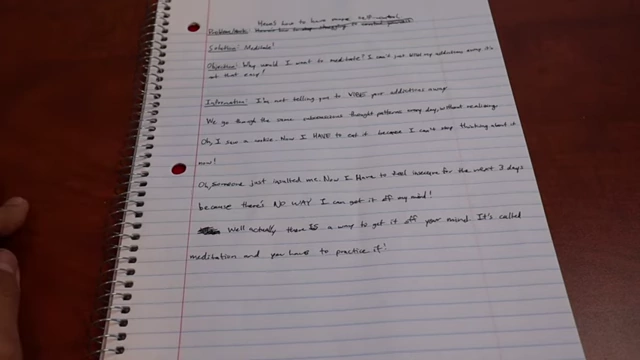
A handwritten script in a notebook, outlining the problem, solution, objection, and information for a video on self-control. [ 02:41:18 ] 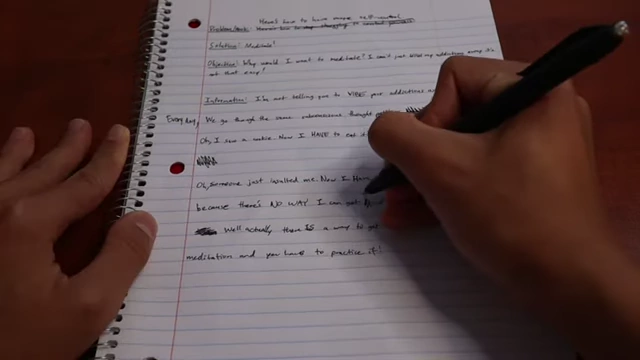
A close-up of a handwritten script in a notebook, showing detailed edits and revisions for clarity and pacing. [ 02:42:38 ]
- Filming Fundamentals for TikTok (Clarity and Speed)
- Lighting: Use high contrast and simplicity. Front-light your subject. Avoid busy backgrounds or backlighting.
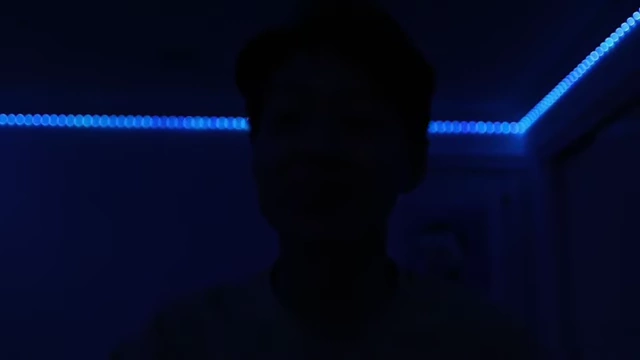
An example of a TikTok video with poor backlighting, making the subject difficult to see. [ 02:46:53 ] - Framing/Camera Angles:
- Frame subjects clearly, ensuring nothing important is cut off or visually cluttered.
- Avoid placing important elements (face, text) in areas covered by app buttons (top, right, bottom).
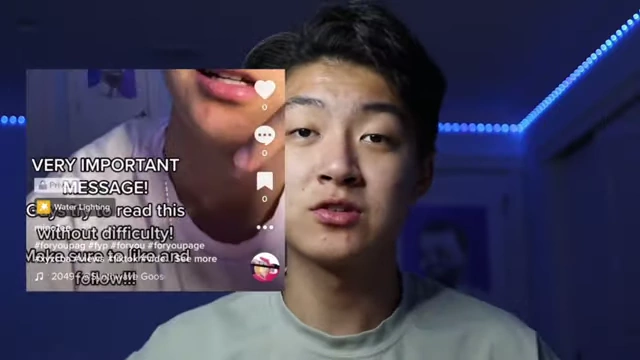
A TikTok screenshot showing important text covered by app UI elements, serving as an example of poor framing. [ 02:47:43 ] - Center subjects or place them strategically to enhance visual satisfaction.
- Pacing:
- Avoid any dead air or pauses, even milliseconds. Trim rigorously in editing.
- Aim for something to be happening on screen every 3 seconds.
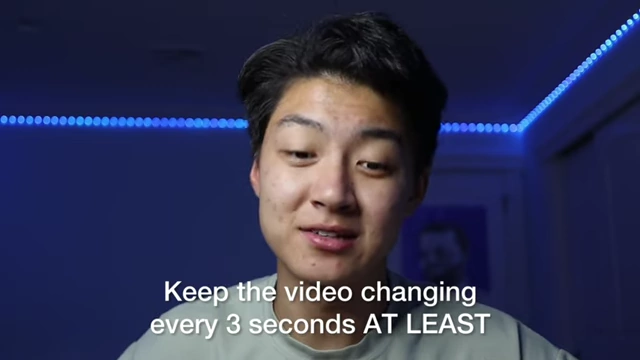
A text overlay on video stating: "Keep the video changing every 3 seconds AT LEAST" to emphasize fast pacing. [ 02:48:39 ] - Use quick cuts to maintain high energy and prevent viewers from scrolling.
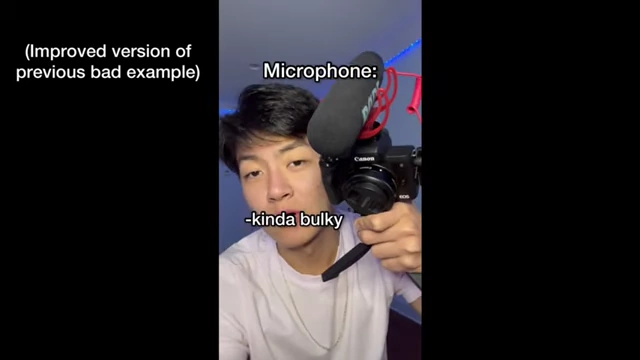
An example of a TikTok video with improved, faster pacing, showing quick cuts and on-screen text. [ 02:48:47 ]
- Filming Process:
- Record voiceovers and B-roll shots separately (if using a complex format like the speaker's).
- The speaker uses a smartphone on a $20 tripod and a $30 ring light; high-end equipment is not necessary.
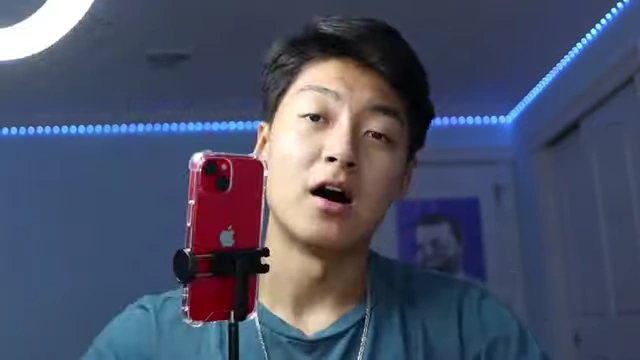
The speaker demonstrating his filming setup with a smartphone on a mini tripod and a ring light. [ 02:53:07 ] - Consistently review clips during filming to ensure clarity and speed.
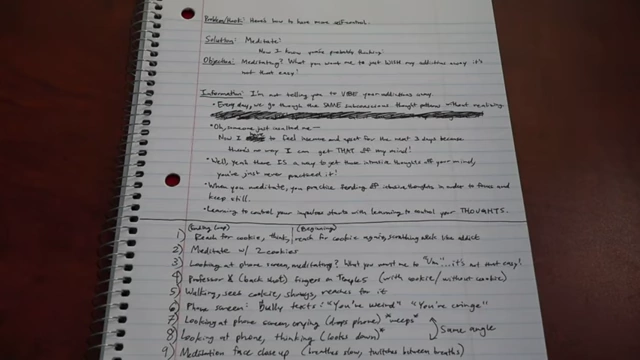
A handwritten note on a notebook detailing a script and a chronological list of B-roll shots to be used for the video. [ 02:51:53 ]
- Lighting: Use high contrast and simplicity. Front-light your subject. Avoid busy backgrounds or backlighting.
- Captions (for Clarity and Speed)
- Length: Aim for at most four words per line, taking up only one line on screen to avoid visual clutter.
- Readability: Use clear, easy-to-read fonts (similar to TikTok's default "Proxima Nova Semibold").
- Placement: Place captions in the middle to bottom-middle area (around 25-30% from the bottom) where eyes naturally gravitate, avoiding areas covered by app UI.
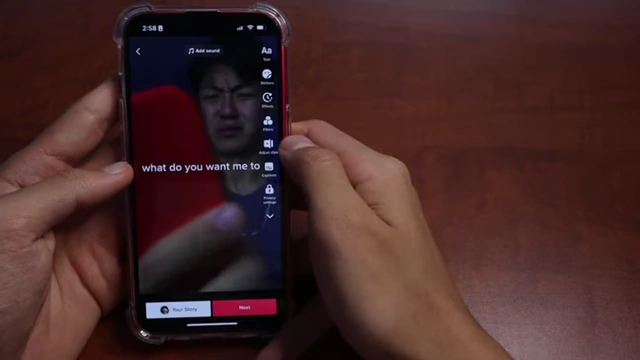
A phone screen showing a TikTok video with captions positioned to avoid being covered by UI elements. [ 03:10:20 ] - Familiarity: Use fonts that look visually familiar to TikTok's default to avoid making your video seem "foreign" to the app.
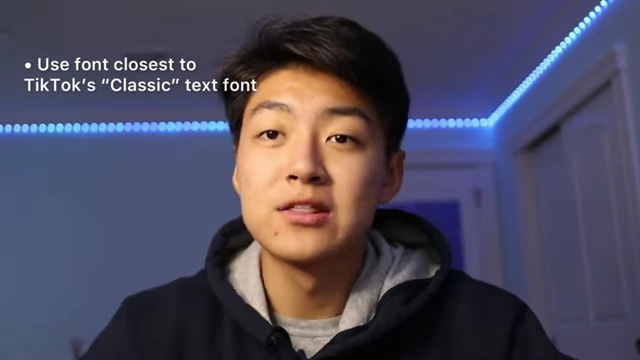
A text overlay stating: "Use font closest to TikTok's 'Classic' text font" to maintain visual familiarity. [ 03:08:15 ]
Day 7: Recap and Next Steps [3:10:42]
This concluding module recaps the key learnings and offers recommendations for continued growth.
- Recap of 6 Days
- Day 1: Posted your first video using basic CapCut editing and scripting.
- Day 2: Created a personal story video that resonates with your "younger self."
- Day 3: Learned the mindset for becoming a creator (overcoming fear, imposter syndrome, discipline).
- Day 4: Built a brand around your life's journey and set specific goals.
- Day 5: Learned to make unscripted, educational videos in a viral way.
- Day 6: Optimized for virality with clear hooks, value, and visual clarity/speed.
- Importance of Action and Community
- Information alone is useless without implementation. Even applying a few modules makes a significant difference.
- The speaker emphasizes the importance of immersing yourself in a community of action-takers for continuous improvement and accountability.
- Community benefits include content reviews, weekly live Q&A calls with experienced creators, and networking events.
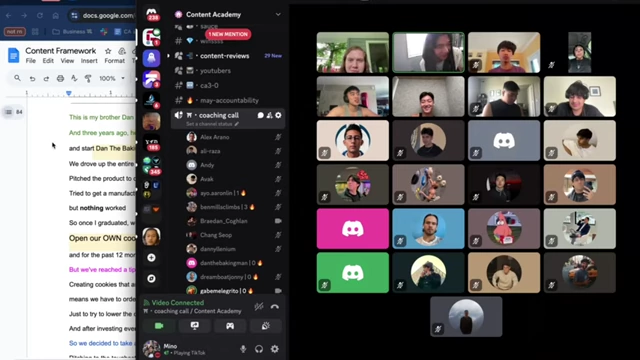
A screenshot of a Discord coaching call with many participants, illustrating the community aspect of the Content Academy. [ 03:13:25 ] 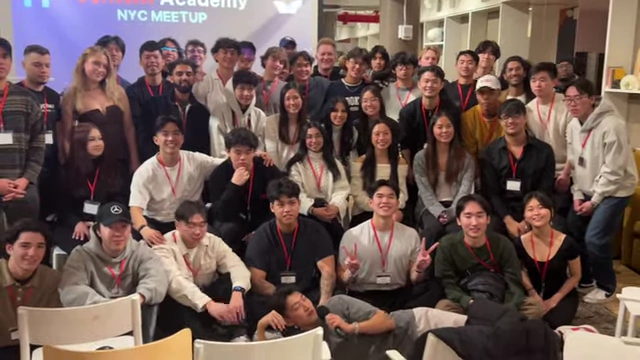
A group photo of attendees at the Content Academy NYC Meetup, highlighting the networking events. [ 03:13:29 ] 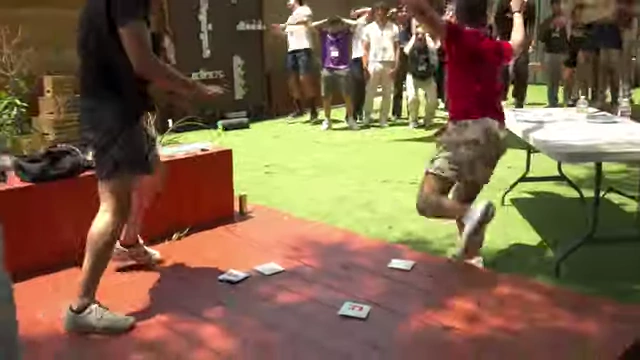
An outdoor shot of people participating in an activity at a Content Academy event. [ 03:13:32 ]
- Next Steps
- The speaker promotes his Content Academy for continued learning, tools, and community support to help users scale their personal brand to 10,000 "true fans" and monetize their content creation.
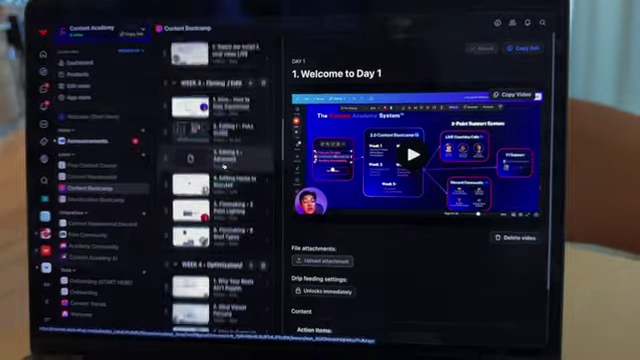
A laptop screen displaying the Content Academy dashboard with various course modules. [ 03:13:36 ]
- The speaker promotes his Content Academy for continued learning, tools, and community support to help users scale their personal brand to 10,000 "true fans" and monetize their content creation.