Essential Knife Skills for Home Cooks: Knives, Care, and Everyday Cuts for Proteins and Vegetables
This video from Andy Cooks focuses on practical knife skills essential for home cooking, rather than complex culinary school techniques.
- Essential Knives: You only need four key knives: a chef's knife (24 cm), a small serrated paring knife, a serrated bread knife, and a boning knife (if you process meat/fish).
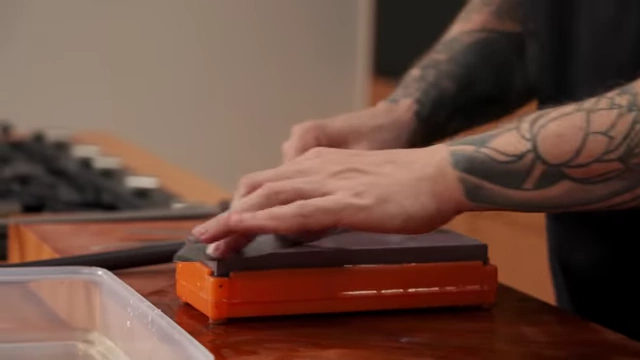
- Knife Care: Hand wash and dry knives. Sharpen with 1000 and 5000 grit wet stones (soaking the 1000 grit for an hour) at a 15-20° angle, then hone with a rod.
- Safety & Boards: Use a non-slip mat under your cutting board. Designate one board for raw proteins and another for cooked foods/vegetables.
- Protein Prep: Learn to break down a whole chicken (legs, thighs, wings, breasts), fillet fish (removing pin bones and skin), and cut beef against the grain for tenderness, also removing silver skin.
- Vegetable Prep: Master everyday cuts for onions (sliced, large dice, fine dice, rings), capsicum (diamonds, slices), broccoli (florets, stems), cucumber (discs, seed removal), carrots (grated, julienne, roasted, stir-fry, diced), garlic (minced, grated), spring onions (sliced white/green), and parsley (chopped).
- Carving: Prep a roast chicken by removing the wishbone and trussing for even cooking, then carve by removing legs and breasts. Carve roast beef against the grain, adjusting slice thickness based on the cut's tenderness.

The four essential knives for home cooking, highlighted by the chef [ 00:00:36 ]
Introduction to Essential Knife Skills [00:00]
Andy, a professional chef, shares practical knife skills that truly matter for home cooks, focusing on everyday tasks rather than intricate culinary school cuts.
Overview of the Video's Focus
- The video will cover selecting and caring for essential knives.
- It will demonstrate crucial cuts for preparing meat, fish, and vegetables.
- Carving techniques for roasted proteins will also be included.
Essential Knives for Home Cooking [00:30]
- Out of a collection of various knives, only four are truly essential for home use.
- 1. Chef's Knife (approx. 24 cm): Versatile for cutting vegetables, meat, and steaks.

A chef's knife demonstrating its use for dicing an onion [ 00:00:51 ] - 2. Small Serrated Paring Knife: Invaluable for quick tasks like cutting fruit or opening bags.
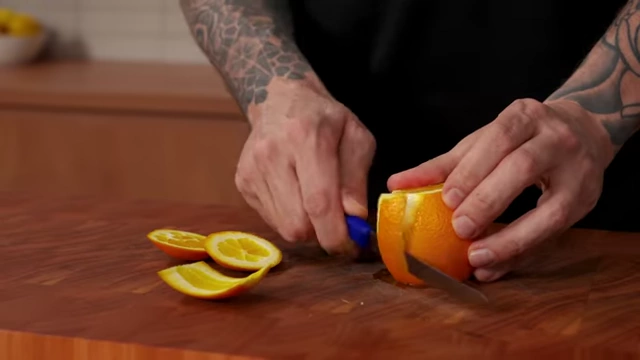
A serrated paring knife effectively peeling and slicing an orange [ 00:01:01 ] - 3. Serrated Bread Knife: Specifically designed for cutting bread.
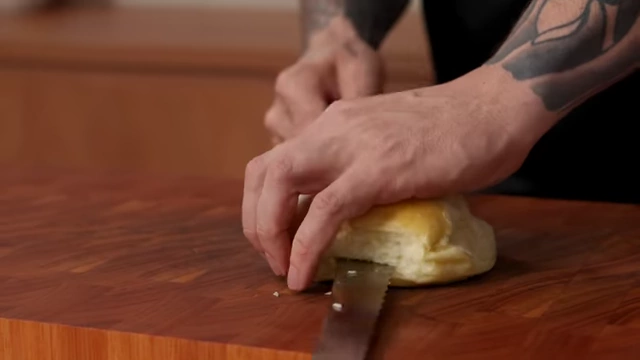
A serr serrated bread knife easily slicing through a roll [ 00:01:12 ] - 4. Boning Knife: Essential if you regularly cut up meat and fish, useful for steaks, removing silver skin, and filleting fish.
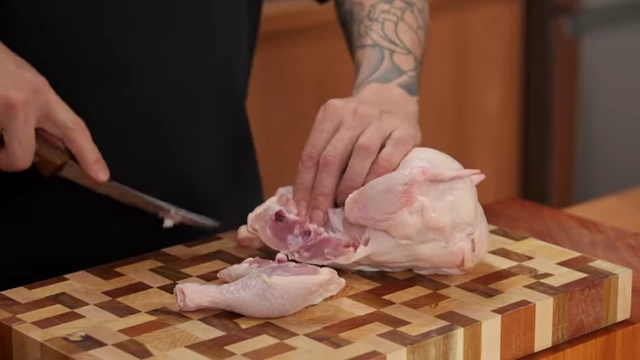
A boning knife separating a raw chicken leg from the carcass [ 00:01:21 ]
The four essential knives for home cooking, highlighted by the chef [ 00:00:36 ]
Knife Care and Sharpening Fundamentals [01:34]
Proper knife care ensures safety and efficiency in the kitchen.
Cleaning:
- Always hand wash knives with hot soapy water.
- Dry them thoroughly immediately after washing to prevent rust and damage.
- Never put knives in a dishwasher.
Sharpening Tools Explained [01:44]
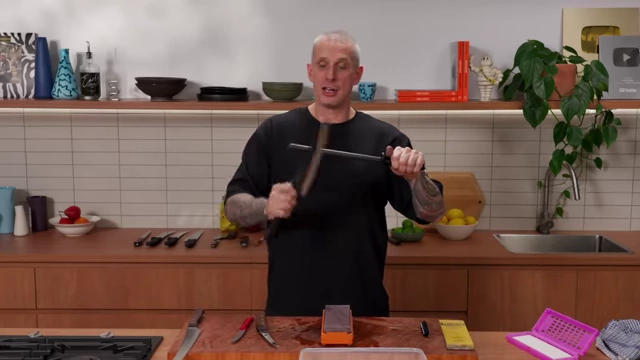
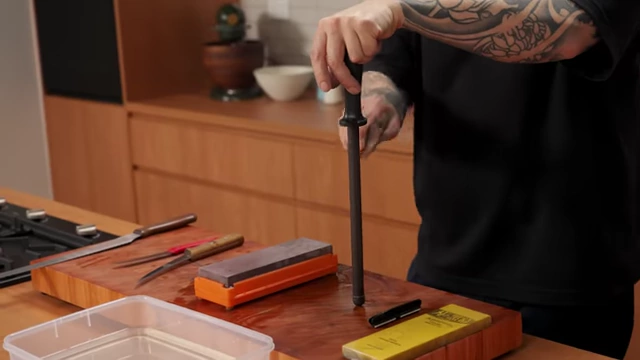
- Honing Rod: This is not a sharpener; it straightens the microscopic edge of a sharp blade. Available in steel or ceramic.

A honing rod (center) and two wet stones (orange and purple) are laid out on a cutting board [ 00:02:00 ] - Wet Stones: The preferred method for sharpening, requiring two grits:
- 1000 grit: For initial sharpening and creating a new edge.
- 5000 grit: For refining and polishing the edge.
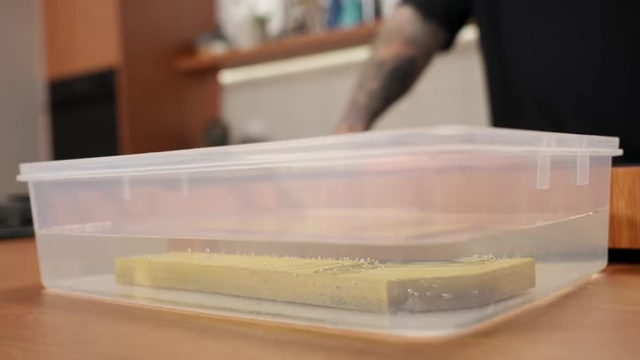
A new wet stone soaking in water until no bubbles appear [ 00:02:49 ] 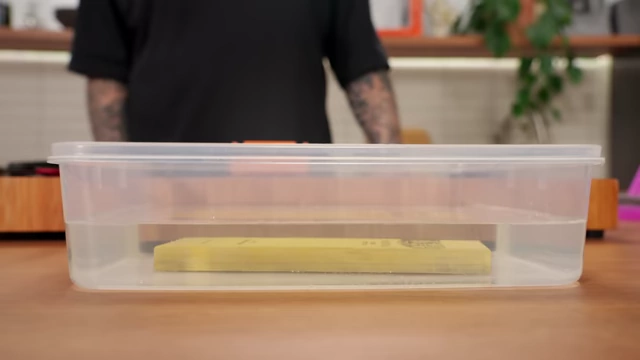
A wet stone is ready for sharpening once it stops bubbling [ 00:02:52 ] - The chef adds water to the wet stone during sharpening to keep it lubricated.
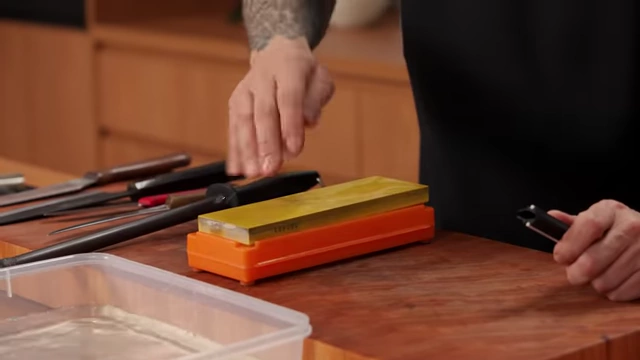
A chef adds water to a wet stone to maintain lubrication during sharpening [ 00:03:18 ]
- Pull-Through Sharpeners: Can maintain a somewhat sharp edge but are not effective for creating a new edge on a blunt knife.
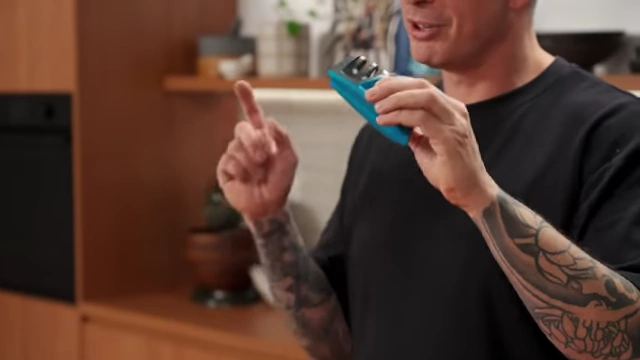
A small, blue pull-through knife sharpener [ 00:02:21 ]
- Honing Rod: This is not a sharpener; it straightens the microscopic edge of a sharp blade. Available in steel or ceramic.
Using Wet Stones [02:33]
- Angle:
- Japanese knives typically use a 15° angle.
- European knives typically use a 20° angle.
- Aim for an angle between 15-20°; angle guides can be helpful for beginners.
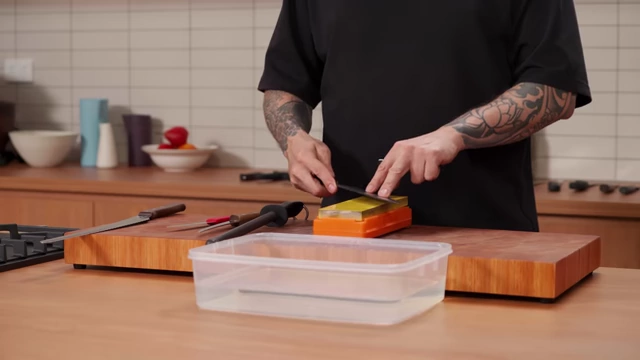
A metal angle guide attached to a knife blade for consistent sharpening on a wet stone [ 00:03:24 ]
- Sharpening Technique (1000 grit) [03:43]
- Start at the tip of the knife.
- Push the blade away from you along the stone at the correct angle, applying pressure.
- Return the blade with no pressure, just skimming the surface.
- Slowly move down the knife, repeating the motion until the entire blade has been sharpened.
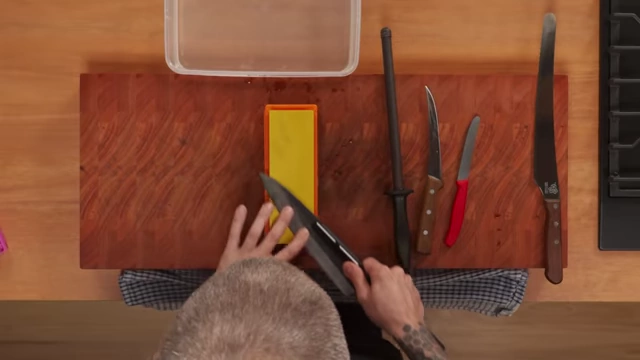
An overhead shot shows the hands of the chef pushing a knife away from himself along a wet stone [ 00:03:55 ] - Look for a "burr" (a raised piece of metal) on the opposite side of the blade, indicating the edge is forming.
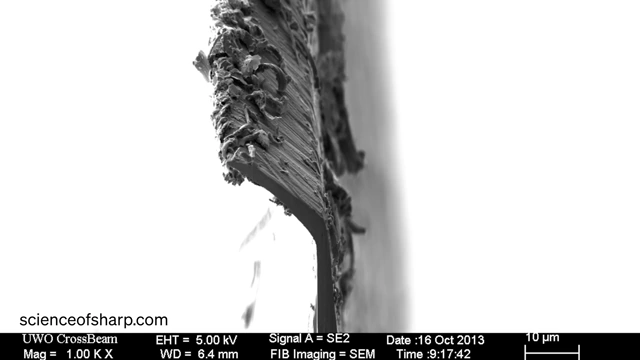
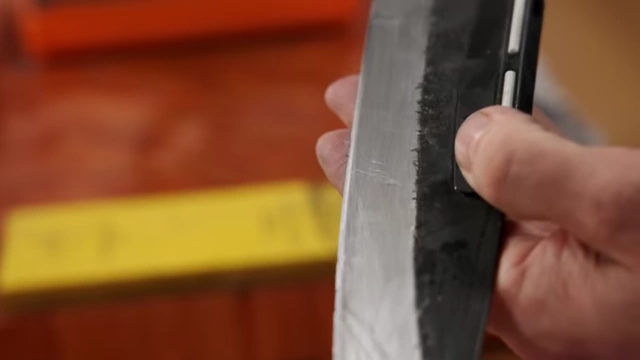
A microscopic view of a burr on a knife's edge, indicating metal has been displaced [ 00:05:06 ] - Flip the knife and drag the blade towards you, applying pressure, to remove the burr and sharpen the other side.
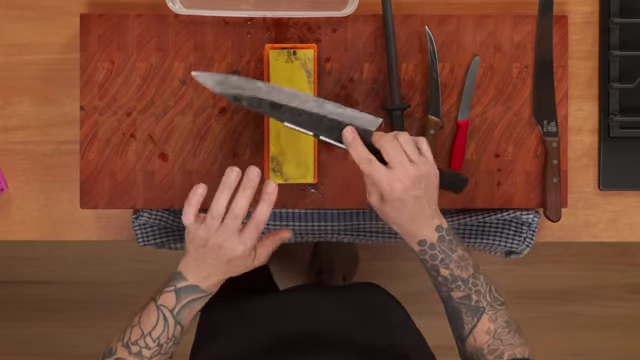
An overhead view of the chef flipping the knife to sharpen the other side of the blade on the wet stone [ 00:05:50 ] 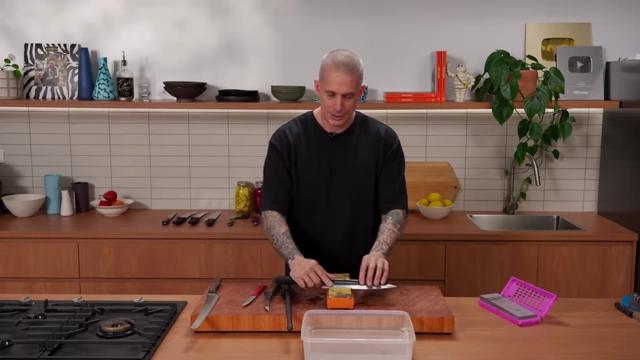
A chef pulls a knife blade towards himself along a wet stone to remove the burr [ 00:06:02 ] - Continue until the burr is no longer felt and the edge is flat.
- Finishing (5000 grit) [06:57]
- Honing [07:22]
- Angle:
Proteins: Preparation and Cutting Techniques [07:54]
Knife Safety and Cutting Boards [07:54]
- Holding a Chef's Knife: Grip the handle with three fingers, placing your thumb and index finger on the front of the blade for maximum control.
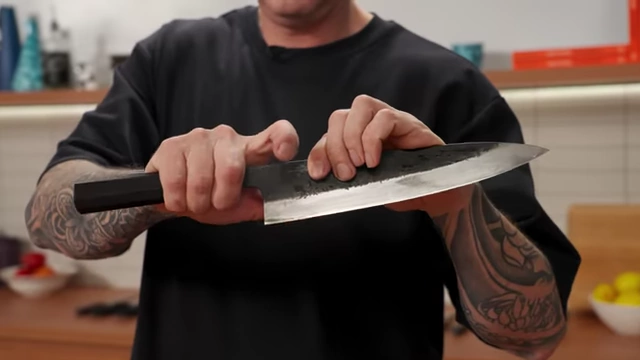
A chef demonstrates the correct grip for a chef's knife, with thumb and index finger on the blade [ 00:07:59 ] - Holding a Boning Knife: Grip the handle firmly; do not hold the blade.
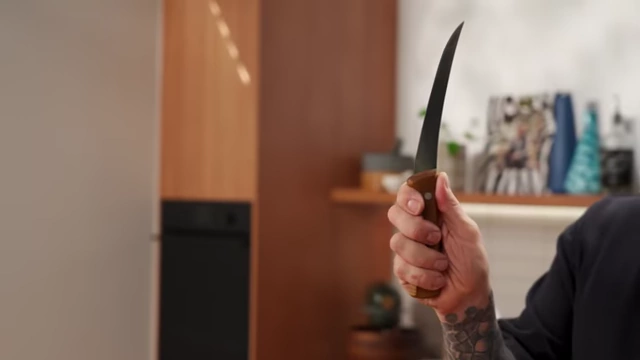
A close-up of a hand properly gripping the handle of a boning knife [ 00:08:25 ] - Cutting Board Stability: Always place a non-slip mat, wet tea towel, or wet paper towel under your cutting board to prevent movement.
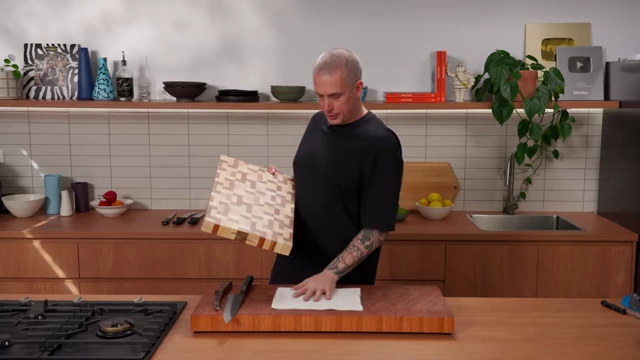
A chef demonstrates placing a non-slip mat under a cutting board for stability [ 00:08:29 ] - Cross-Contamination: Use one cutting board exclusively for raw meat and fish, and another for cooked meat, vegetables, and other ingredients to prevent foodborne illness.
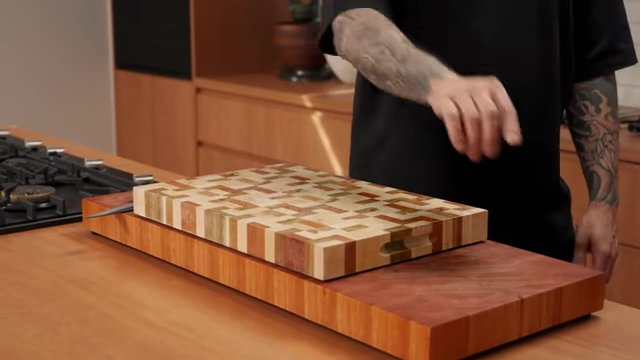
Two distinct cutting boards on a counter, illustrating the separation of boards for raw meat and other foods [ 00:08:50 ]
- Holding a Chef's Knife: Grip the handle with three fingers, placing your thumb and index finger on the front of the blade for maximum control.
Breaking Down a Whole Chicken [08:57]
- Preparation: A whole raw chicken is placed on a cutting board, ready for butchery.
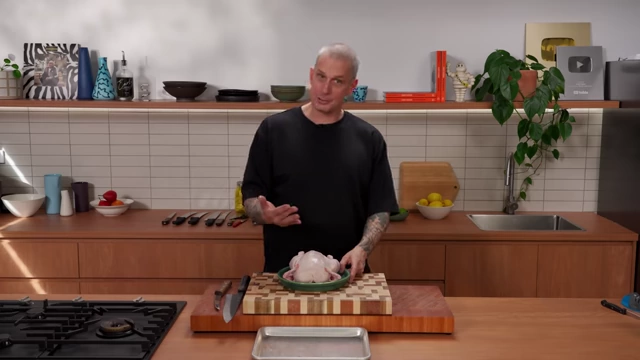
A whole raw chicken on a cutting board, ready for butchery [ 00:09:04 ] - Removing Legs: Slice the skin between the drumstick and breast. Bend the leg to pop the thigh bone out of its joint, then cut around the joint to remove the entire leg.
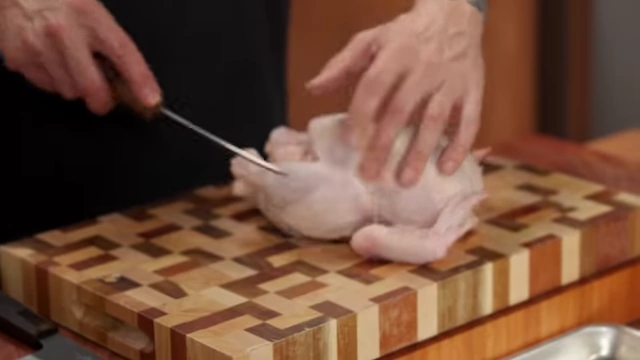
The chef cuts the chicken leg by inserting the boning knife between the drumstick and breast [ 00:09:09 ] 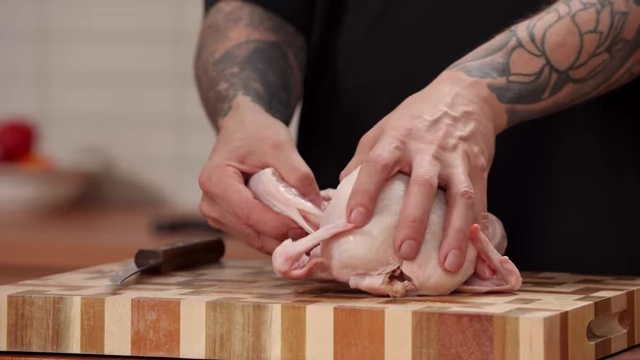
A chef separates the chicken leg from the body by bending it back to dislocate the joint [ 00:09:29 ] 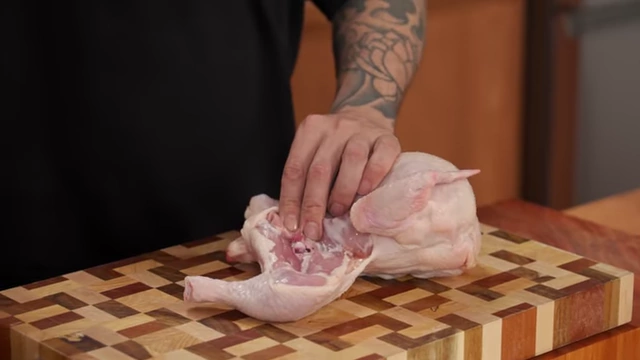
A chef precisely cuts around the dislocated thigh joint of a chicken to remove the entire leg [ 00:09:41 ] - Separating Thigh and Drumstick: Locate the joint between the drumstick and thigh with your finger and cut through it.
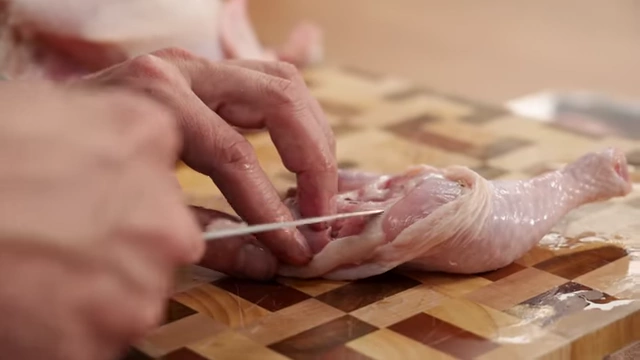
A chef locates the joint between the drumstick and thigh with a finger before cutting [ 00:10:01 ] - Boning a Thigh: Run the tip of your boning knife along both sides of the thigh bone, then cut underneath to detach it.
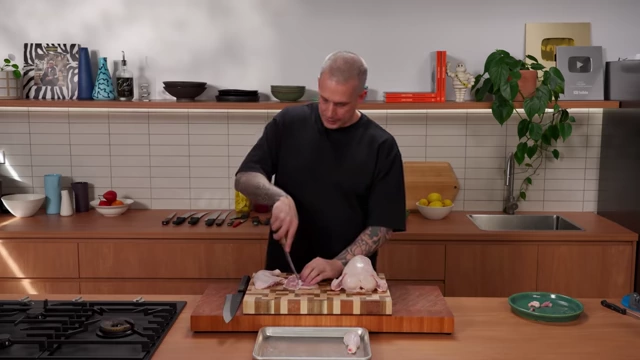
A chef bones a chicken thigh by carefully slicing along the bone with a boning knife [ 00:10:15 ] 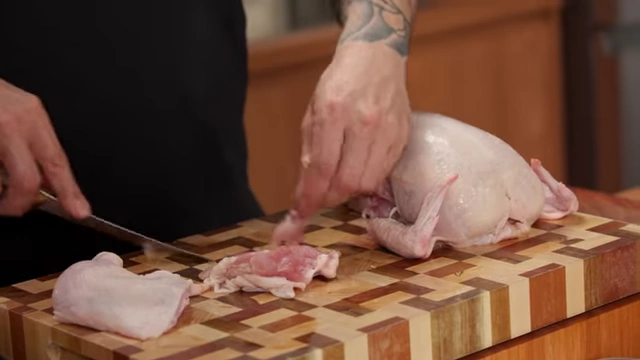
A boned chicken thigh lies on a cutting board, ready for cooking [ 00:10:31 ] - Removing Wings: Similar to legs, feel for the joint and cut through it. Detach wing tips for stock if desired.
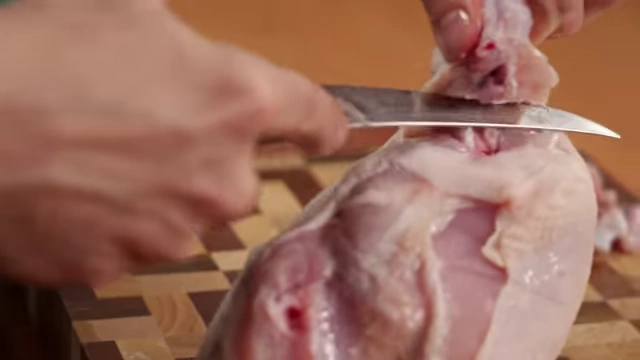
A chef cuts through the joint to remove the chicken wing from the carcass [ 00:11:05 ] - Removing Breasts: Identify the sternum bone running down the center. Make a deep cut along one side of the wishbone and sternum, following the rib cage to carefully detach the breast, including the tenderloin.

Close-up of the chef cutting the chicken breast from the sternum bone [ 00:11:39 ] 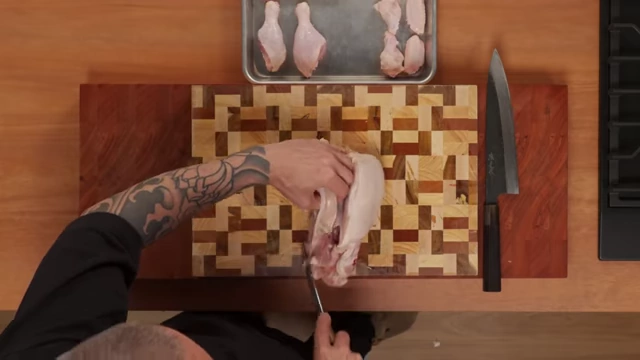
An overhead shot of the chef carefully removing a chicken breast from the carcass [ 00:12:05 ] - Benefits: Saves money, allows for different cuts, and provides carcass for stock.
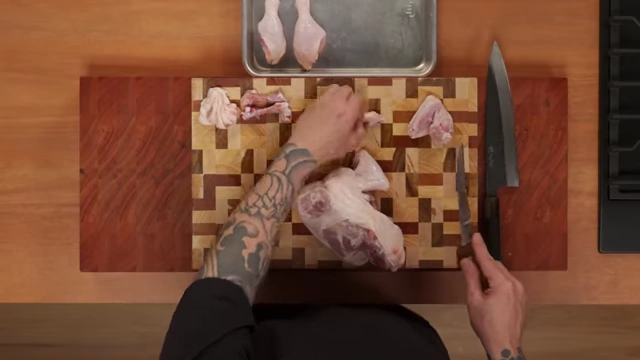
Various cuts of raw chicken—drumsticks, thighs, and wings—arranged on a cutting board [ 00:11:13 ]
- Preparation: A whole raw chicken is placed on a cutting board, ready for butchery.
Filleting Fish [12:56]
- Preparation: A whole fish ready for filleting on a cutting board. You can optionally remove fins with kitchen scissors; be cautious of sharp, sometimes poisonous, dorsal fins.
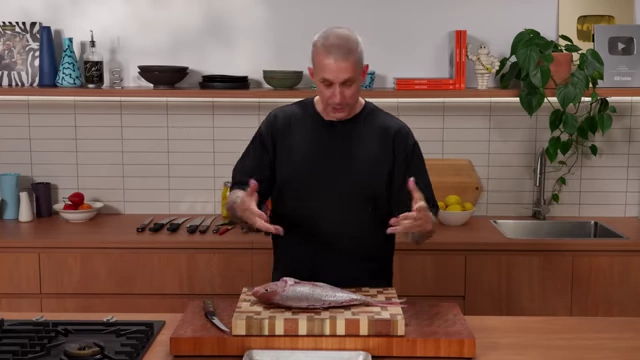
A whole snapper fish rests on a cutting board, prepared for filleting [ 00:13:00 ] 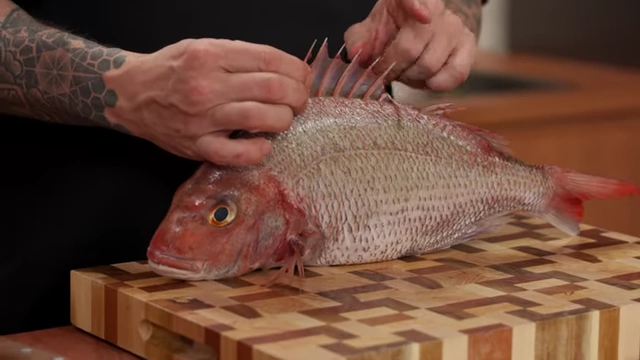
A close-up of the sharp dorsal fins on a fish, indicating where to exercise caution [ 00:13:16 ] - Initial Cuts: Run your blade from the top of the head down to the dorsal fin, then make an incision and carefully run the blade along the spine, staying close to the bone structure.
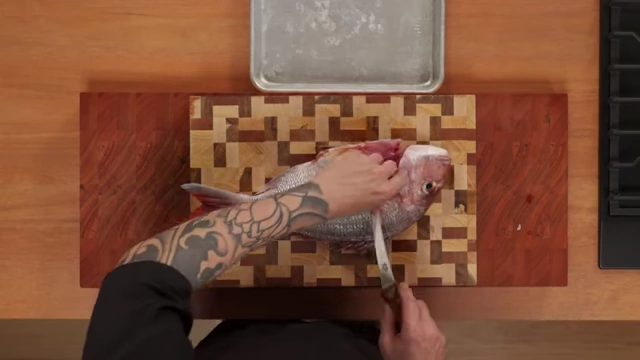
An overhead view of the chef making an incision behind the fish's head, along the spine [ 00:13:39 ] 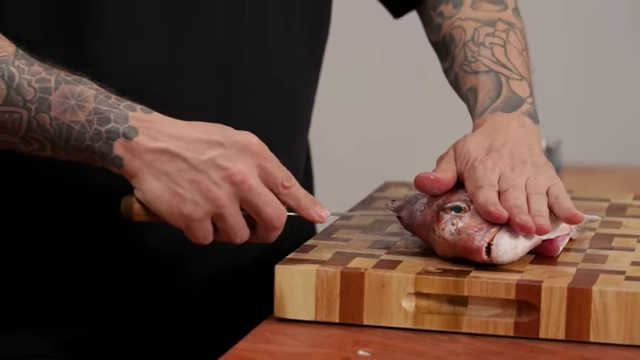
A chef carefully runs a boning knife along the fish's spine to separate the fillet [ 00:13:57 ] - Separating Fillet: Continue cutting along the rib cage, keeping the blade as close to the bones as possible.

The chef demonstrates how to separate the fish fillet from the rib cage [ 00:14:38 ] - Belly Section: The belly can be tricky; work slowly, supporting the flesh as you cut.
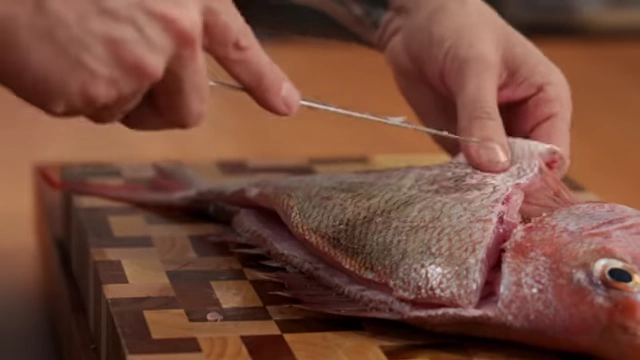
A chef carefully separates the belly section of the fish fillet from the frame [ 00:14:44 ] - Carcass Use: Don't waste the carcass; scrape off any remaining meat and use the head and bones (after removing eyes and rinsing) for fish stock.
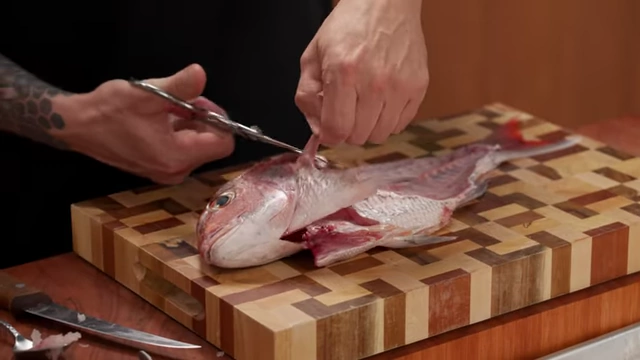
A chef uses kitchen shears to remove the fins from a fish carcass for stock [ 00:15:32 ] 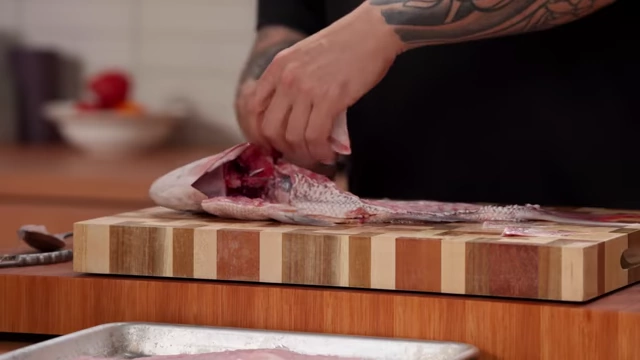
A chef separates the collar from the fish carcass, preparing it for grilling or stock [ 00:15:35 ] 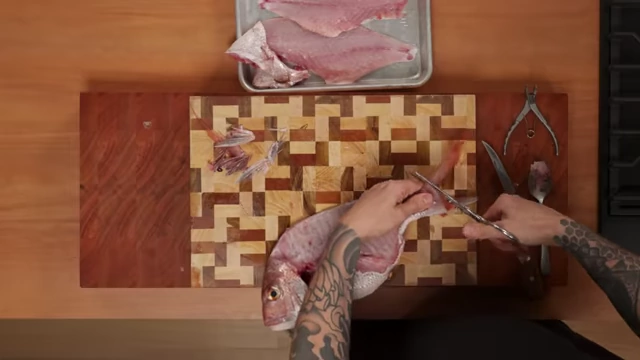
A chef uses kitchen shears to segment the fish carcass for fish stock [ 00:15:51 ] - Pin Boning: Feel for pin bones along the fillet with your finger. Use tweezers or small pliers to pull them out, supporting the surrounding flesh.
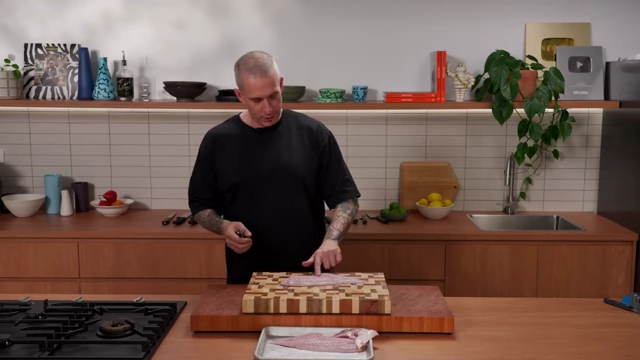
A chef points to the line of pin bones on a fish fillet [ 00:16:29 ] 
A chef carefully removes pin bones from a fish fillet using tweezers [ 00:16:39 ] - Skinning (Optional) [16:40]
- Make a small cut at one end of the fillet to reach the skin.
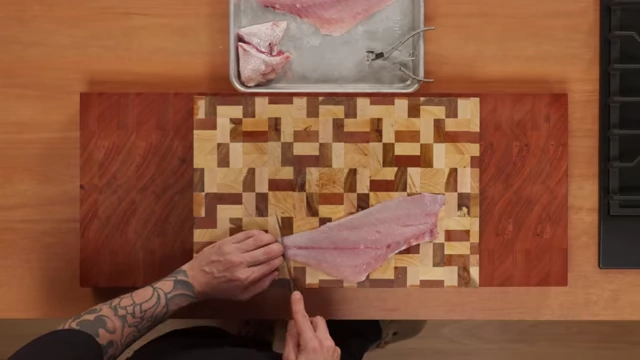
An overhead shot shows a chef making the initial cut to begin skinning a fish fillet [ 00:16:48 ] - Angle your sharp knife slightly downwards, gripping the skin firmly, and move the skin back and forth against the stationary blade to separate it from the flesh.
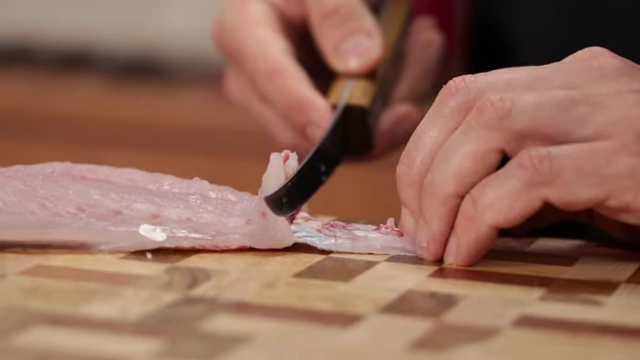
A chef demonstrates the correct angle of the knife to separate skin from fish fillet [ 00:16:54 ] 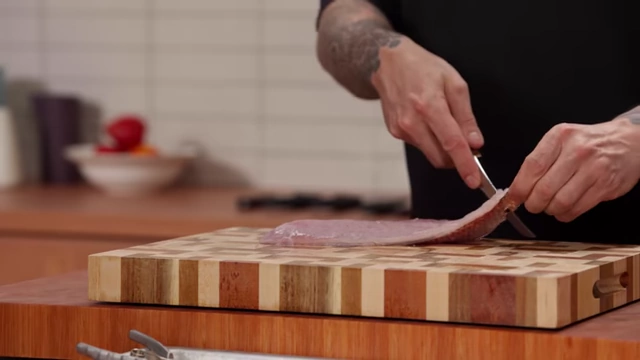
A chef shows a small incision in the fish skin to get a better grip for skinning [ 00:17:19 ] 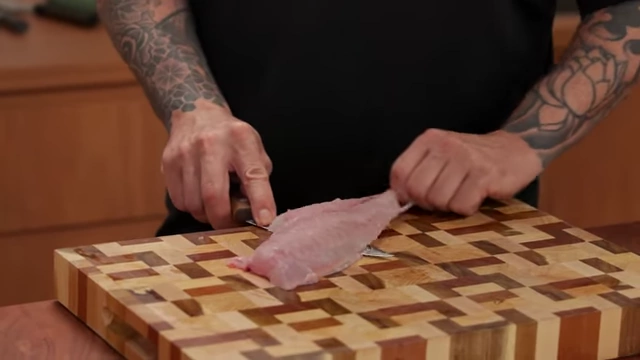
A chef wiggles the skin back and forth to separate it from the fish fillet, leaving the blade stationary [ 00:17:26 ] - The skinned fillet is shown next to the removed skin.
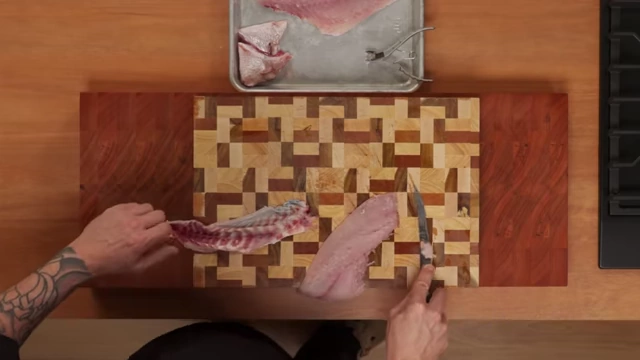
An overhead view of a perfectly skinned fish fillet next to the removed skin [ 00:17:32 ]
- Make a small cut at one end of the fillet to reach the skin.
- Preparation: A whole fish ready for filleting on a cutting board. You can optionally remove fins with kitchen scissors; be cautious of sharp, sometimes poisonous, dorsal fins.
Cutting Beef (Flank Steak) [17:41]
- Identifying Silver Skin: Silver skin is visible on a flank steak, indicating where to trim.
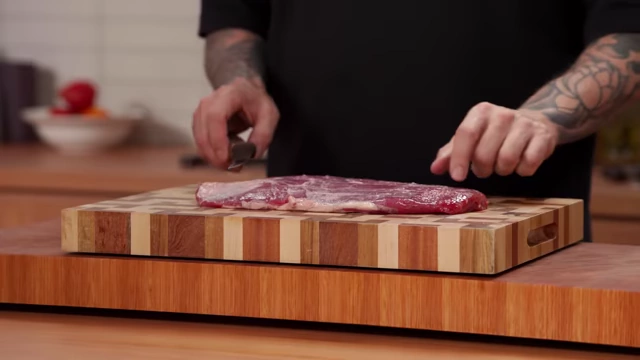
A raw flank steak lies on a cutting board, with silver skin visible on its surface [ 00:17:49 ] 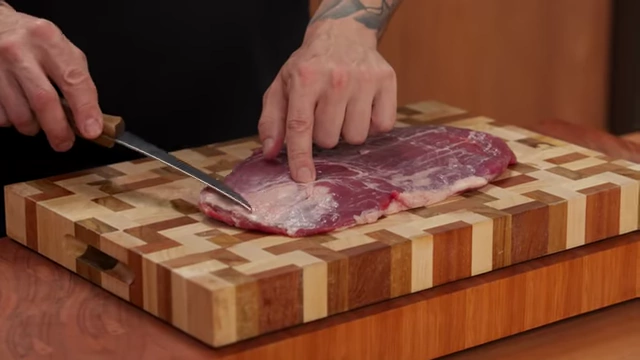
A chef points out the silver skin on a raw piece of beef [ 00:17:55 ] - Removing Silver Skin [17:49]
- Silver skin is a tough connective tissue on meat. Use the tip of your boning knife to get underneath it.
- Point the knife upwards and carefully run the blade to separate the silver skin from the muscle, minimizing meat waste.
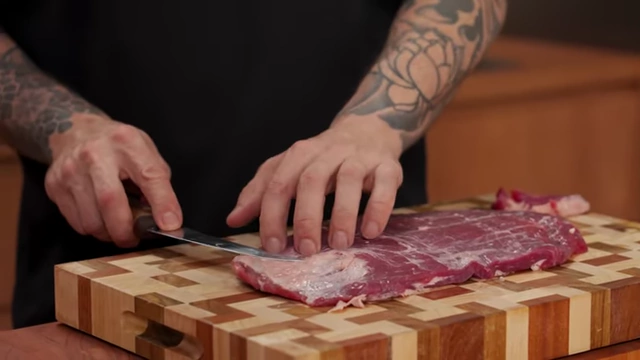
A chef skillfully removes silver skin from a flank steak using the tip of a boning knife [ 00:18:08 ] 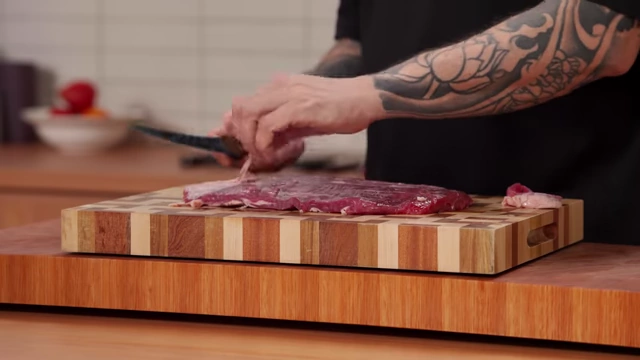
A chef removes silver skin from beef, showing the thin, separated layer of connective tissue [ 00:18:13 ] 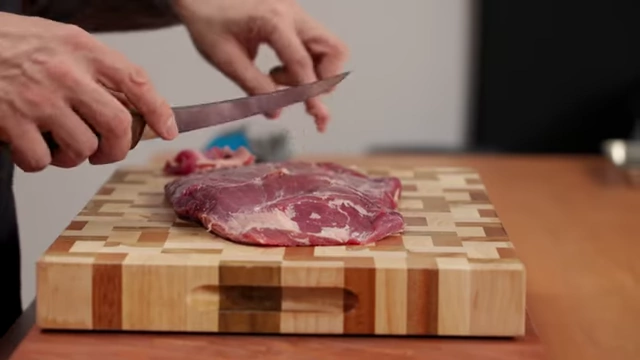
A chef removes translucent membrane from a piece of beef with a boning knife [ 00:18:30 ]
- Cutting Against the Grain [18:38]
- Always cut beef (and lamb) against the grain.
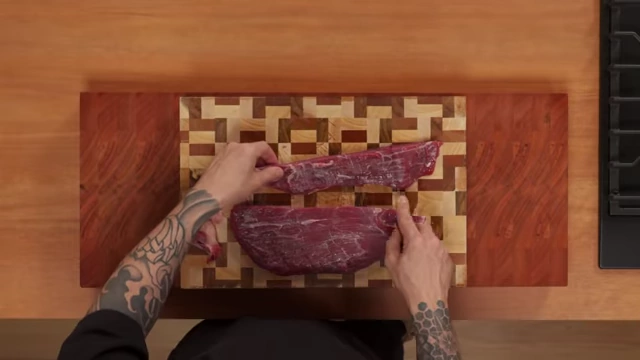
An overhead shot of a flank steak, highlighting the long muscle fibers that define the grain [ 00:18:58 ] - Identify the grain by looking for the long muscle fibers running in one direction.
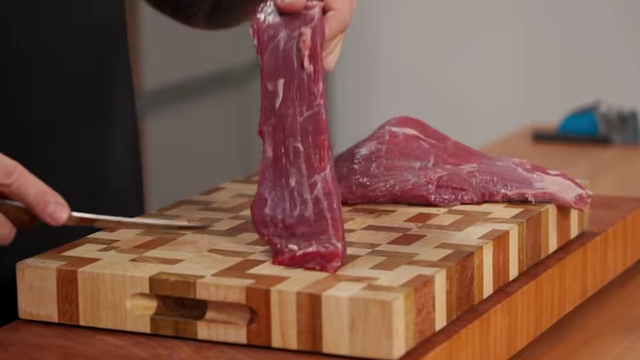
A close-up shot of raw beef showing visible muscle fibers, with the chef demonstrating how to cut across the grain for tenderness [ 00:19:07 ] - Cutting against the grain shortens these fibers, making the meat more tender.
- Demonstrate by showing how easily meat cut against the grain pulls apart compared to meat cut with the grain.
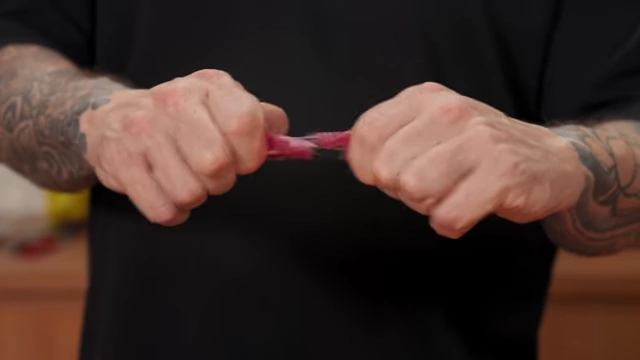
Hands easily pulling apart a piece of beef that was cut against the grain, showing its tenderness [ 00:19:20 ] 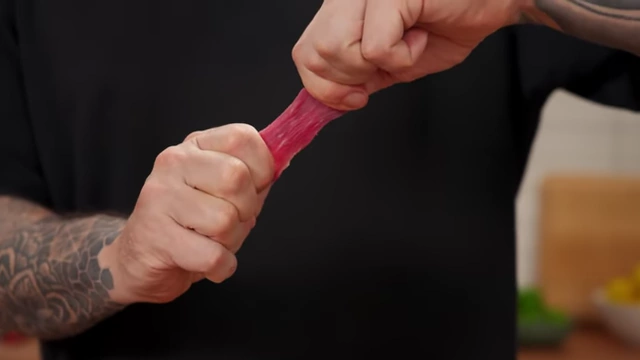
Hands struggling to pull apart a piece of beef cut with the grain, demonstrating its toughness [ 00:19:28 ]
- Always cut beef (and lamb) against the grain.
- Exceptions: Chicken and pork generally do not require specific grain-based cutting.
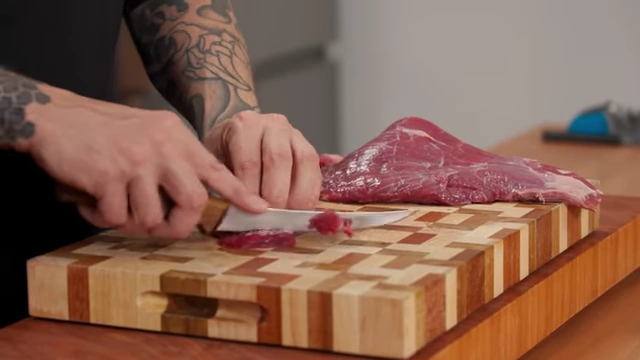
A chef slices raw beef into small, even pieces for stir-frying [ 00:19:12 ]
- Identifying Silver Skin: Silver skin is visible on a flank steak, indicating where to trim.
Vegetables: Everyday Cutting Techniques [20:01]
Learn essential, practical cuts for common vegetables for daily cooking.
Overview of Vegetables to be Cut
- An assortment of fresh vegetables including peppers, onions, garlic, carrots, broccoli, and herbs, displayed on a tray.
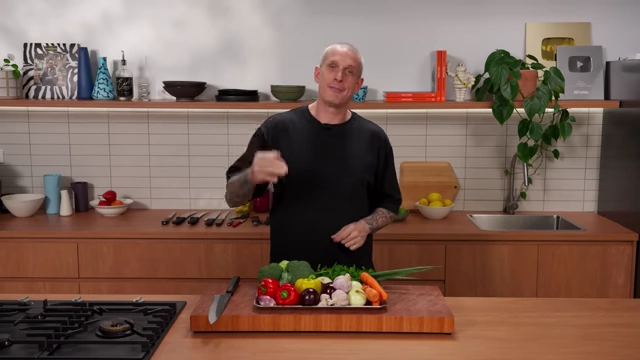
An assortment of fresh vegetables including peppers, onions, garlic, carrots, broccoli, and herbs, displayed on a tray [ 00:20:10 ]
- An assortment of fresh vegetables including peppers, onions, garlic, carrots, broccoli, and herbs, displayed on a tray.
Onions [20:28]
- Sliced: Cut off the top and bottom, halve the onion, and slice with the grain using the "claw" technique (fingers curled, knuckles guiding the blade). Ideal for salads or caramelizing.
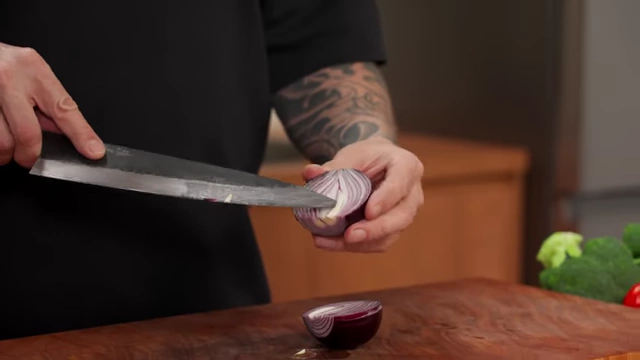
A chef shows how the grain of an onion runs from top to root, guiding the slicing direction [ 00:20:41 ] 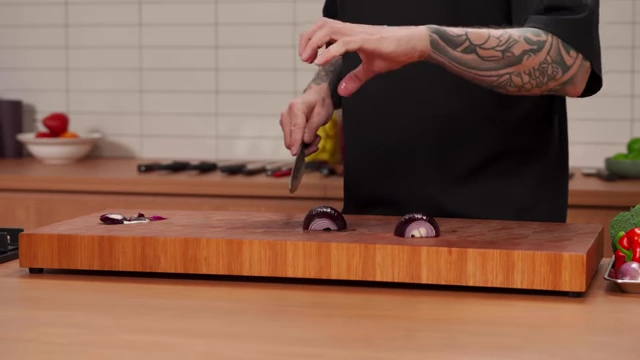
A chef demonstrates the "claw" grip, where fingers are curled to protect them while slicing an onion [ 00:20:45 ] 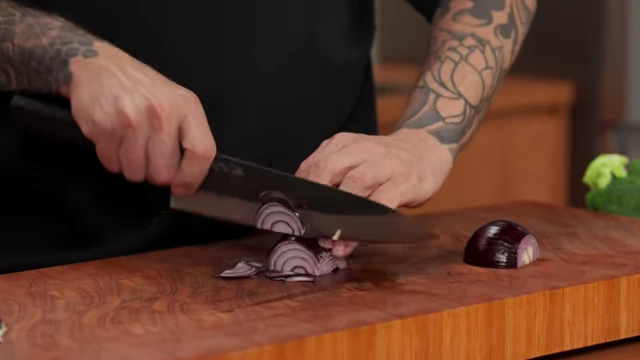
A close-up of a red onion being sliced thinly using the "claw" grip, with the knife resting against the knuckles [ 00:20:47 ] 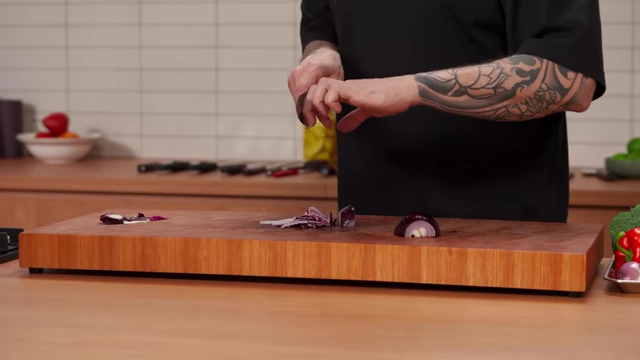
A chef shows how to adjust the "claw" grip by opening the hand slightly as the onion gets smaller [ 00:20:54 ] 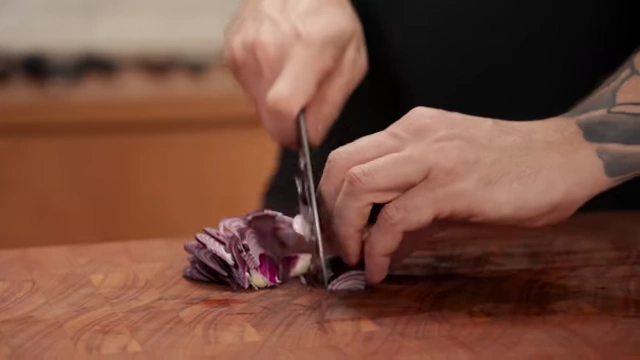
Thinly sliced red onion pieces, ready for use [ 00:21:01 ] - Large Dice: Cut off top and bottom, halve. Make several horizontal cuts almost to the root, then turn and make vertical cuts.
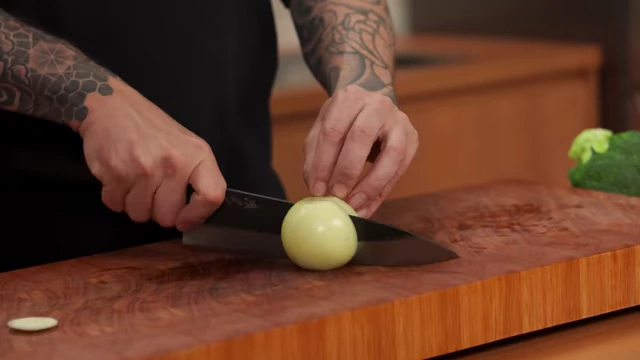
A chef makes horizontal slices into half an onion, keeping the slices connected at the root [ 00:21:20 ] 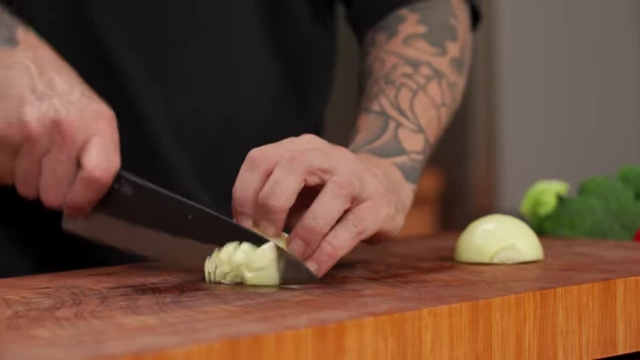
A chef turns the onion half and makes vertical cuts to create a large dice [ 00:21:32 ] 
Large diced onion pieces on a cutting board [ 00:21:35 ] - Fine Dice: Cut off the top, leave the root intact for stability, halve. Make thin horizontal slices almost to the root, optionally make vertical slices, then finely slice across using the claw technique.

A chef makes horizontal slices into half an onion, leaving the root intact to hold it together [ 00:21:54 ] 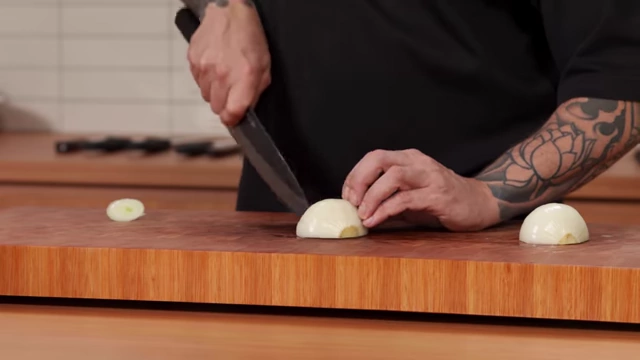
A chef makes vertical slices into the onion to prepare for a fine dice [ 00:22:00 ] 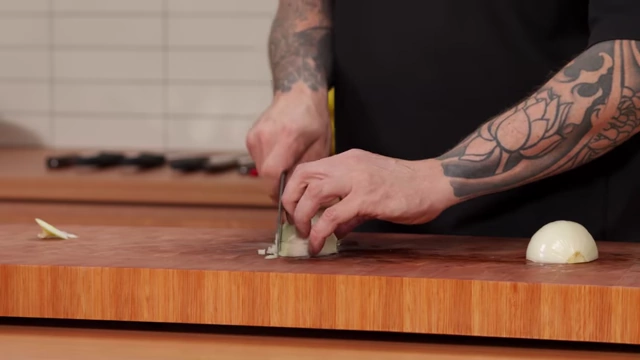
A chef finely dices an onion, creating very small, uniform pieces [ 00:22:13 ] 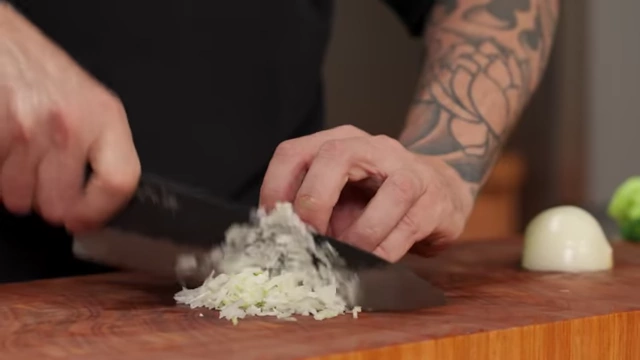
Finely diced onion on a cutting board [ 00:22:16 ] - Rings/Slices: Cut off the top and bottom. Place the onion flat and slice carefully to desired thickness, using your palm to stabilize the round object.
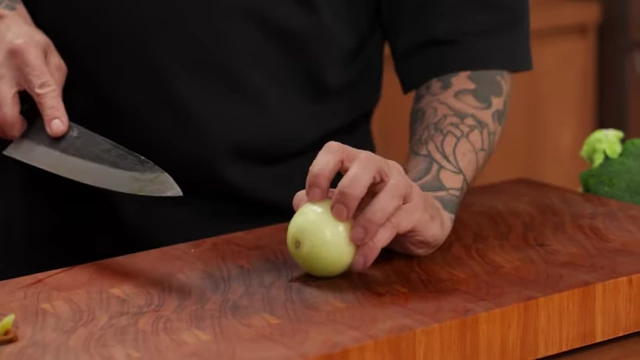
A chef stabilizes a whole onion with his palm while slicing it into rings [ 00:22:47 ] 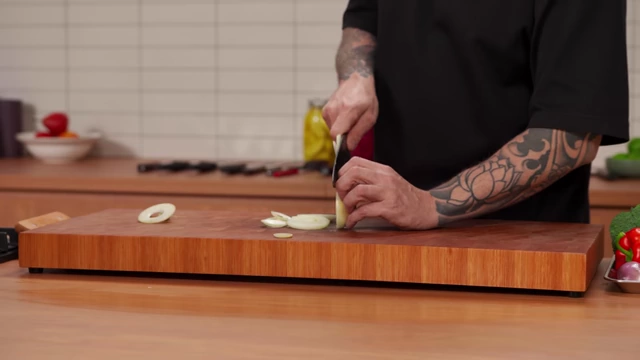
Thin, even onion rings are sliced from a whole onion [ 00:22:53 ]
- Sliced: Cut off the top and bottom, halve the onion, and slice with the grain using the "claw" technique (fingers curled, knuckles guiding the blade). Ideal for salads or caramelizing.
Capsicum (Bell Pepper) [22:56]
- Preparation: Cut off the top and bottom, remove the core and white membrane.

A chef removes the inner core and seeds from a bell pepper [ 00:23:06 ] 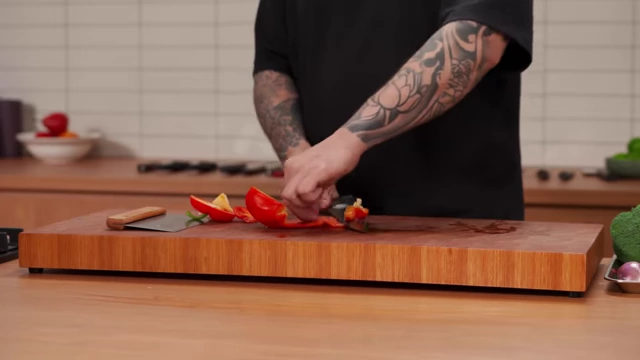
A chef removes the white membrane from the inside of a red bell pepper [ 00:23:15 ] 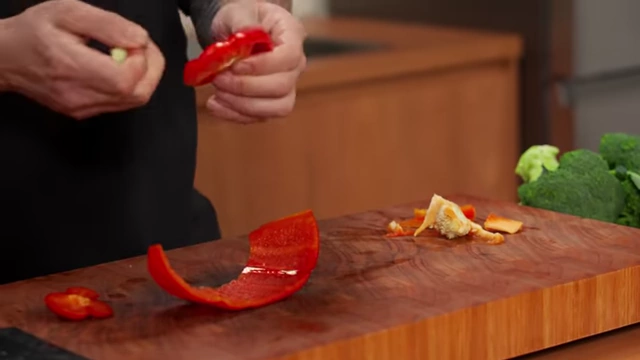
A chef displays the cleaned segments of a red bell pepper, ready for cutting [ 00:23:20 ] - Stir-fry (Diamonds): Lay pieces flat, cut diagonally, then turn and cut diagonally again to create diamond shapes.
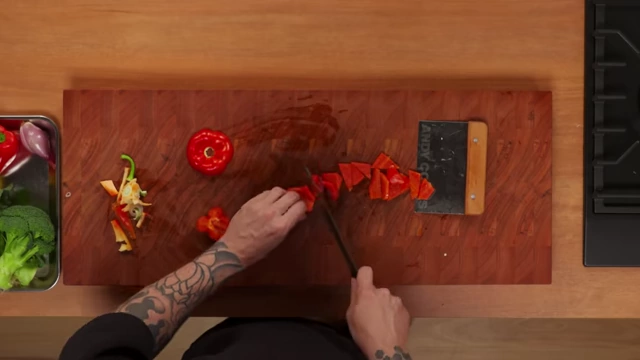
An overhead view of a red bell pepper being cut into small, even diamond shapes on a wooden cutting board [ 00:23:27 ] - Salad (Slices): Cut pieces into manageable strips, stack them, and slice.
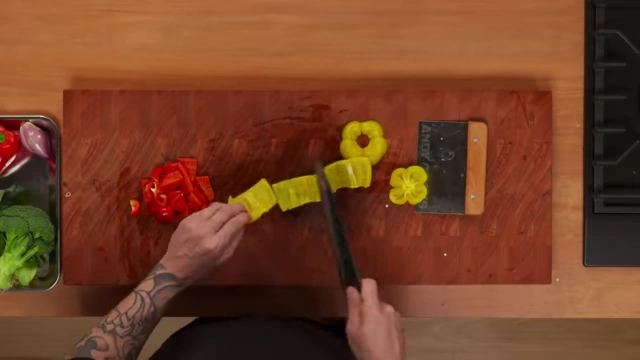
A chef slices a yellow bell pepper into uniform strips for a salad [ 00:23:37 ] 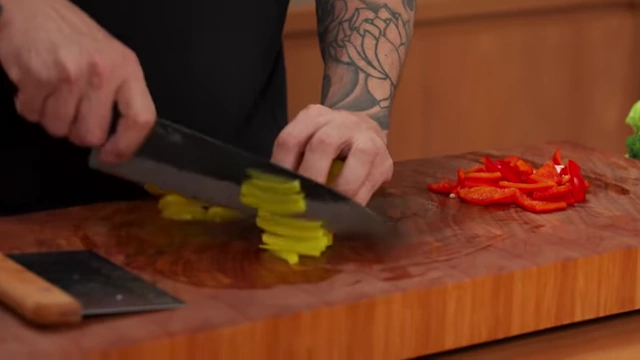
Thinly sliced yellow bell pepper pieces [ 00:23:42 ]
- Preparation: Cut off the top and bottom, remove the core and white membrane.
Broccoli [23:46]
- Florets: Place the head down, cut off florets from the main stem. Break larger florets by inserting a knife into the stem and twisting.
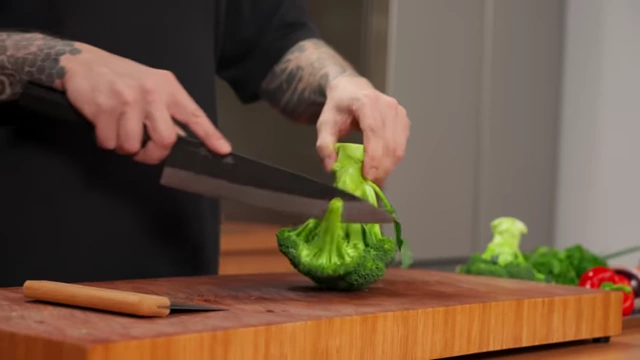
A chef cuts broccoli florets from the main stem [ 00:23:56 ] 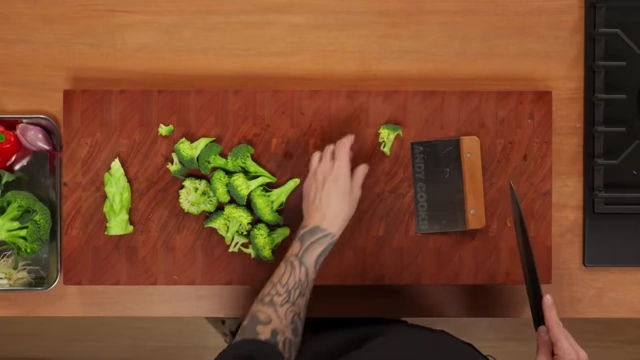
Different sizes of broccoli florets are displayed on a cutting board [ 00:24:05 ] 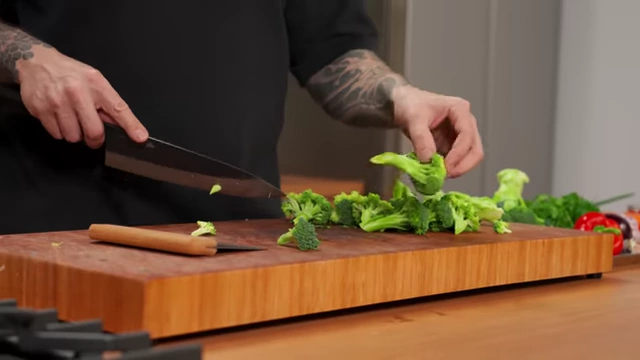
A chef splits a large broccoli floret stem to create smaller, more manageable pieces [ 00:24:07 ] - Stems: Peel any woody outer layers. Slice for stir-fries or blanching. Can also be grated and added to sauces like bolognese to add hidden vegetables.
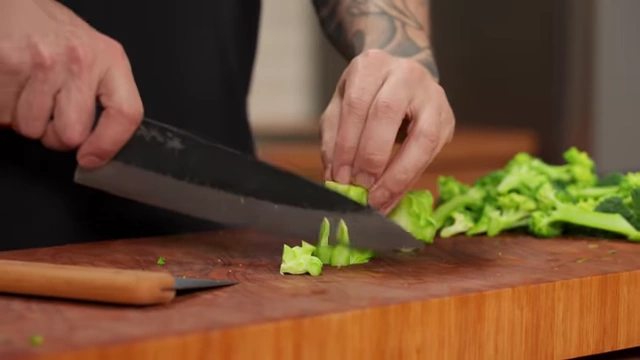
A chef peels the woody outer layer from a broccoli stem before slicing [ 00:24:24 ] 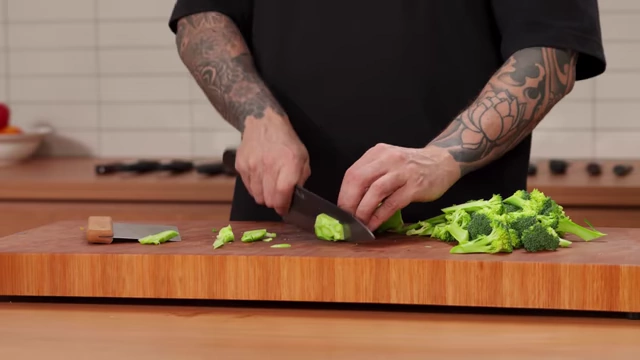
A chef slices a broccoli stem into thin, even pieces for stir-frying [ 00:24:27 ] 
A chef peels and slices a broccoli stem on a cutting board [ 00:24:39 ]
- Florets: Place the head down, cut off florets from the main stem. Break larger florets by inserting a knife into the stem and twisting.
Cucumber [24:54]
- Preparation: Cut off ends, halve lengthwise.
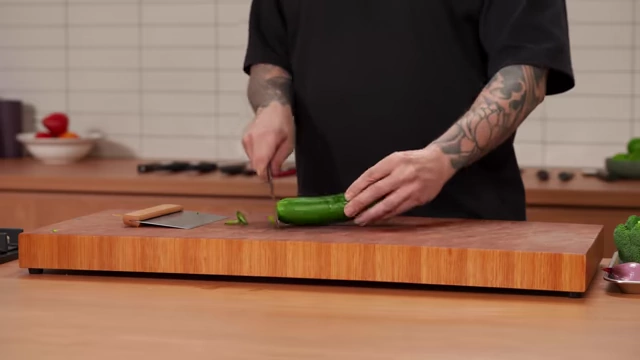
A chef halves a cucumber lengthwise on a cutting board [ 00:24:57 ] - Slices/Discs: Slice into discs. For salads, especially meal prep, scoop out the watery seeds with a spoon to prevent sogginess.
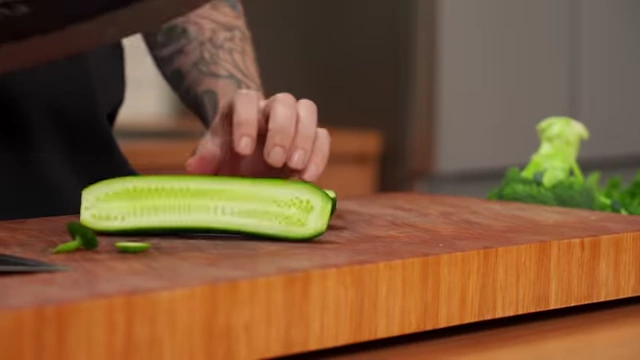
A chef halves a cucumber lengthwise, showing the seeded interior [ 00:24:58 ] 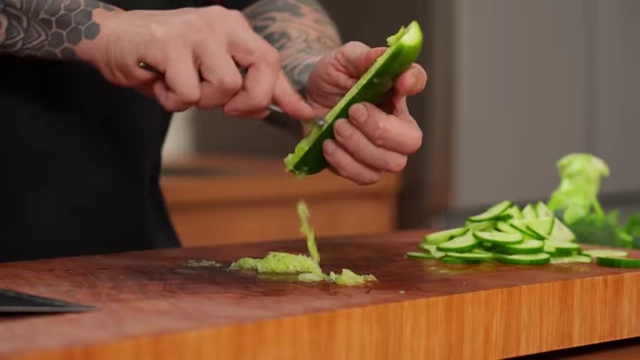
A chef uses a spoon to scoop out the watery seeds from a cucumber half [ 00:25:07 ]
- Preparation: Cut off ends, halve lengthwise.
Carrots [25:16]
- Grated: For coleslaw or sofrito, grating is the easiest method.
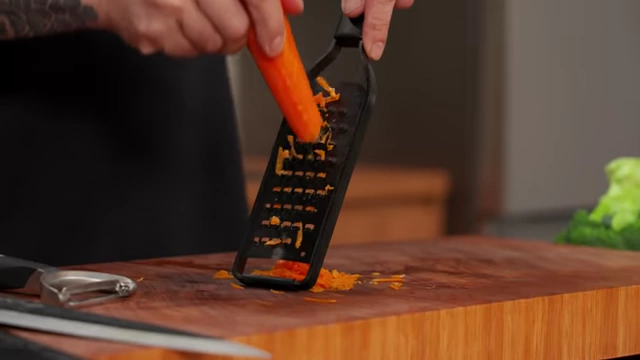
A chef grates a carrot over a cutting board [ 00:25:26 ] - Julienne (Salad): Peel, cut one flat side to stabilize, then slice into thin planks, stack, and julienne.

A chef creates thin planks from a carrot by making a flat cut for stability [ 00:25:33 ] 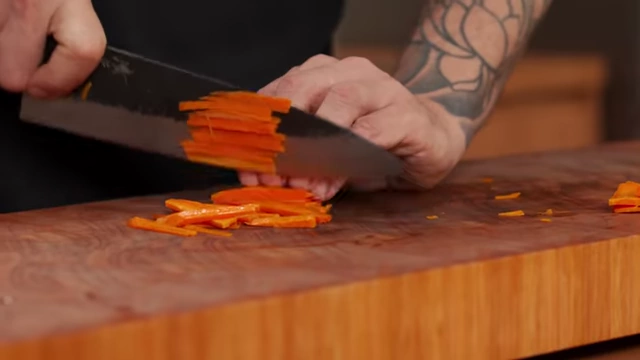
A chef juliennes carrots by stacking thin planks and slicing them into matchsticks [ 00:25:46 ] - Roast: Leave skin on (if clean), cut into rustic, uneven shapes by slicing and rolling the carrot. These shapes create more surface area for caramelization.
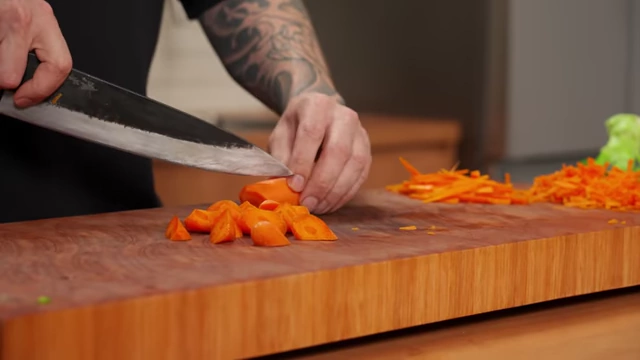
A chef demonstrates how to cut carrots into varied, rustic shapes ideal for roasting by slicing and rotating the carrot [ 00:26:16 ] - Stir-fry: Cut in half lengthwise, lay flat, and slice diagonally into 10mm thick pieces for quick cooking.
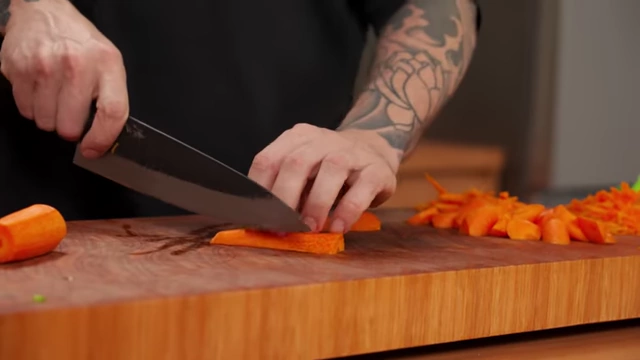
A chef slices a carrot diagonally into thick, even pieces for stir-frying [ 00:26:28 ] - Diced: Peel, quarter lengthwise, then dice into 1cm cubes.
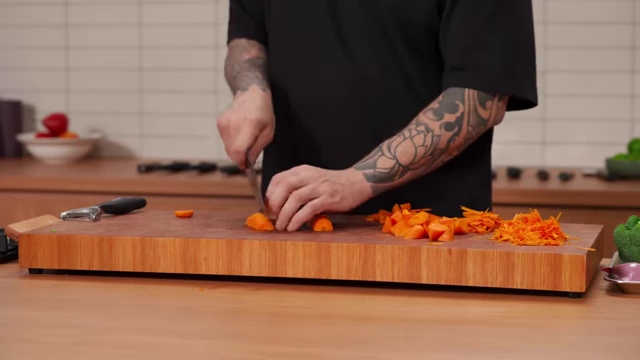
A chef quarters a carrot lengthwise for dicing [ 00:26:43 ] 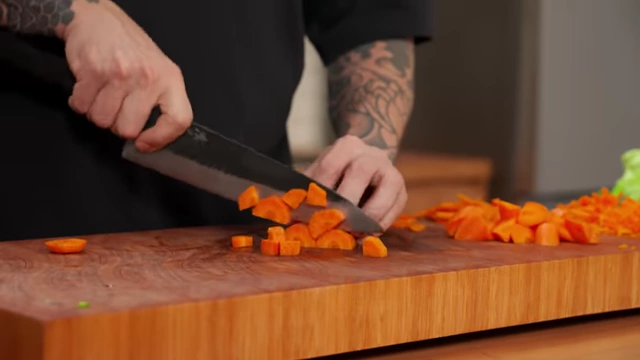
A chef dices a quartered carrot into small, uniform cubes [ 00:26:45 ]
- Grated: For coleslaw or sofrito, grating is the easiest method.
Garlic [26:50]
- Mincing: Break open the bulb, remove cloves, cut off root ends. Smash cloves with the flat side of your knife to easily peel. Mince finely using the claw technique (rocking motion).
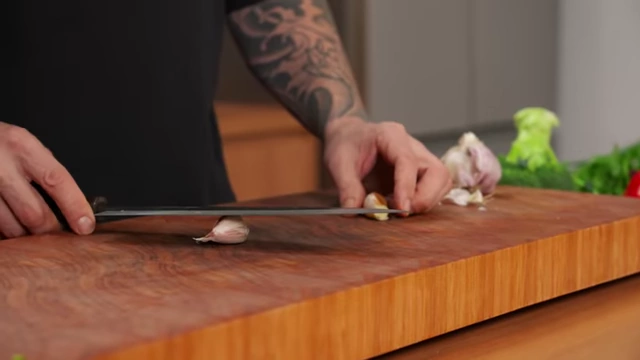
A chef smashes a garlic clove with the flat side of a knife to loosen the skin [ 00:26:57 ] 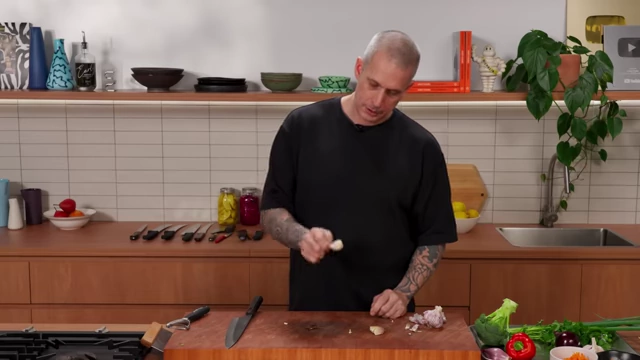
A smashed garlic clove with its skin easily removed [ 00:27:00 ] 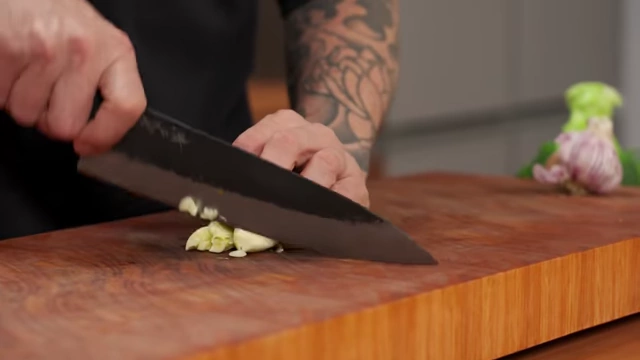
A chef minces garlic cloves using a rocking motion with a chef's knife [ 00:27:04 ] 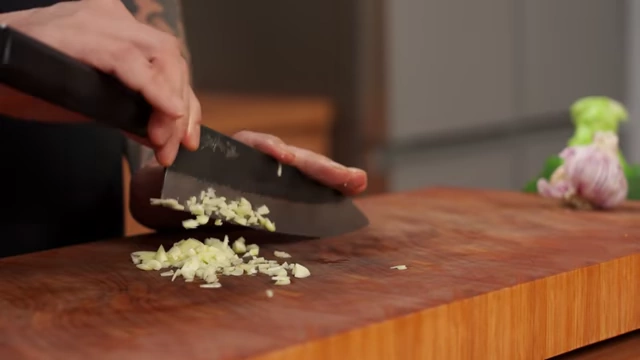
Finely minced garlic on a cutting board [ 00:27:08 ] - Grated: For very fine garlic, use a microplane grater, ideally over a bench scraper to prevent it from touching the board.
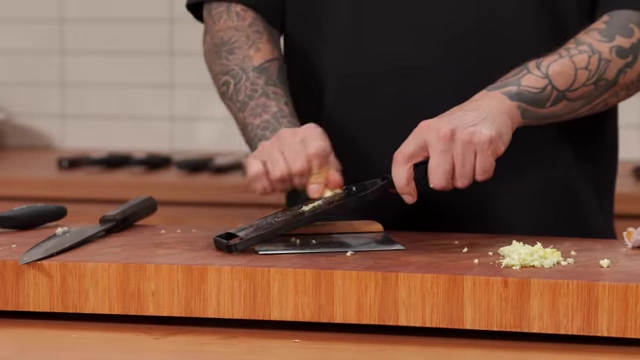
A chef grating garlic using a microplane over a bench scraper, preventing contact with the cutting board [ 00:27:26 ]
- Mincing: Break open the bulb, remove cloves, cut off root ends. Smash cloves with the flat side of your knife to easily peel. Mince finely using the claw technique (rocking motion).
Spring Onions (Scallions) [27:36]
- Preparation: An assortment of spring onions and parsley, ready for cutting.
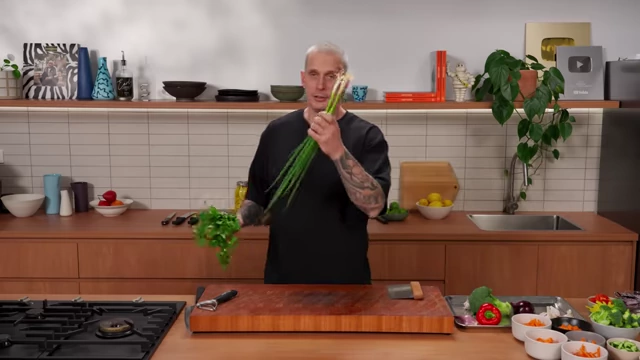
An assortment of spring onions and parsley, ready for cutting [ 00:27:37 ] - White Parts: Remove roots. Slice the white section (thicker for stir-fries, thinner for salads).
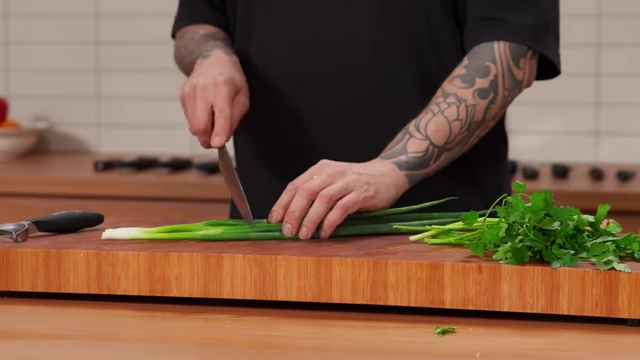
A chef slices the white portion of spring onions into small pieces [ 00:27:47 ] 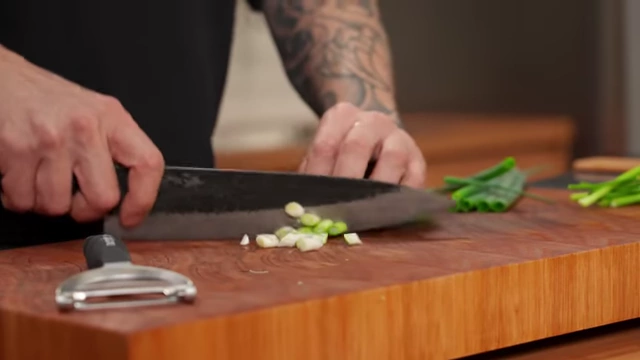
Small, uniformly sliced white parts of spring onions [ 00:27:51 ] - Green Parts: Roll the green parts tightly, then slice finely at a sharp angle for garnish.
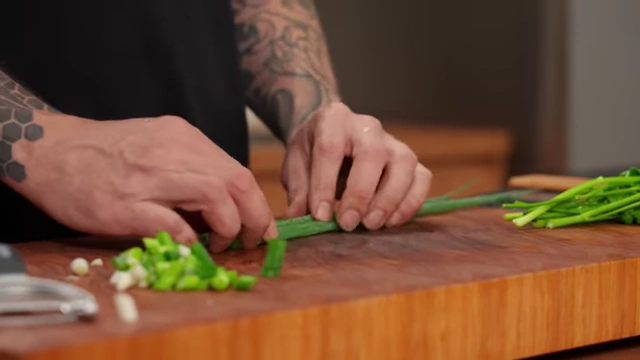
A chef tightly rolls the green parts of spring onions before slicing them [ 00:28:00 ] 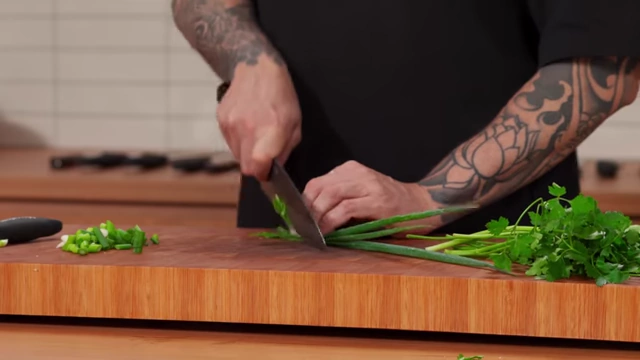
A close-up of a chef finely slicing the green parts of spring onions at an angle, held together tightly [ 00:28:06 ] 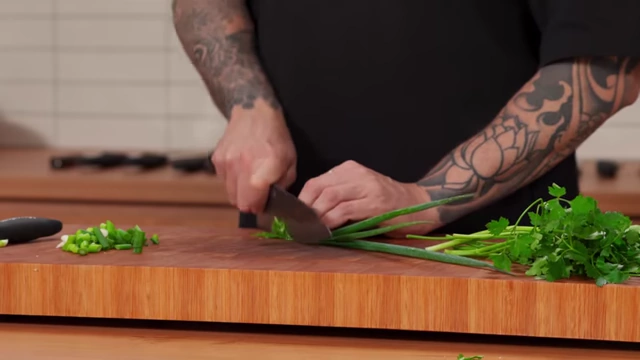
Finely sliced green parts of spring onions, ready for garnish [ 00:28:09 ]
- Preparation: An assortment of spring onions and parsley, ready for cutting.
Parsley [28:16]
- Preparation: For home cooking, loosely pick leaves, a bit of stalk is acceptable.
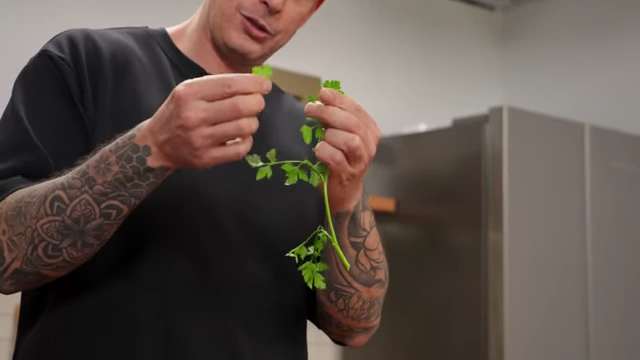
A close-up of a parsley sprig, illustrating the preferred method of picking leaves with minimal stalk [ 00:28:22 ] - Chopping: Gather the picked leaves, scrunch them tightly, and roll them into a cigar shape. Slice once across to the desired fineness. Avoid multiple passes to prevent bruising and loss of color/vibrancy.

A chef tightly rolls parsley leaves into a cigar shape before chopping them [ 00:28:46 ] 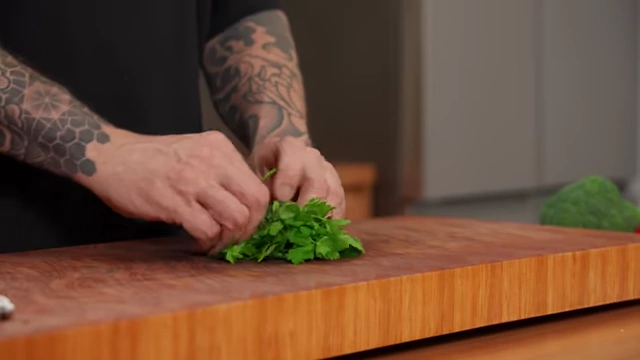
A close-up shows parsley leaves tightly rolled into a cigar shape, ready for a single, precise slice [ 00:28:49 ] 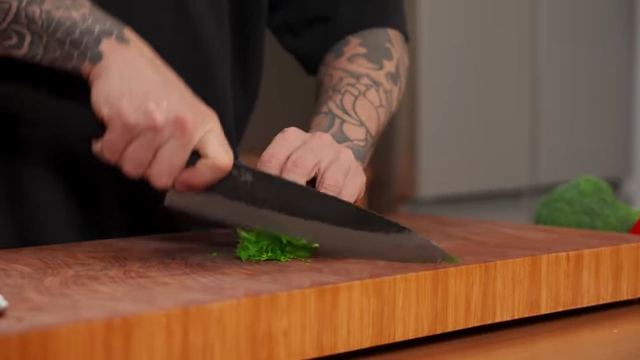
A chef finely chops rolled parsley leaves with a single pass of the knife [ 00:29:06 ] 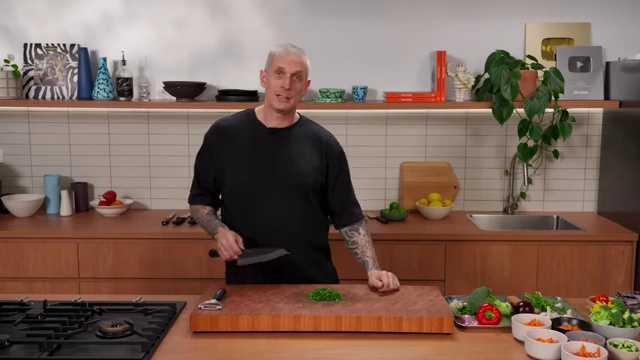
Finely chopped parsley on a wooden cutting board [ 00:29:14 ]
- Preparation: For home cooking, loosely pick leaves, a bit of stalk is acceptable.
Carving Meats with Precision [31:48]
Carving a Roast Chicken [31:48]
- Pre-Roasting Preparation:
- Remove Wishbone: Use a boning knife to scrape the flesh from around the wishbone inside the chicken's neck cavity. Loosen it with your fingers and pull it out. This makes carving the breast much easier after cooking.
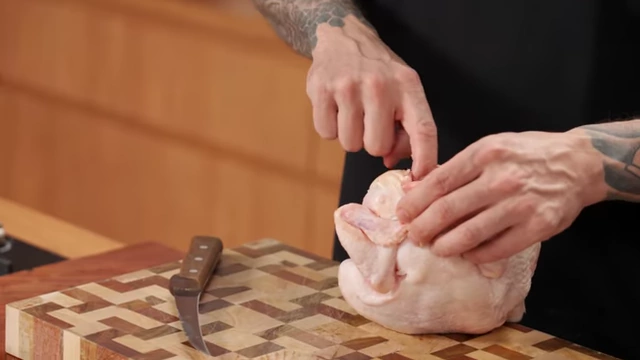
A chef points to the wishbone area in the neck cavity of a raw chicken [ 00:30:07 ] 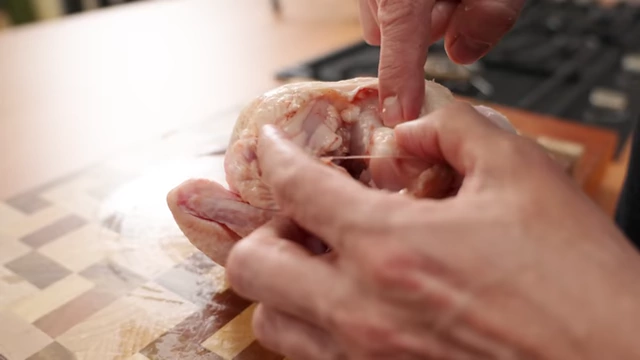
A chef feels for the wishbone inside the chicken's neck cavity [ 00:30:11 ] 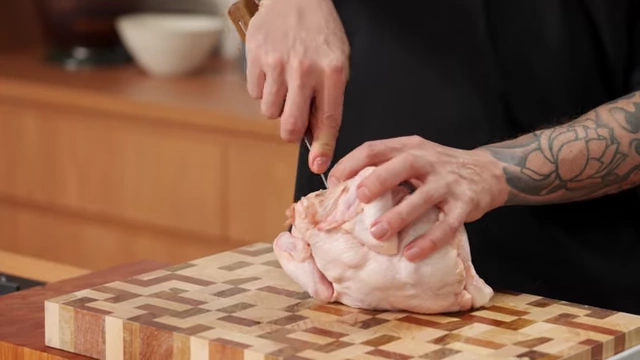
A chef uses a boning knife to scrape flesh away from the wishbone inside a raw chicken [ 00:30:23 ] 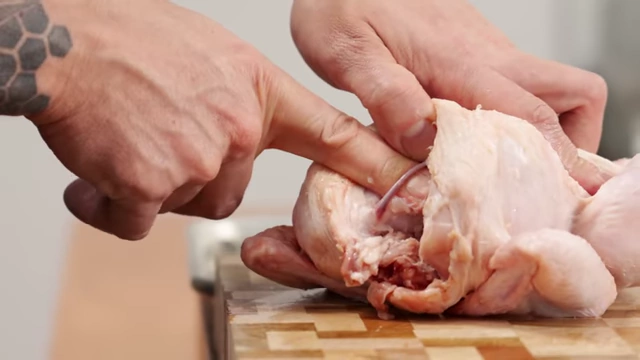
A chef loosens the wishbone with his fingers before pulling it out of the chicken [ 00:30:38 ] - Trussing: Use butcher's string to tie the chicken. Tuck wings under, bring string around the top of the breasts, under the drumsticks, and tie them together tightly. Trussing helps the chicken cook more evenly and maintains a plump shape.
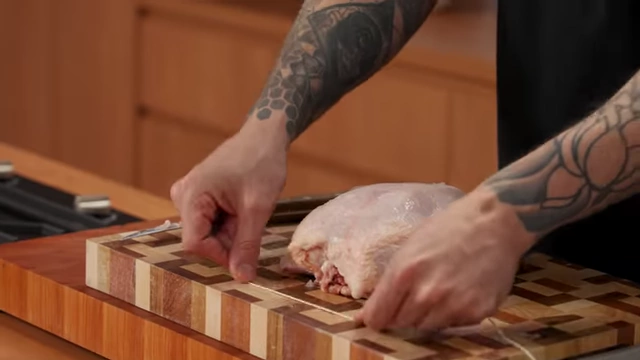
A chef positions butcher's string under the wings of a raw chicken for trussing [ 00:31:15 ] 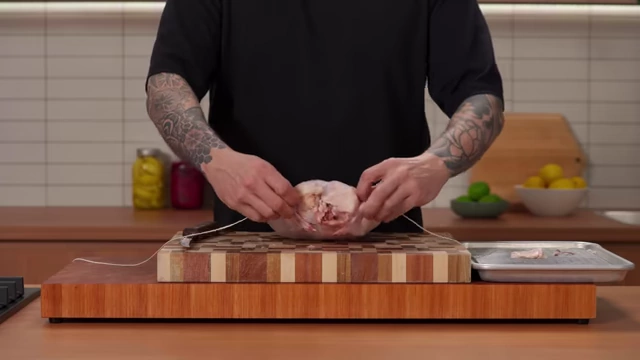
A chef wraps butcher's string around the top of the chicken breasts to secure the wings [ 00:31:21 ] 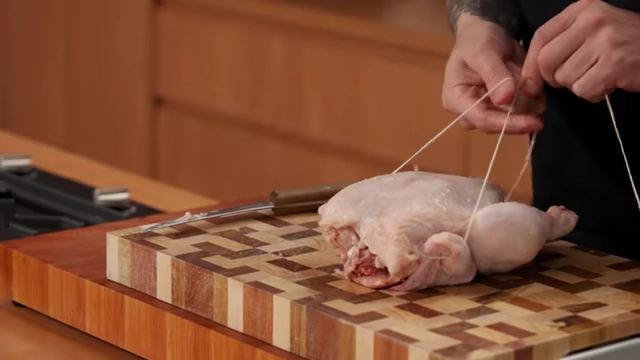
A chef brings butcher's string down around the legs of a raw chicken for trussing [ 00:31:24 ] 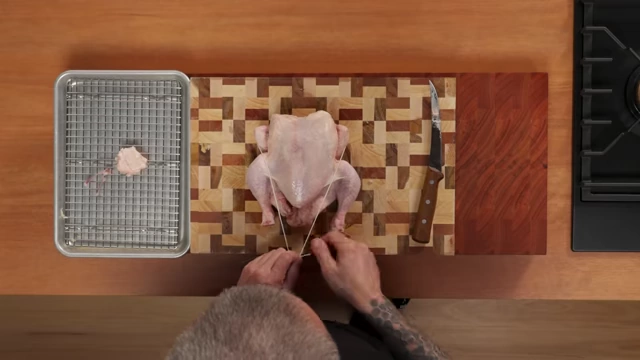
An overhead view of a raw chicken, partially trussed with string [ 00:31:26 ] 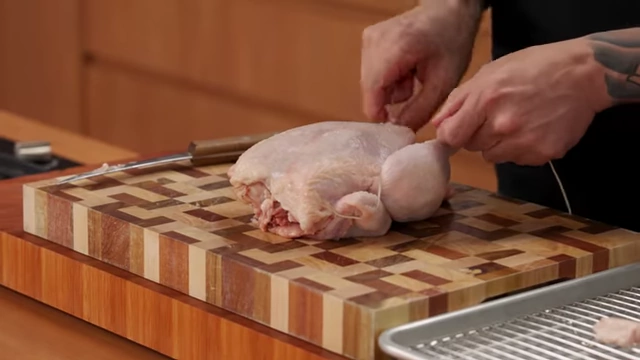
A chef tightens the butcher's string around the drumsticks of a raw chicken to pull them together [ 00:31:29 ] 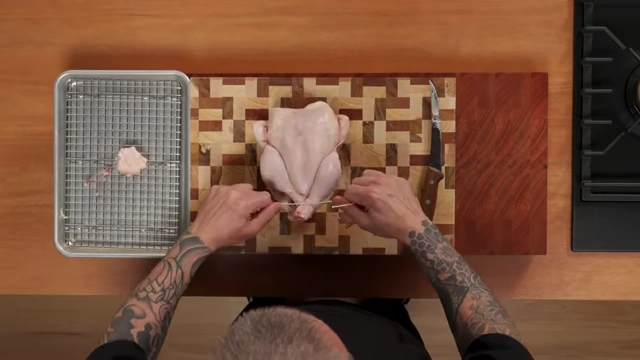
An overhead view of a raw chicken, perfectly trussed and ready for roasting [ 00:31:33 ]
- Remove Wishbone: Use a boning knife to scrape the flesh from around the wishbone inside the chicken's neck cavity. Loosen it with your fingers and pull it out. This makes carving the breast much easier after cooking.
- Post-Roasting Carving:
- Resting: Allow the chicken to rest after roasting to redistribute juices.
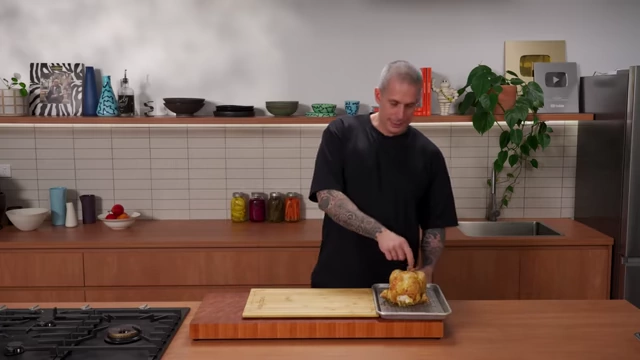
A golden brown roasted chicken rests on a wire rack over a baking sheet [ 00:31:46 ] - Drain Juices: Poke a hole in the cavity to drain any excess liquid for gravy.
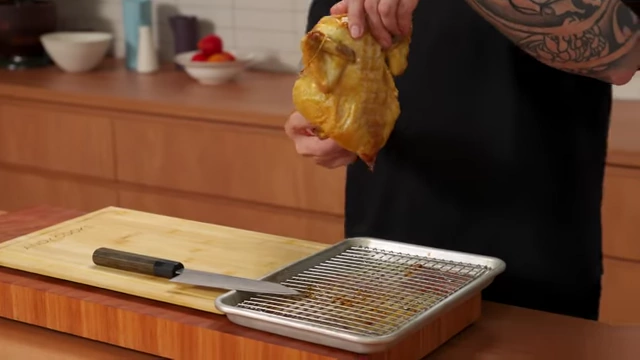
A chef drains excess liquid from the cavity of a roasted chicken into a tray [ 00:31:59 ] - Remove Twine: Cut and unravel the butcher's twine.
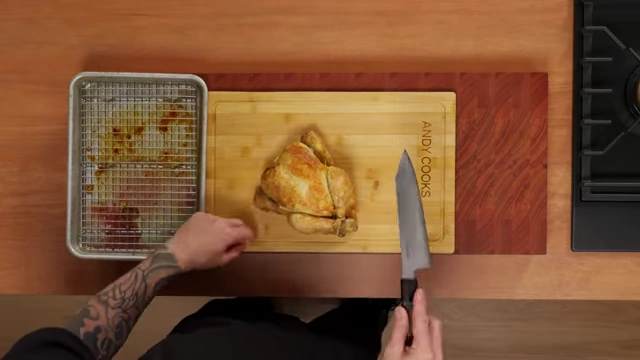
An overhead view of a roasted chicken on a cutting board with twine, ready for carving [ 00:32:11 ] - Remove Legs: Cut between the breast and thigh, pop the joint to crack it, then cut through the joint. Separate the drumstick and thigh at their joint.
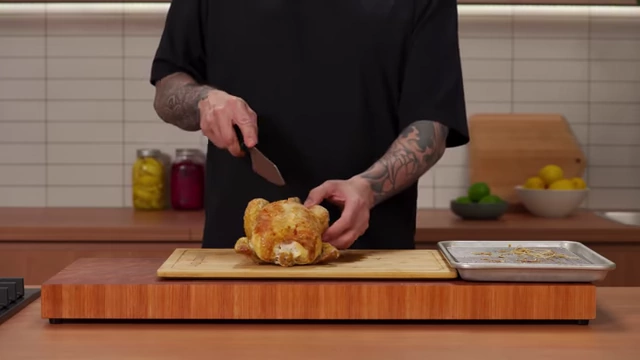
A chef makes an initial cut between the breast and thigh of a roasted chicken [ 00:32:16 ] 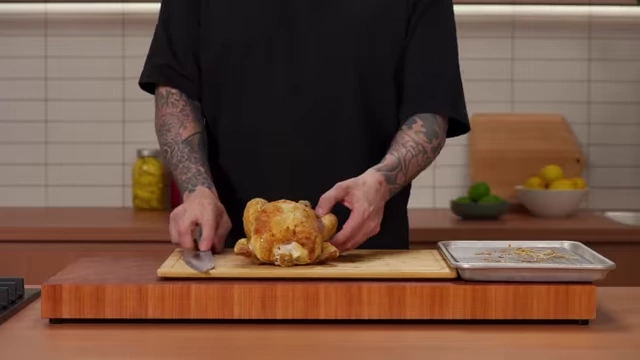
A chef pops the leg joint of a roasted chicken to prepare for removal [ 00:32:21 ] 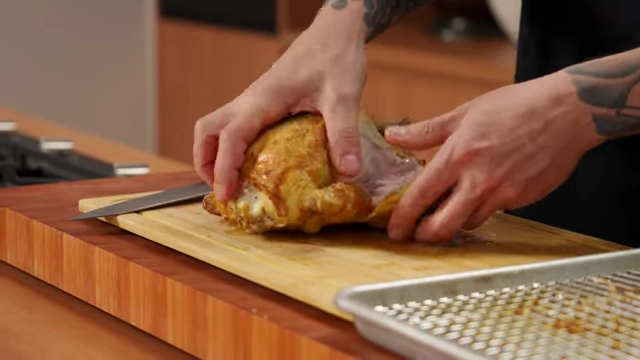
A chef cuts through the joint to remove the leg from a roasted chicken [ 00:32:25 ] - Remove Breasts: Cut along the sternum bone from top to bottom, keeping the skin attached. Follow the rib cage closely with your knife to detach the entire breast with the wing attached. Slice each breast into 4-5 pieces, leaving some meat on the wing.
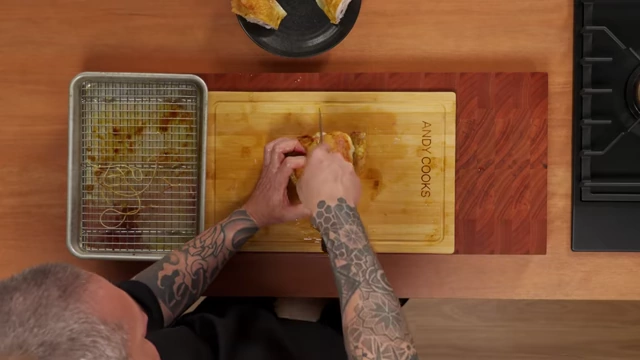
A chef carves a roasted chicken breast by cutting along the sternum bone and following the rib cage [ 00:32:45 ] 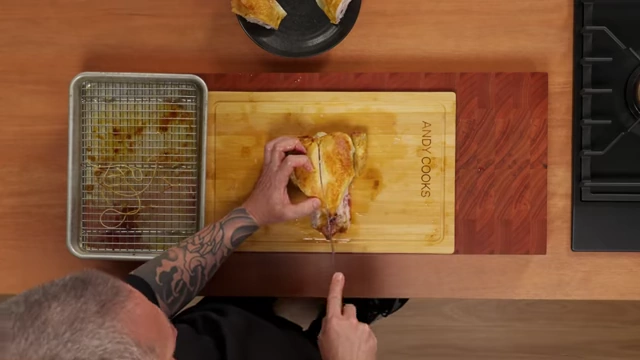
An overhead view of a chef carving a roasted chicken breast, following the sternum bone [ 00:32:49 ] 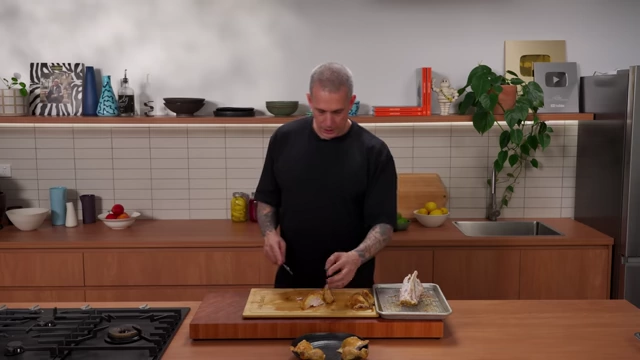
A chef slices roasted chicken breast into individual portions [ 00:33:10 ] 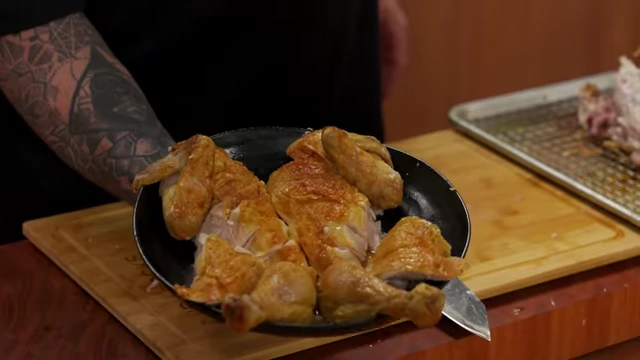
Plated, carved roasted chicken pieces, including drumsticks, thighs, and sliced breast [ 00:33:24 ]
- Resting: Allow the chicken to rest after roasting to redistribute juices.
- Pre-Roasting Preparation:
Carving Roast Beef [33:25]
- Key Rule: Always Cut Against the Grain. This is crucial for tenderness, especially with tougher cuts.
- Identifying the Grain: Look at the cross-section of the roast; if the muscle fibers appear small and round, you're looking at the end of the grain. The grain runs perpendicular to this. For large roasts, look for visible long lines of muscle and cut across them.
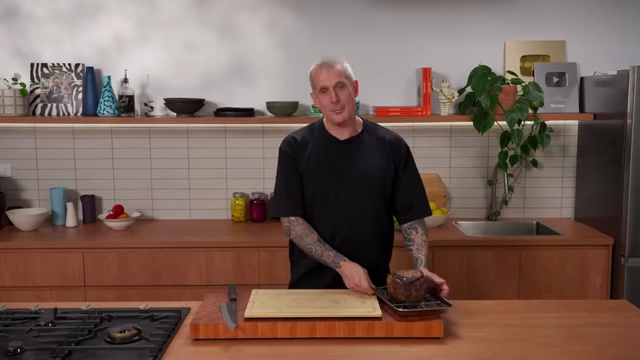
A perfectly roasted beef joint rests on a wire rack, ready for carving [ 00:33:29 ] 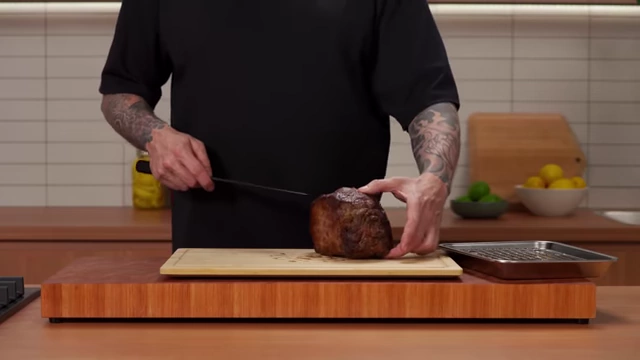
A chef shows the cross-section of a roasted beef joint to identify the grain [ 00:33:40 ] 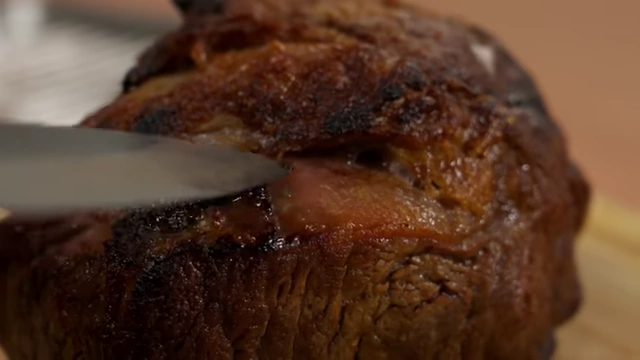
A close-up of a roasted beef joint, showing the subtle lines of muscle fibers that indicate the grain direction [ 00:33:54 ] 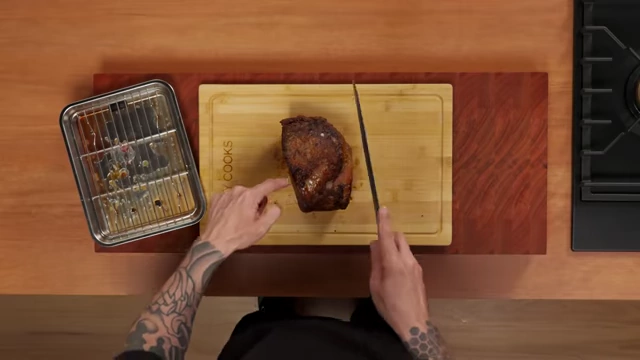
An overhead view of a roasted beef joint on a cutting board, with lines indicating the direction of the grain for proper carving [ 00:33:57 ] - Slice Thickness:
- Tender Cuts (e.g., rib roast/ribeye/cube roll): Cut thicker slices (e.g., 1.5 cm) for individual portions.
- Tougher Cuts (e.g., rump/top sirloin): Cut thinner slices to aid in tenderness.
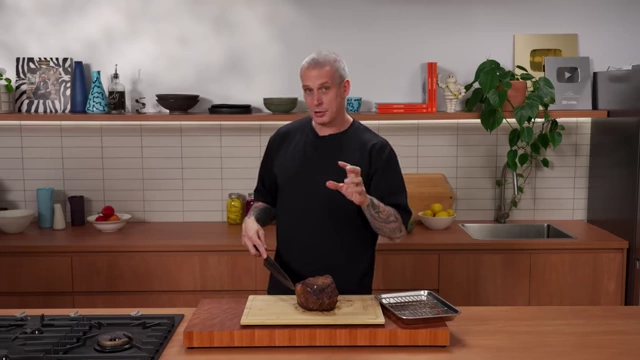
A chef explains how slice thickness depends on the cut of beef, demonstrating with hand gestures [ 00:34:11 ]
- Technique: Let the sharp knife do the work, using a gentle pushing motion rather than applying excessive downward pressure. This results in cleaner slices and minimizes muscle fatigue.
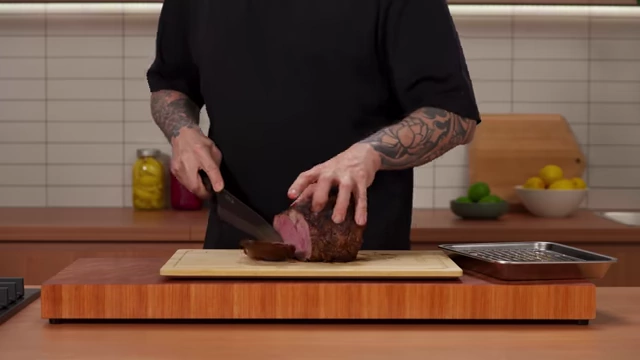
A chef slices a perfectly rested roast beef against the grain, revealing the internal cooked temperature [ 00:34:25 ] 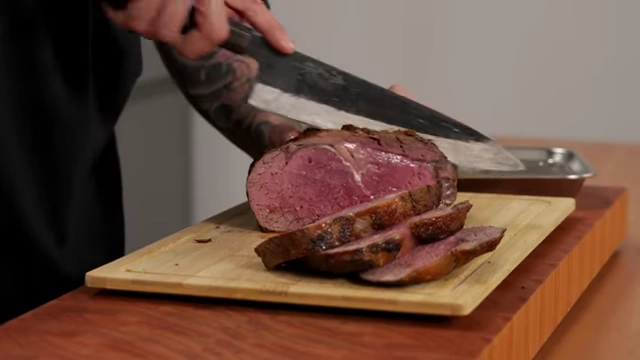
A chef demonstrates slicing roast beef with a sharp knife, letting the blade do the work for clean cuts [ 00:34:38 ] 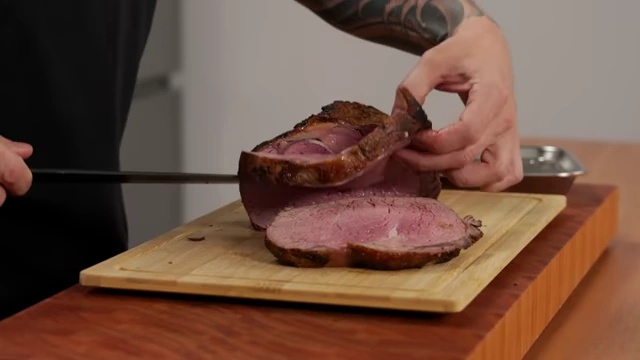
A close-up of beautifully sliced roast beef, showing consistent thickness and juiciness [ 00:34:32 ] 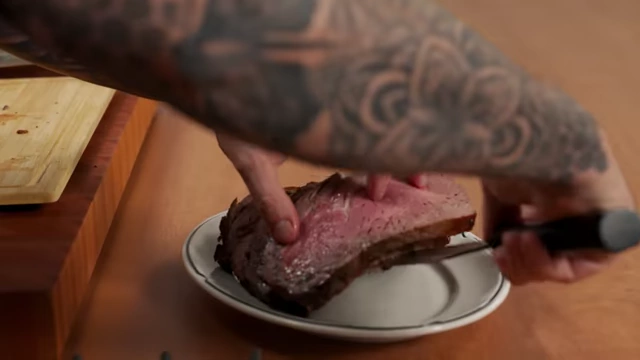
A plate of perfectly carved roast beef slices [ 00:34:53 ]