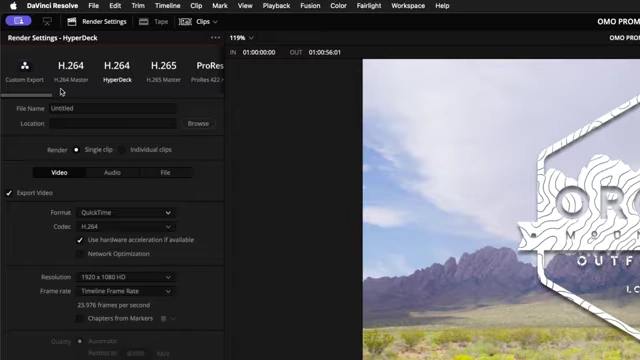
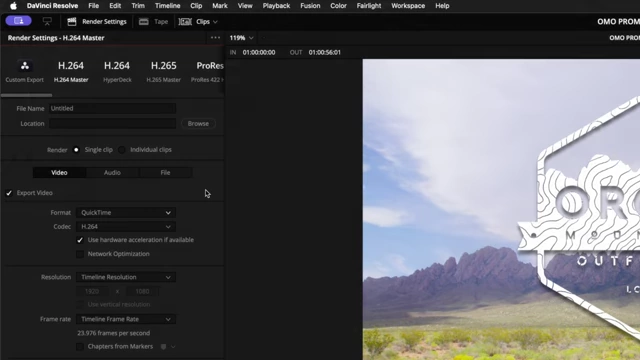
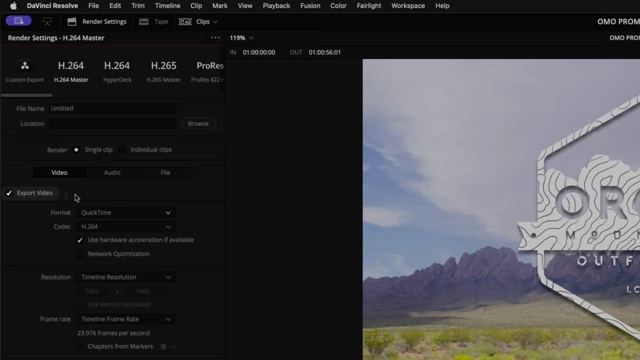
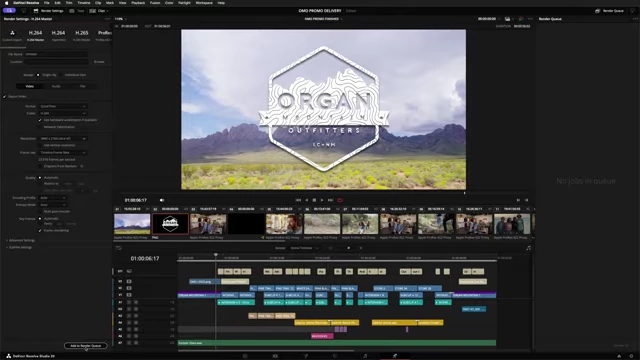
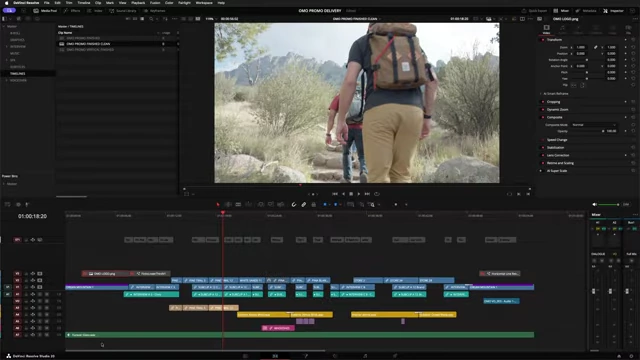
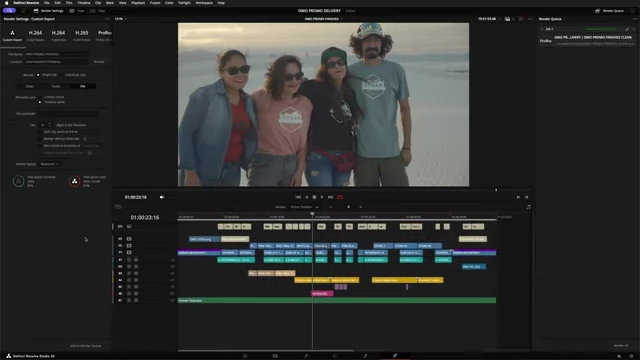
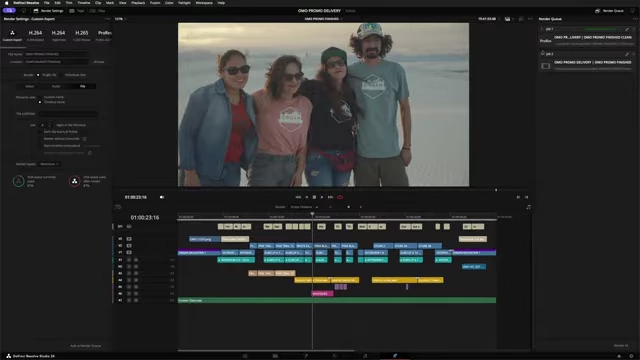
The Deliver page is divided into three main sections: render settings, viewer/timeline, and render queue.
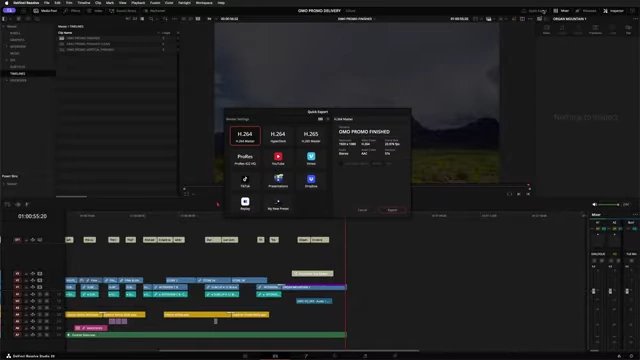
It covers various presets for different platforms and workflows, including H.264, H.265, ProRes, and options for social media or round-tripping to other NLEs.
Key distinctions between single clip and individual clip exports are explained, emphasizing single clip for most final deliveries.
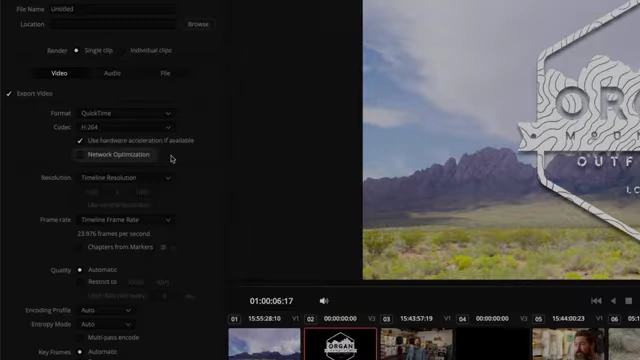
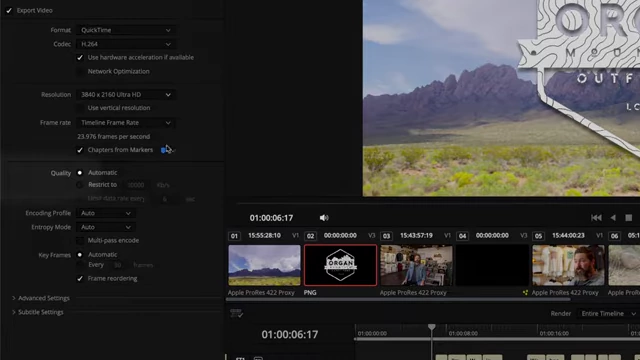
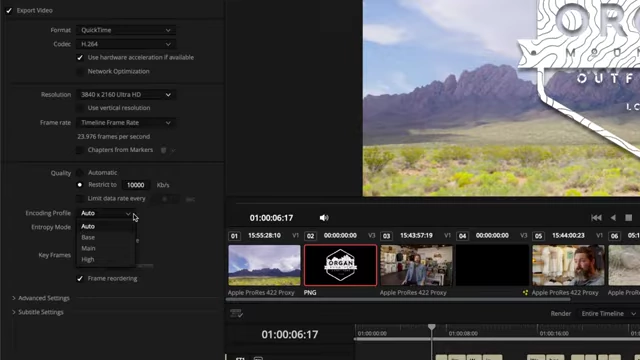
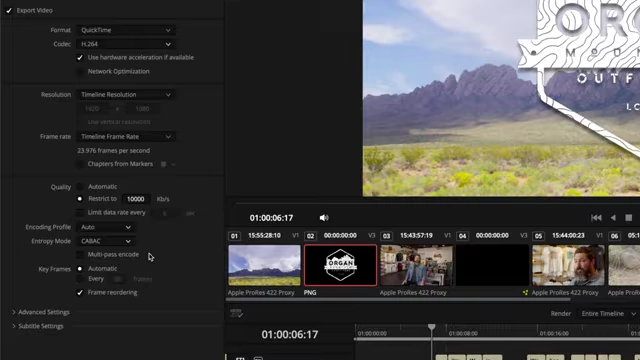
The video details critical video settings such as format, codec, hardware acceleration, network optimization, resolution, frame rate, and crucial bitrate settings for optimal quality on platforms like YouTube.
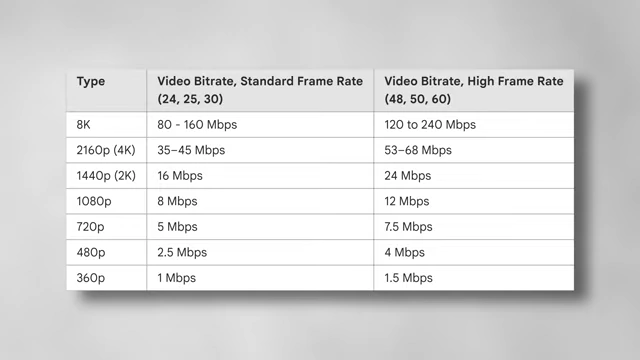
YouTube Recommended Video Bitrates Table
[
00:08:11
]
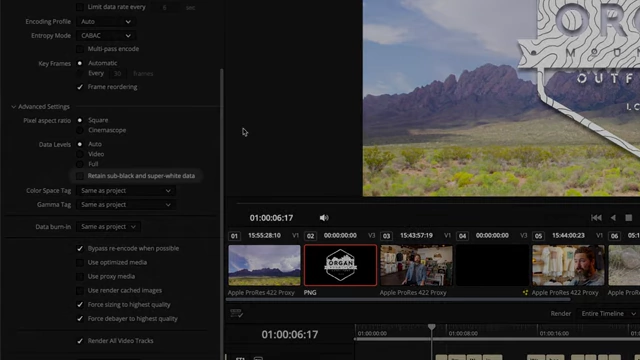
It breaks down advanced video encoding concepts like entropy mode, encoding profiles, multi-pass encoding, keyframes, and frame reordering, highlighting their impact on file size and quality.
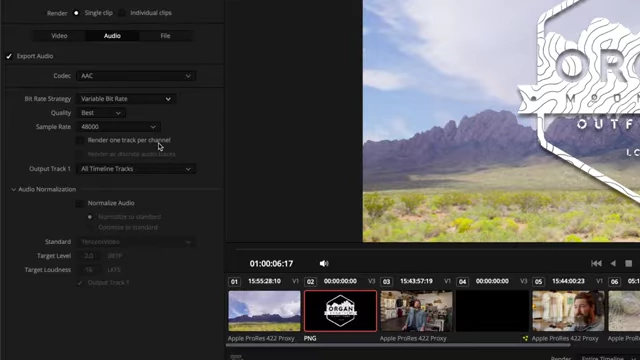
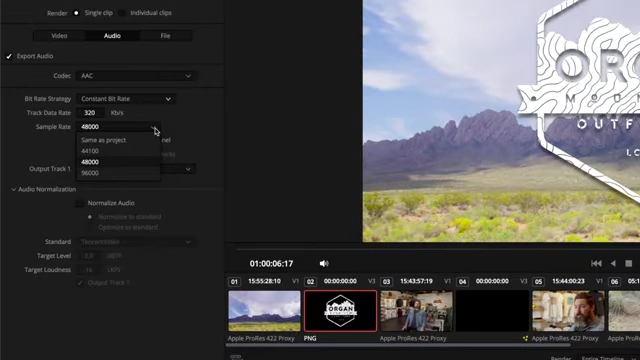
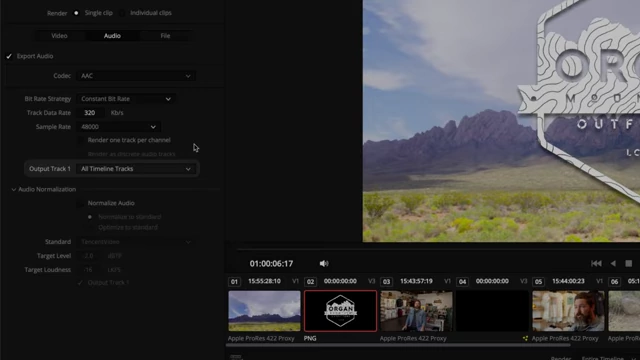
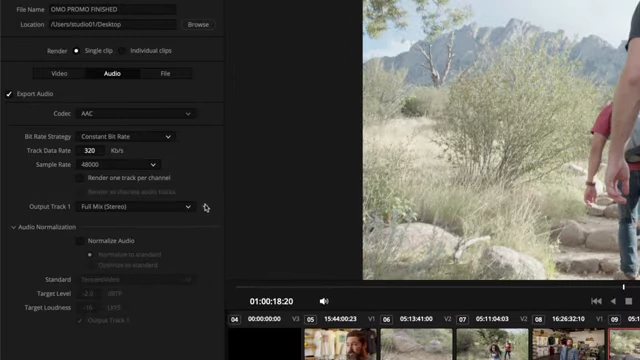
Audio settings are also covered, including bitrate strategies (CBR, VBR, ABR, VBR-C), sample rate (48k standard), and audio normalization for various broadcast and streaming standards.
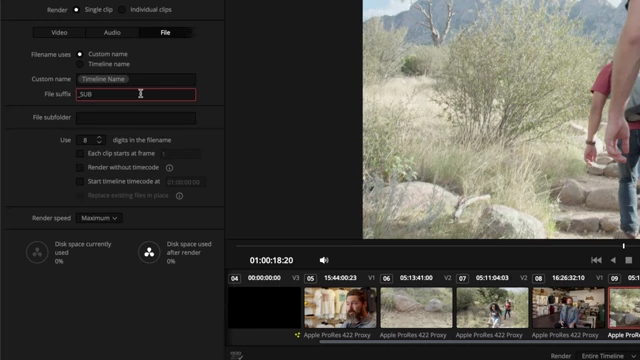
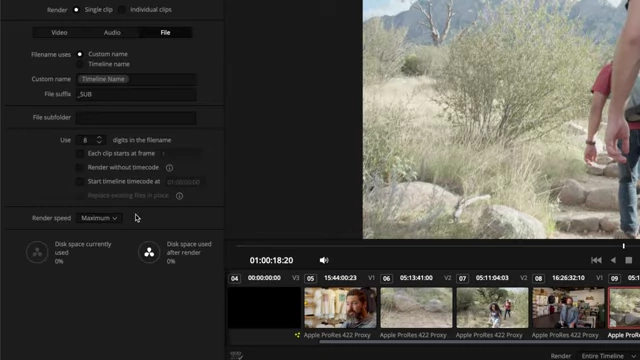
Workflow enhancements like custom file naming with metadata, subfolders, and batch exporting multiple timelines using custom presets are demonstrated to improve efficiency.
Render Settings [0:00:31]: This acts as the command center, allowing users to choose the format, codec, and resolution.
Viewer and Timeline [0:00:38]: Here, users can preview what is being exported, whether it's the entire timeline or a specific section.
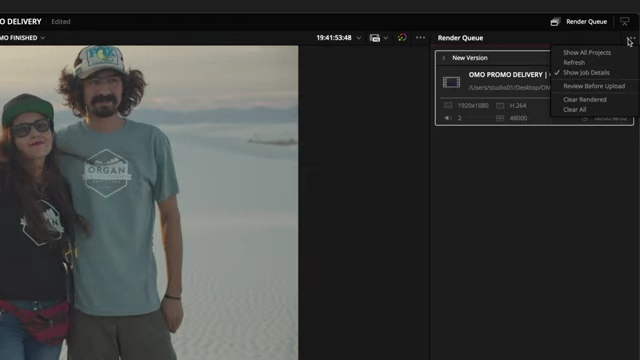
Render Queue [0:00:45]: This section lists all prepared exports, enabling users to set up multiple exports (e.g., for YouTube and archiving) that Resolve will process sequentially.
H.264 and H.265 Master: These presets export files using the respective codecs, defaulting to QuickTime (.MOV) but allowing changes to other formats like MP4.
Blackmagic HyperDeck [0:01:42]: Used for exporting files compatible with HyperDeck recorders for live or broadcast workflows.
Includes presets for YouTube, Vimeo, and TikTok, offering direct upload functionality after export, which requires signing into the platform's account via Resolve's preferences.
Note on Quality [0:02:15]: The video advises against using these direct upload options due to lack of control over the file's quality, recommending custom presets for better results. YouTube re-encodes uploaded videos, so providing a higher-quality source file leads to better final variations.
Client Review Platforms [0:02:40]: Presets for Blackmagic Presentations and Dropbox Replay function similarly to social media presets for direct uploading for client review.
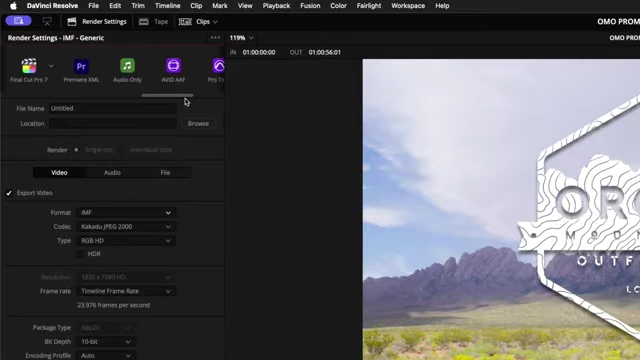
Final Cut, Premiere Pro, and Avid: These presets are for "round-tripping" projects back to these NLEs after color grading or VFX work in Resolve. They export individual media clips and an XML (or AAF for Avid) file to rebuild the edit.
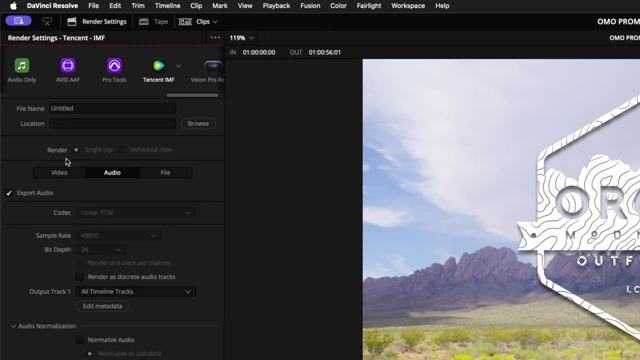
DaVinci Resolve Inter-Application Presets (IMF, Final Cut, Premiere Pro, Avid, Pro Tools)
[
00:03:01
]
Pro Tools [0:03:14]: Exports an AAF file with separate audio files and a reference video for professional audio mixing, without baking in Resolve's audio effects.
Exports every single clip on the timeline as a separate media file.
Use Cases: Useful for sending clips to VFX artists, creating dailies with burned-in data (like timecode), or sending graded files back to editors who need to tweak individual cuts.
For everyday delivery to clients or web platforms, "Single Clip" is almost always preferred.
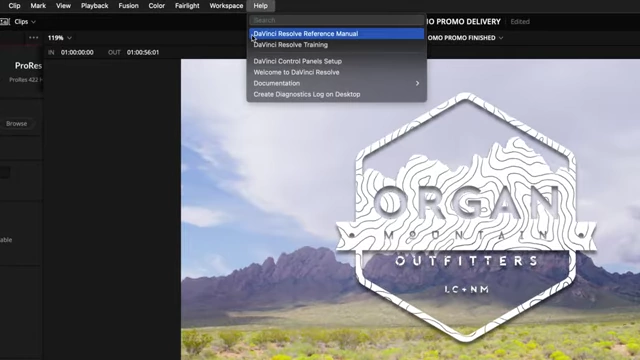
Help Menu [0:04:46]: The DaVinci Resolve Reference Manual is accessible via the help menu for specific questions.
Accessing the DaVinci Resolve Reference Manual
[
00:04:49
]
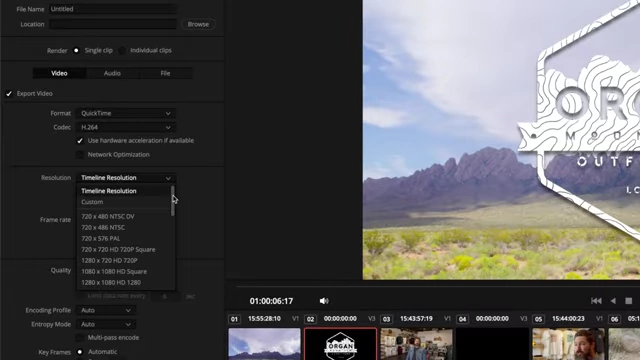
Format: The "container" or "wrapper" for the file (e.g., QuickTime for .MOV, MP4).
Codec: The "recipe" or method used to compress and store the video and audio data inside the format (e.g., H.264, ProRes). The chosen format dictates available codecs.
Resolution Dropdown in DaVinci Resolve
[
00:06:51
]
Upscaling Warning [0:06:59]: Upscaling an HD timeline to 4K only enlarges existing pixels, it doesn't add detail. For a true 4K export from 4K footage edited on an HD timeline, the timeline must be set to 4K before delivering.
Allows choosing "Automatic" or a specific maximum data rate in kilobits per second (Kb/s).
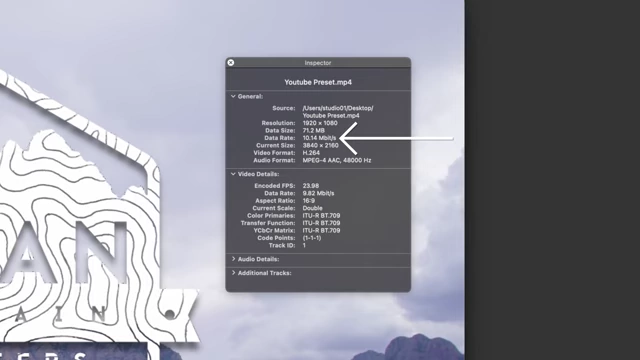
YouTube Recommendations [0:08:07]: YouTube recommends 8-12 Mbps (8,000-12,000 Kb/s) for HD video.
YouTube Recommended Video Bitrates Table
[
00:08:11
]
Example of a Video's Data Rate in Inspector
[
00:08:19
]
Perceptually Lossless Bitrate [0:08:38]: The goal is to find a bitrate where the compressed video is visually indistinguishable from the high-quality original.
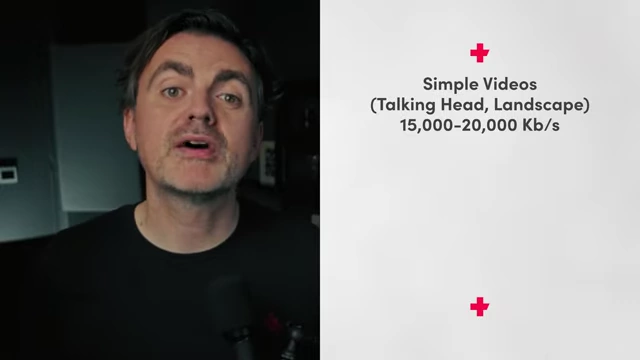
Recommended Bitrates for Simple Video Content
[
00:08:53
]
Complex Videos (action, sports, fast edits) [0:08:56]: 30,000-40,000 Kb/s.
Overkill [0:09:09]: Above 40,000-50,000 Kb/s for 8-bit H.264 typically yields no visible benefit but dramatically increases file size.
4K Exports [0:09:27]: Improvements typically cease between 60,000-90,000 Kb/s.
Master Files [0:09:35]: For high-quality archiving or further editing, ProRes 422 or DNxHR HQ are preferred over H.264, despite larger file sizes.
H.265 [0:09:54]: A more efficient codec that allows for lower bitrates while maintaining good quality, resulting in smaller file sizes. May have compatibility issues with older equipment.
H.264 Options: Auto, Base (super compressed, not recommended), Main (for SD analog), High (for Blu-ray, HD transmission). Auto or High are generally good choices.
H.265 Options: Main (4.2.0 8-bit), Main 10 (4.2.0 10-bit), Main 422 10 (4.2.2 10-bit).
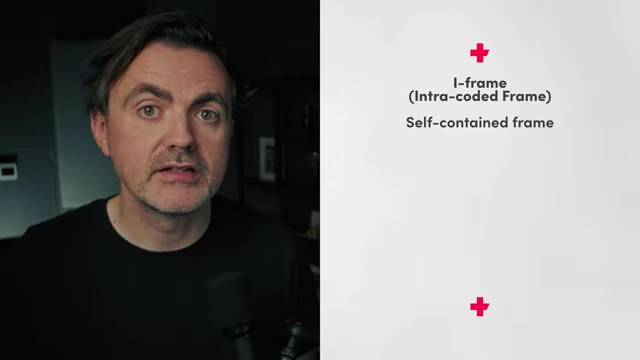
Video Compression Basics [0:11:41]: Not all frames are complete pictures.
I-Frame (Intra-coded Frame) [0:11:48]: A full, self-contained image (the "keyframe").
Explanation of I-Frame in Video Compression
[
00:11:54
]
P-Frame (Predicted Frame) [0:11:54]: Stores changes from the preceding I-frame or P-frame, containing less data.
B-Frame (Bi-directional Frame) [0:12:02]: Stores changes from both preceding and upcoming frames, typically the smallest frame type, requiring frame reordering.
GOP (Group of Pictures) [0:12:14]: A sequence of frames between two I-frames.
Automatic: Recommended. The encoder intelligently places I-frames at the start of GOPs and whenever major scene changes are detected, optimizing quality and file size for varying content.
Fixed Interval: Forces I-frames at regular intervals. Inefficient for static shots (wastes data) and detrimental for fast cuts (can cause artifacts). Only use if specific platform delivery specs require it.
Enables the use of B-frames, which are significantly more efficient, providing higher quality at the same bitrate or smaller file sizes for the same quality.
While older devices once struggled, this is rarely an issue today.
General rule: Leave it on unless troubleshooting rendering artifacts or platform specifications state otherwise.
Preserves luminance values that exceed normal video limits (brighter than white, darker than black), if the video format supports it. Turning it off clips these values to meet QC standards.
These settings are linked to color management and affect the NCLC tag, which tells video players how to interpret color and brightness.
For YouTube, files are expected to be tagged as 1-1-1 (Rec.709 for both color space and gamma). Proper monitor calibration and color management setup are essential.
Recommended Video for Understanding Color Management (Creative Video Tips)
[
00:15:21
]
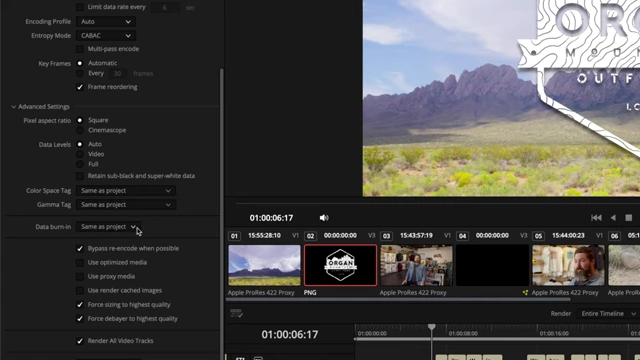
Data Burn-In Option in DaVinci Resolve
[
00:15:43
]
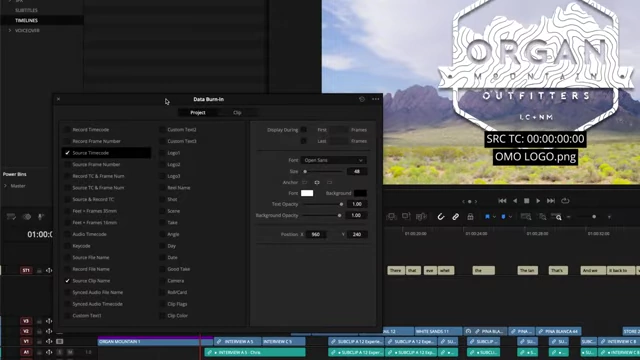
Embeds information (like file names or timecode) from the Workspace > Data Burn-In settings directly into the exported image, useful for rough drafts or client reviews.
DaVinci Resolve Data Burn-In Settings Panel
[
00:15:56
]
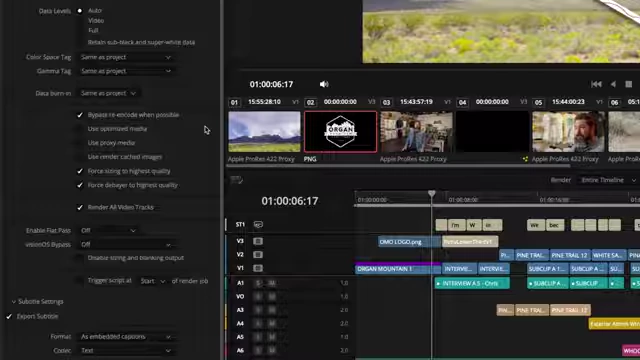
Performs a direct copy from source media to the export file when the format, codec, and export type match the source, skipping reprocessing for speed and quality.
Limitations: Does not work if color grading, Resolve FX, layered effects, multiple clips, resizing, stabilization, timeline output size changes, or Fusion effects are applied. Transitions are only reprocessed for their duration.
Use Optimized Media / Use Proxy Media / Use Render Cached Images [0:16:36]:
When checked, Resolve uses these pre-processed media files for rendering.
Recommendation: Turn off if the optimized/proxy/cached media is of lower quality than the desired final video to ensure original files are used for best quality. Useful for quick drafts with lower quality media.
If bilinear sizing was used during editing for performance, this option automatically switches to a sharper filter for the final render, improving the look of resized clips.
Constant Bitrate (CBR) [0:20:16]: Uses a fixed amount of data per second. High compatibility, predictable file size, but less efficient as it wastes data on simple/silent parts and might not provide enough for complex sections. For YouTube, 320 Kb/s CBR is a safe bet.
Variable Bitrate (VBR) [0:20:50]: The "smartest" mode. Targets a quality level, variably assigning low bitrate for simple parts and high bitrate for complex parts. Delivers maximum quality for the smallest file size. File size depends on audio complexity.
Average Bitrate (ABR) [0:21:15]: A hybrid. Sets a target average bitrate; encoder varies bitrate (higher for complex, lower for simple) to meet the overall average. Predictable file size, slightly less efficient than true VBR.
Variable Bitrate Constrained (VBR-C) [0:21:41]: Another hybrid, a "safer" VBR. Sets a minimum bitrate, but allows exceeding it for complex audio to prevent quality drops, potentially leading to slightly larger files.
Recommendation: Stick with 48k from start to finish in any video workflow to avoid resampling degradation, sync issues, and playback errors. 96k is for high-end audio production, not typical final video exports.
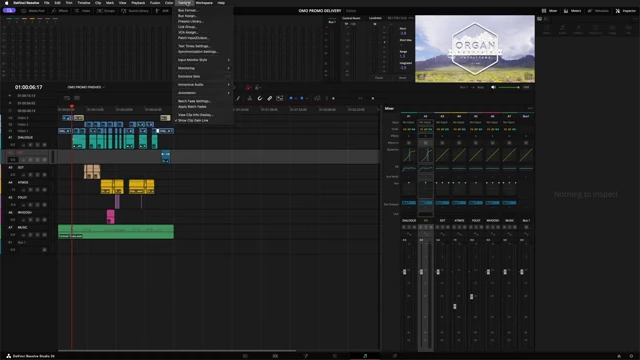
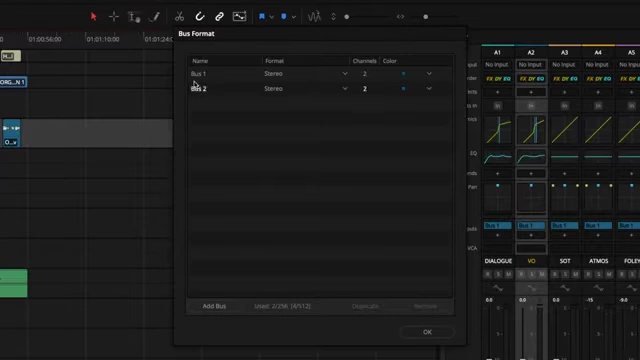
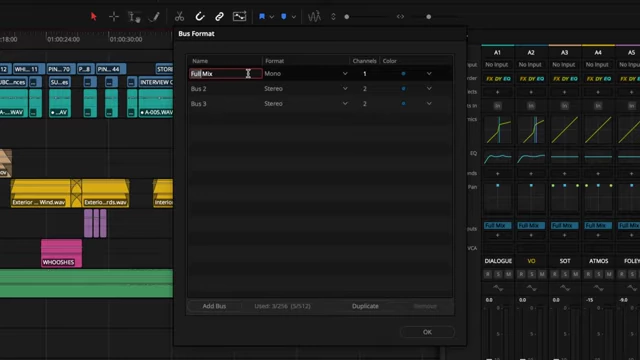
Bus Formats [0:24:18]: In the Fairlight menu, you can add and name multiple buses (e.g., Full Mix, Music & Effects (M&E), Dialogue (DX), Sound Effects (SFX), Music (MX)).
Accessing Fairlight Bus Format Settings
[
00:24:19
]
Fairlight Bus Format Dialog for Adding and Renaming Buses
[
00:24:24
]
M&E Mix Example [0:24:05]: Create a separate bus for music and effects, excluding dialogue, for foreign language dubbing.
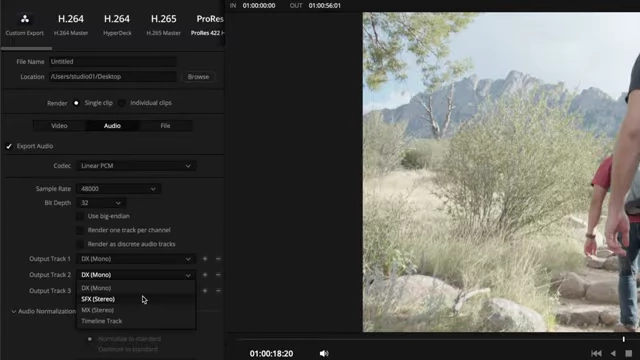
Selecting Audio Output Bus on Deliver Page
[
00:25:02
]
Clean Version Example [0:25:06]: Create separate buses for DX, SFX, and MX, allowing for a clean video export without on-screen graphics and with isolated audio tracks for re-use or re-editing.
Edit Page with Graphics Disabled for 'Clean Version' Workflow
[
00:25:31
]
Custom Fairlight Buses for Dialogue (DX), Sound Effects (SFX), and Music (MX)
[
00:25:53
]
Assigning Multiple Audio Bus Outputs on Deliver Page
[
00:26:11
]
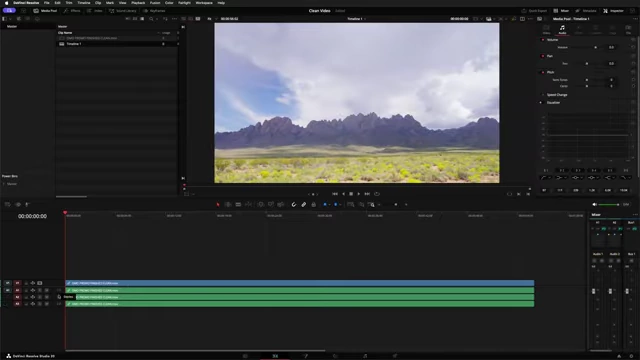
Media Pool Displaying Clean Video with Separated Audio Tracks
[
00:26:20
]
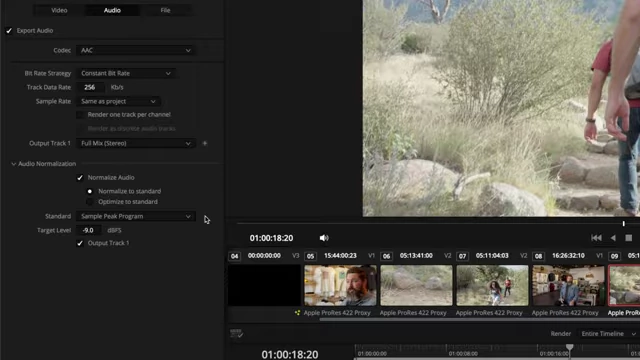
Audio Normalization Settings in DaVinci Resolve
[
00:26:29
]
Automatically adjusts the mix to meet specific loudness standards (e.g., streaming, broadcast).
Normalize to Standard [0:27:45]: Uniformly turns the entire mix up or down until one of the loudness targets (peak or integrated loudness) is met.
Optimize to Standard [0:28:04]: Dynamically adjusts volume throughout the mix to meet both peak and integrated loudness targets. This can drastically alter the original mix's dynamics.
Recommendation: Mix audio in Fairlight as close as possible to the target standard, then use "Normalize to Standard" for a final subtle tweak on export.
Sample Peak Program: Aims for an average loudness.
True Peak: Ensures no part of the mix exceeds a specific maximum level.
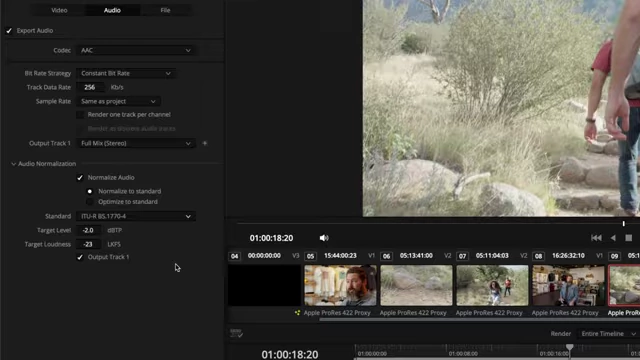
ITU BS.1770-4: A modern algorithm for measuring loudness, often used by streaming services and broadcasters. Other broadcast-specific standards (e.g., EBU R128, ATSC A/85) are also available.
Audio Normalization to ITU BS.1770-4 Standard
[
00:27:30
]
Option to apply normalization to selected outputs if multiple audio outputs are configured.
Render Speed Option (Maximum or Slower)
[
00:30:20
]
Normally set to Maximum for fastest export.
Can be slowed down if multiple edit suites share the same storage system, to prevent Resolve's fast rendering from hogging bandwidth and causing playback issues for others.
Review Before Upload [0:32:45]: For direct platform uploads, this option allows checking the export before it's sent.
Editing Render Queue Jobs [0:32:56]: Click the pencil icon next to a queued job to reload its settings, make changes, and then "Update Job."
Revealing Files [0:33:14]: After rendering, right-click a job to "Reveal in Media Storage" (opens Media page) or "Reveal in Finder" (opens OS file explorer).
Clear Render Status [0:33:23]: Allows re-rendering a job that was previously completed (e.g., after fixing a typo) without reconfiguring all settings.
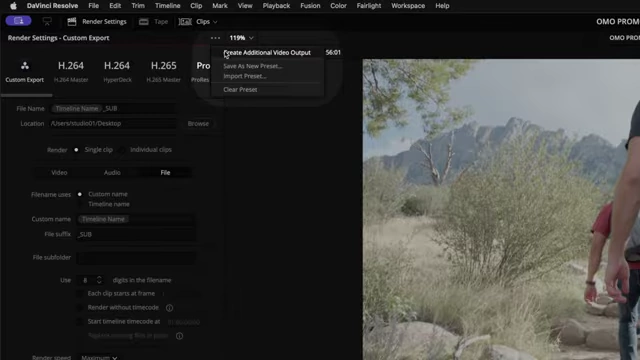
On the Edit page, select multiple timelines, right-click, go to "Timelines > Add to Render Queue Using," and choose a preset to add them all to the queue at once.