How to DIY Upgrade Soldered Storage on Apple Silicon MacBooks (M2 MacBook Air & M4 Mac Mini)
This video demonstrates a complex DIY storage upgrade for Apple Silicon Macs, highlighting the technical feasibility and cost-effectiveness compared to Apple's exorbitant pricing. While Apple solders memory and storage, only NAND storage is realistically upgradable. The process involves specialized tools, desoldering original NAND, cleaning the board, installing missing support components for base models, reballing new NAND chips, and soldering them. A DFU restore is crucial for programming the new NANDs. An M2 MacBook Air was successfully upgraded from 256GB to 2TB, even gaining a performance boost due to a dual-NAND configuration. An M4 Mac Mini upgrade from 256GB to 2TB initially failed due to incompatible chips but succeeded as a 1TB upgrade with different chips. These upgrades, while risky, offer significant savings and support the right to repair.

Introduction [0:00]
- Apple Silicon Macs offer competitive pricing at base configurations, but upgrading memory and storage through Apple is prohibitively expensive due to components being soldered directly to the mainboard.
Apple's expensive storage upgrade options [ 00:00:14 ] - For example, an M4 Mac Mini 2TB SSD upgrade costs $800 more than the 256GB base model.
- MacBook storage upgrades are also very expensive.
- Soldering memory directly to the SOC can improve GPU performance by reducing signal loss.
- Memory (RAM) is integrated directly onto the SOC package with bonding material, making desoldering and replacement technically impossible without damaging both the chips and the SOC.
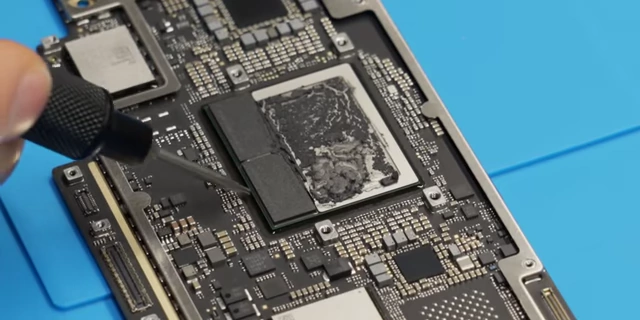
Memory integrated onto the SOC package [ 00:07:52 ]
- Memory (RAM) is integrated directly onto the SOC package with bonding material, making desoldering and replacement technically impossible without damaging both the chips and the SOC.
- However, soldering storage (NAND) has no performance benefit and appears to be a strategy for profit and control.
- Apple's Mac Studio and M4 Mac Mini feature modular storage, tacitly admitting no performance penalty for modular storage. 
- Other manufacturers like Framework offer user-upgradable storage.
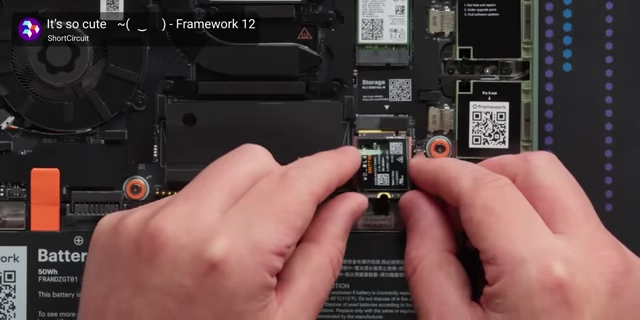
Modular SSD in a Framework laptop [ 00:01:06 ] - Apple's storage controller is integrated into the CPU, providing hardware-level encryption through a secure enclave.
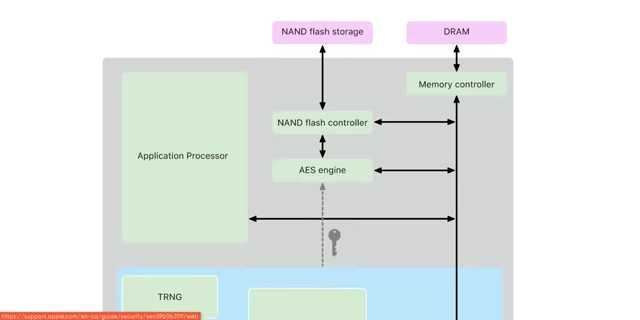
Diagram of Apple's integrated storage controller [ 00:01:37 ]
- The video aims to demonstrate a DIY storage upgrade on an M2 MacBook Air, which has a 256GB configuration with a single NAND chip.
- An upgrade would also improve storage bandwidth by moving from a single to dual NAND configuration (though this doesn't apply to M3 and newer models).
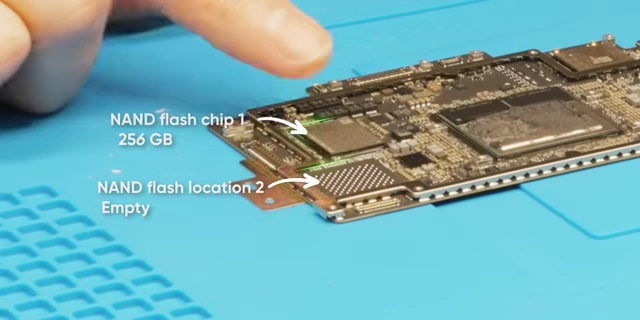
M2 MacBook Air logic board showing single NAND and empty second NAND location [ 00:07:43 ]
- An upgrade would also improve storage bandwidth by moving from a single to dual NAND configuration (though this doesn't apply to M3 and newer models).
- The 256GB M2 MacBook Air requires adding approximately 50 missing support components for the second NAND chip.
- NAND chips for upgrades can be sourced from AliExpress, while support components can be found on distributors like Mouser or DigiKey.
- Even with professional labor, DIY upgrades are roughly half the cost of Apple's official upgrades.
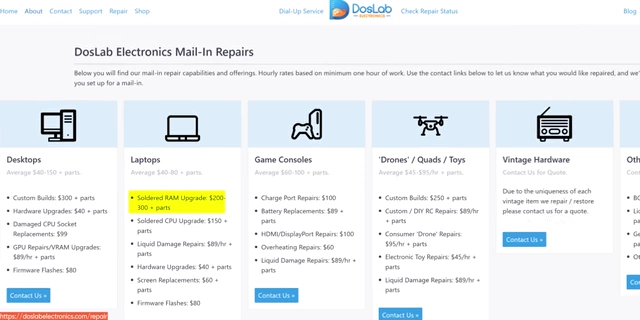
DosLab Electronics Mail-in Repairs showing upgrade pricing for soldered RAM [ 00:05:18 ]
- Even with professional labor, DIY upgrades are roughly half the cost of Apple's official upgrades.
Tools and Preparation [3:03]
- Essential Tools: The process requires specialized tools, including:

- A hot air station and soldering iron.
- Solder paste and solder wick.
- BGA stencils for reballing NANDs.
- An underfill removal tool with attachments.
- A preheater for easier installation.
- Skill Requirement: The procedure demands significant skill and practice, ideally on "dead boards," before attempting on a functional device.
- Disassembly:
- Removing the bottom cover of the MacBook Air requires prying it with a bit to create an entry point, then popping retention clips.
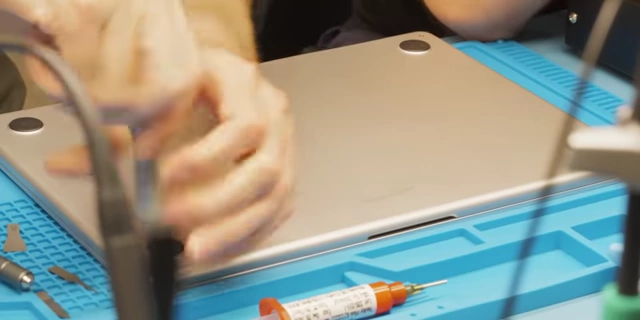
Prying open the MacBook Air bottom cover with a bit [ 00:05:32 ] - The shield/heatsink covering the mainboard is secured by T3 screws and is prone to bending during removal.
- Removing the bottom cover of the MacBook Air requires prying it with a bit to create an entry point, then popping retention clips.
- Thermal Paste: The M2 MacBook Air uses a unique "goopy black" carbon-based thermal paste.
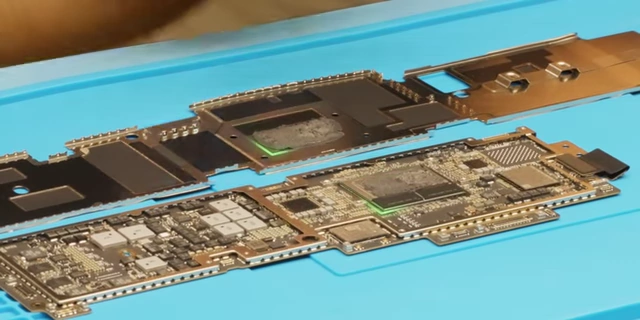
The unique "goopy black" thermal paste on the M2 MacBook Air heatsink and board [ 00:06:36 ] - This paste should not be removed or replaced with standard liquid thermal paste as it does not require pressure-mounted heatsinks.
- Only TCRS Carbon Black thermal compound is a suitable aftermarket replacement.
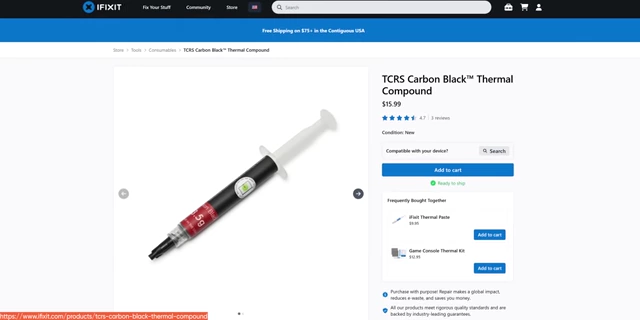
TCRS Carbon Black Thermal Compound, a suitable aftermarket replacement [ 00:06:49 ]
Removal Process [7:40]
- NAND Desoldering:
- The board is placed flat on a silicone mat without a preheater to concentrate heat on the NAND chip only.
- Precise tweezers are necessary for handling tiny components; good tweezers allow one to lift the entire board by a single component.
- Underfill Removal: Heat the NAND area to 280°F (138°C) using the hot air station to make the underfill brittle.
- Scrape away the underfill around the chip with the specialized underfill removal tool.
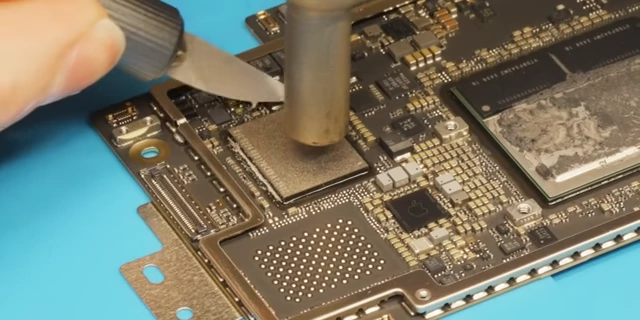
Using the underfill removal tool during the desoldering process [ 00:09:21 ] - Two capacitors near the NAND chip are temporarily removed to create sufficient space for the underfill removal tool.
- Sometimes, minor solder mask damage can occur but is usually not deep enough to cause issues.
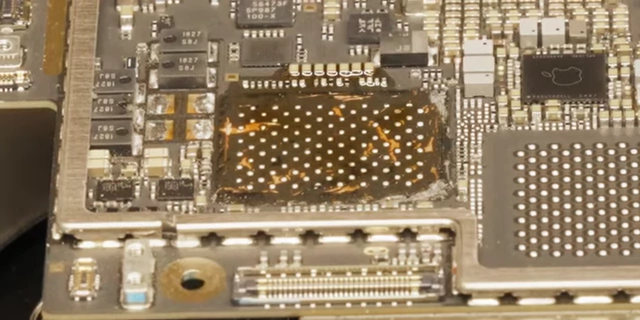
Visible solder mask damage after underfill removal [ 00:11:55 ]
- Scrape away the underfill around the chip with the specialized underfill removal tool.
- Chip Removal: Increase heat to 380°F (193°C). Once the solder is molten, the underfill removal tool slides underneath easily, allowing the chip to be pushed off the board without tearing pads.
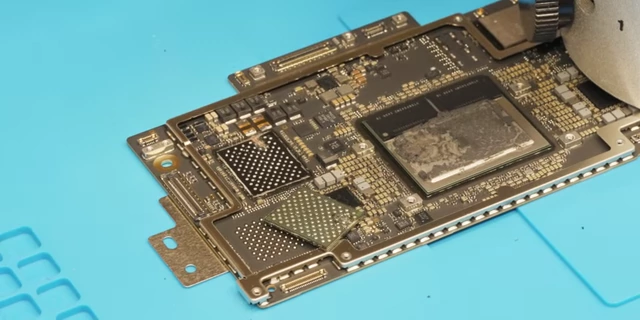
The original NAND chip being removed from the board [ 00:10:38 ] - The removed 256GB NAND chip is blank and can be discarded, as new blank NANDs will be programmed by the system.
Cleanup [10:55]
- After NAND removal, all remaining underfill and solder must be cleaned from the pads.
- Leaded solder is added to the pads and then removed with solder wick, making the cleanup process significantly easier than with lead-free solder.
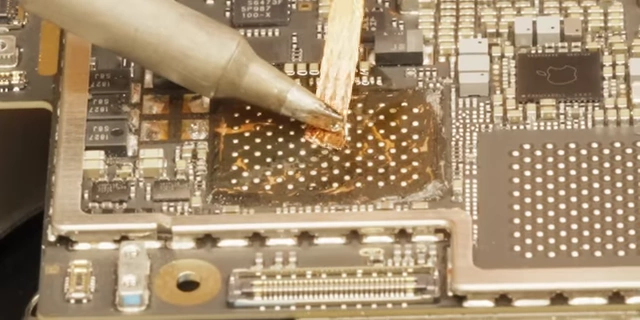
Using solder wick to clean residual solder from the pads [ 00:13:15 ]
Installing Components [13:30]
- Capacitor Reinstallation: The two temporarily removed capacitors are reinstalled using the existing solder on the board.
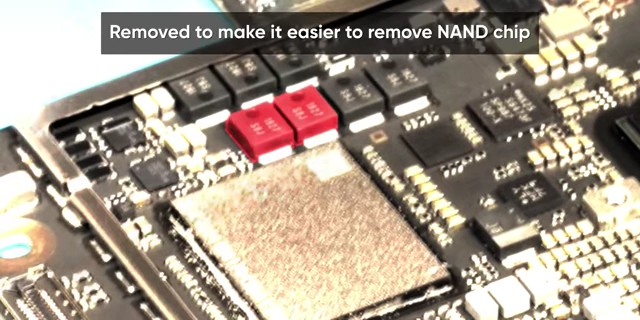
Capacitors being reinstalled near the NAND area [ 00:13:28 ] - Missing Component Installation: For the 256GB M2 MacBook Air, about 50 omitted support components (e.g., resistors, capacitors) for the second NAND chip need to be installed.
- This requires referring to Apple schematics, often obtained from third-party sources. 
- Some smaller decoupling capacitors can be omitted due to time constraints and the tedious nature of installing them, without significantly impacting the NAND's functionality.
- These components are incredibly tiny (0201 size resistors) and require extreme precision.
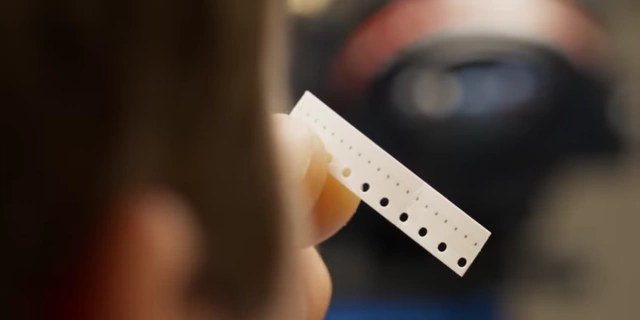
Close-up of tiny 0201 resistors used as support components [ 00:15:16 ] - Components are placed and soldered using flux and leaded solder.
Prepping NAND [16:40]
- New NAND chips (1TB each for a total of 2TB) are prepared. These are brand new, Apple-compatible chips.
- The new 1TB NANDs are physically thicker than the original 256GB ones due to a higher stack die, indicating increased density.
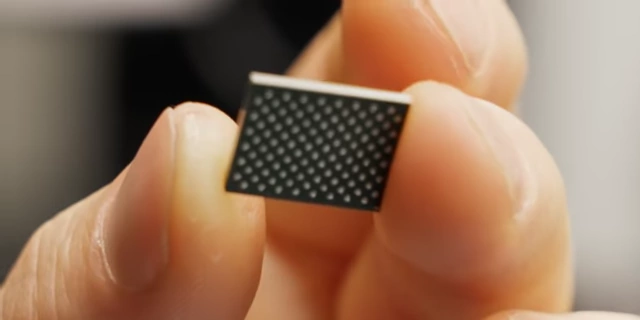
Comparing the thickness of the original and new 1TB NAND chips [ 00:17:35 ] - Reballing Process:
- Secure the NAND chip to a BGA stencil using Kapton tape.
- Apply solder paste (tiny solder balls suspended in flux) over the stencil, ensuring it fills the openings.
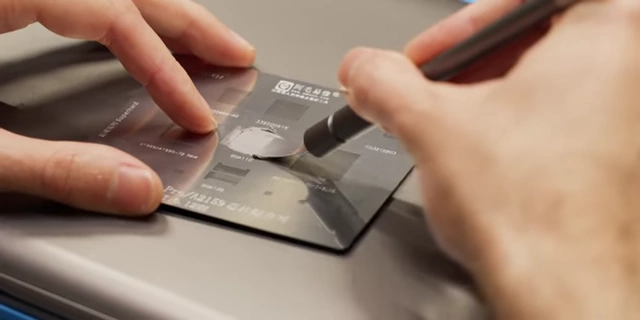
Applying solder paste to the NAND chip using a BGA stencil [ 00:18:09 ] - Scrape off any excess solder paste using a perpendicular motion.
- Heat the stencil and chip with a hot air station at a relatively low temperature (e.g., 330°C for this stage) to melt the solder paste into spherical balls, heating slowly to prevent paste from running under the stencil.
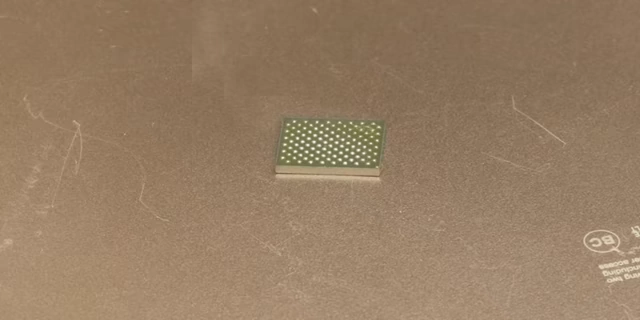
A reballed NAND chip with perfectly formed solder balls [ 00:18:51 ] - Remove the stencil and heat the reballed chip again to ensure all solder balls are perfectly formed and flat.
Installing NAND [19:37]
- The reballed NAND chips are now ready for installation onto the logic board.
- Chip Placement:
- Reference the board view from the schematic to identify the correct orientation for pin one on each chip.
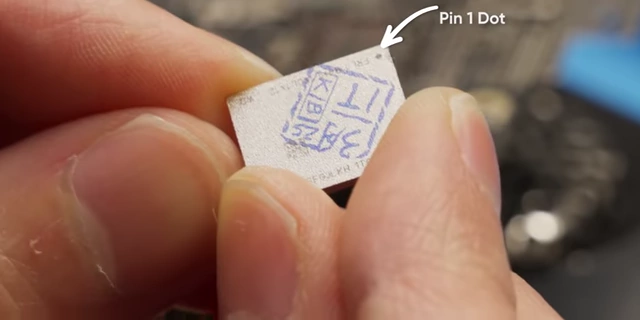
Close-up of a NAND chip showing the "Pin 1 Dot" [ 00:19:42 ] - Carefully align the chip with the pads on the logic board; a subtle "click" or resistance can be felt when the solder balls make contact.
- Reference the board view from the schematic to identify the correct orientation for pin one on each chip.
- Soldering:
- Heat the area with the hot air station at a higher temperature (e.g., 380°C for the MacBook Air board).
- The chip will "suck down" into place as the solder melts. Gently tapping the chip with tweezers confirms proper solder flow and seating if it moves slightly.
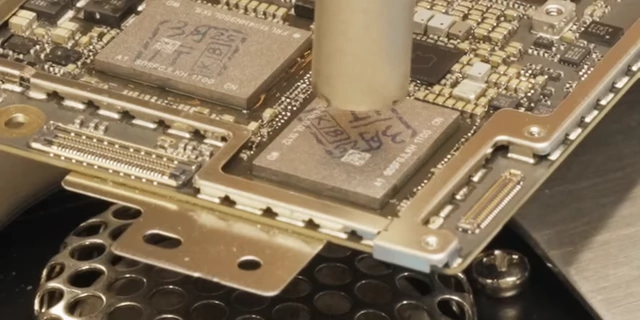
The new NAND chip "sucking down" onto the board during soldering [ 00:20:23 ] - The MacBook Air logic board with both new NAND chips successfully installed.
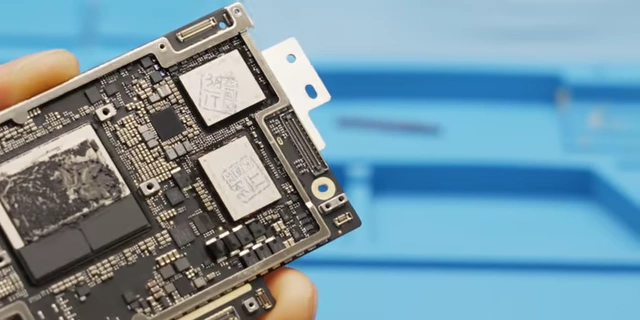
The MacBook Air logic board with both new NAND chips successfully installed [ 00:20:26 ]
DFU (MacBook Air) [21:05]
- The mainboard is partially reassembled into the MacBook Air to allow access to debug pads.
- DFU Mode Entry: To bypass keyboard commands and facilitate entry into DFU mode, specific debug pads on the logic board are shorted. This is necessary because the resistor for keyboard DFU is unpopulated on consumer boards (a cost-saving measure by Apple, costing less than a cent at scale).

Debug pads used to force DFU mode on the MacBook Air [ 00:21:12 ] - A schematic highlighting the specific pads for DFU mode.
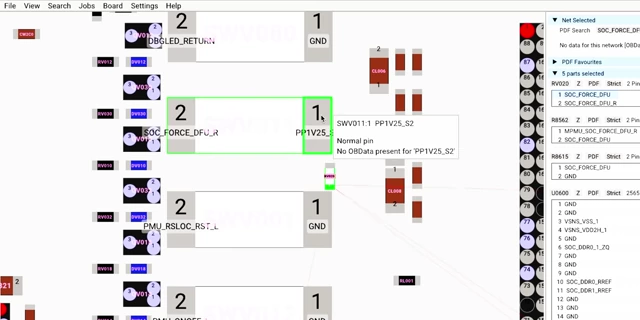
Schematic showing SOC_FORCE_DFU_R pad to short for DFU mode [ 00:21:48 ]
- A schematic highlighting the specific pads for DFU mode.
- DFU Restore:
- Connect the MacBook Air to another Mac running Apple Configurator.
- Hold "Option" and click "Restore Mac" to select the latest macOS version.
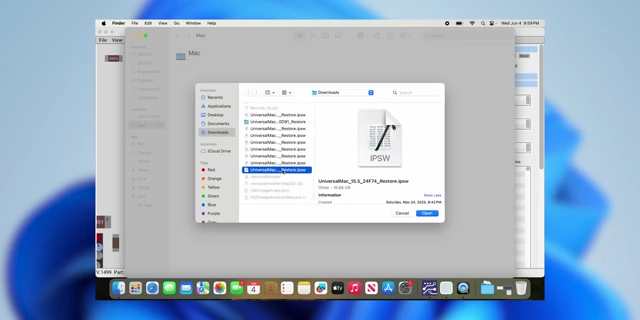
Apple Configurator restore screen, showing the IPSW file selection [ 00:22:05 ] - The DFU restore process programs the new NAND chips. If the NANDs are incompatible or improperly installed, they become unusable at this stage.
- Result: The DFU restore was successful, and the M2 MacBook Air was recognized with 2TB of storage.
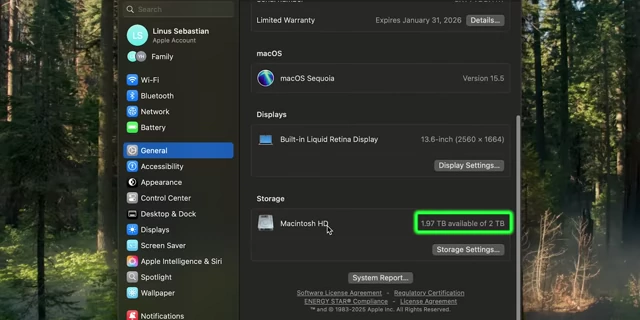
"About This Mac" showing the M2 MacBook Air successfully upgraded to 2TB storage [ 00:22:45 ]
Mac Mini Prep [23:00]
- Linus attempts the upgrade on an M4 Mac Mini, which is considered an easier machine for a beginner due to its modular SSD.
- Apple's own pricing for Mac Mini storage upgrades is also shown to be very expensive. 
- Disassembly:
- The Mac Mini requires removing eight T8 screws from the base plate.
- The fan is removed (two T5 screws) and typically left connected during the upgrade.
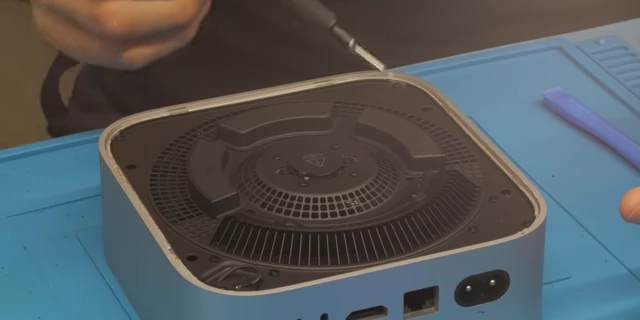
Removing the Mac Mini fan to access internal components [ 00:23:48 ] - The modular SSD card is then accessible.
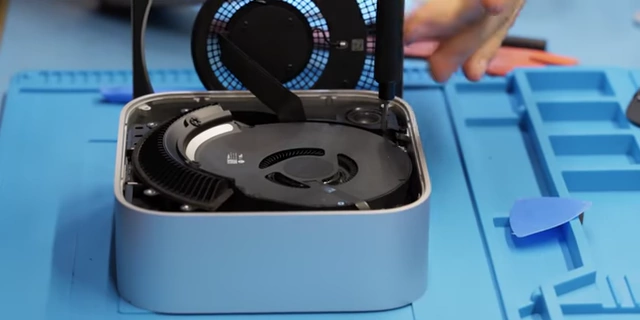
The M4 Mac Mini with its modular SSD accessible [ 00:23:52 ]
- SSD Card Analysis: The Mac Mini's SSD card features two NAND packages positioned opposite each other.
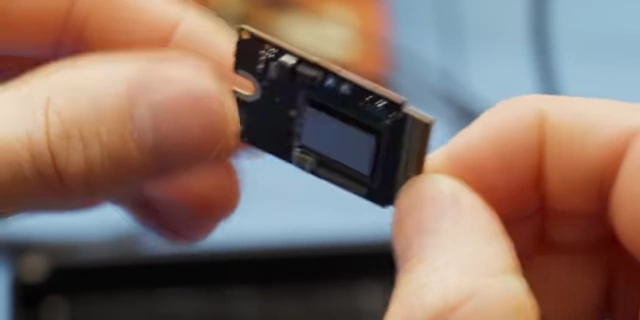
Close-up of the Mac Mini's modular SSD card with two NAND packages [ 00:24:01 ]
NAND Prep (Mac Mini) [27:30]
- The process for prepping the Mac Mini's NANDs is similar to the MacBook Air.
- Underfill Removal: Heat the NAND area (at a lower temperature, around 250°C, due to the smaller module's lower thermal mass and elevated position) and scrape away the underfill. Maintain a flat surface on the sides, as the new NANDs are wider.
- Linus successfully scrapes underfill from the Mac Mini SSD module.
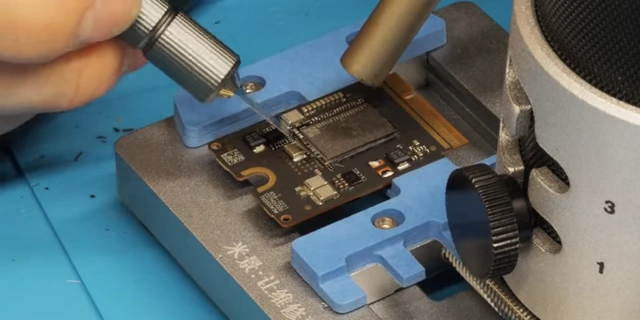
Linus scraping underfill from the Mac Mini SSD module [ 00:25:17 ]
- Linus successfully scrapes underfill from the Mac Mini SSD module.
- Cleanup: Clean residual solder from the pads using flux, leaded solder, and solder wick.
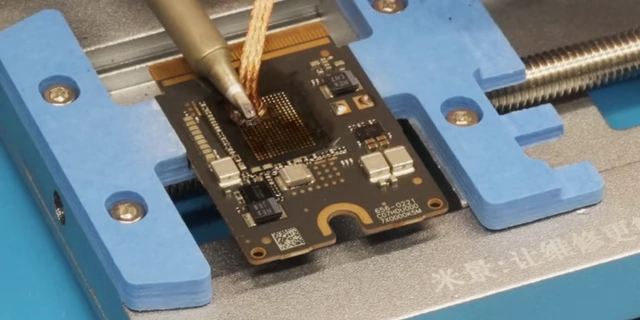
Linus using solder wick to clean residual solder from the Mac Mini SSD module [ 00:27:01 ] - Reballing: Reball the new 1TB NAND chips using the stencil, solder paste, and hot air. Newer NANDs are thinner due to improved density. It's advised to reball one chip at a time to prevent stencil warping.
NAND Install (Mac Mini) [28:30]
- Align the reballed NAND chips onto the Mac Mini's modular card. Pin one orientation is crucial.
- Heat the chips with hot air (around 300°C for this module).
- Wait for the solder to melt and for flux to bubble from the sides of the chip, indicating successful soldering. Unlike the MacBook Air, tapping with tweezers is not recommended for this particular chip to confirm seating.
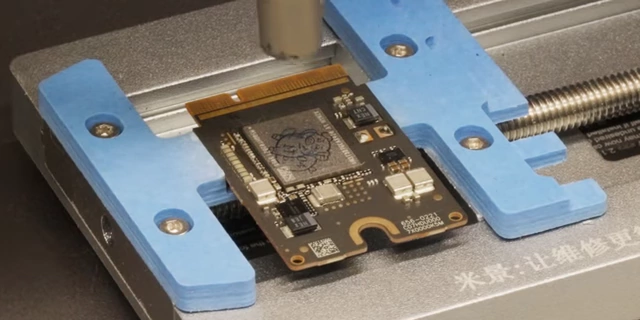
Hot air on Mac Mini NAND chip during soldering, showing flux bubbling [ 00:28:52 ] - The successfully upgraded Mac Mini SSD module.
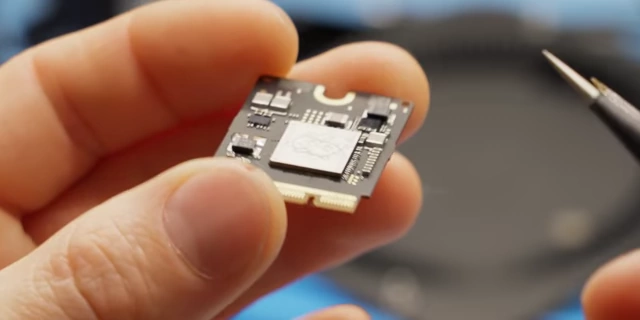
The upgraded Mac Mini modular SSD module [ 00:29:13 ]
- The successfully upgraded Mac Mini SSD module.
DFU (Mac Mini) [29:30]
- After installing the new NANDs on the modular card, the Mac Mini is connected for a DFU restore.
- Initial Failure: The first DFU attempt resulted in an error: "An error occurred while formatting the NAND," indicating that the initial 2TB NAND chips were either incompatible or improperly programmed.
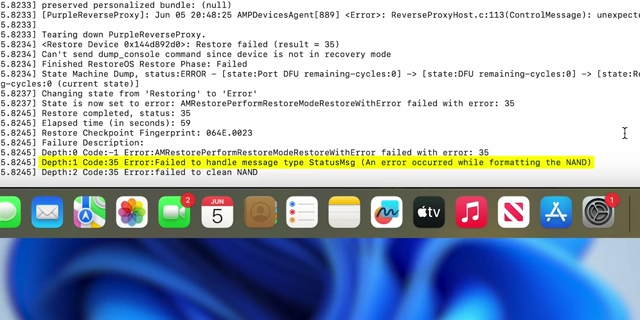
The "An error occurred while formatting the NAND" message during the Mac Mini DFU restore [ 00:30:02 ] - Resolution: Colin had backup 512GB NAND chips, which were then installed (for a total of 1TB). The DFU restore was successful with these chips.
Conclusion [30:10]
- The M2 MacBook Air was successfully upgraded from 256GB to 2TB.
- The M4 Mac Mini was successfully upgraded from 256GB to 1TB after the initial 2TB chips proved incompatible.
- Risks & Benefits: The video highlights that while such DIY upgrades are possible and offer significant cost savings over Apple's official options, they are not without risk, even for experienced technicians (as seen with the Mac Mini's incompatible chips).
- These "right to repair" efforts help keep machines with limited hardware out of the garbage bin, extending their useful life.
- Linus successfully performed his part of the upgrade without damaging the board, demonstrating that with proper instruction and practice, it is achievable.