DaVinci Resolve Color Grading: Mastering Saturation and Color Density with HSV Channel 2 and Hue Curves
This video demonstrates advanced saturation and color density techniques within DaVinci Resolve, contrasting general saturation with a specialized "color density" node for a more natural look.
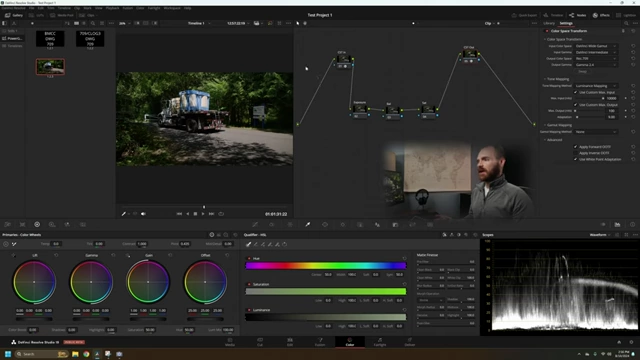
- The tutorial begins by setting up a standard color space transform node tree for Blackmagic footage [00:00:20].
- It highlights the difference between using the general saturation slider, which can lead to over-saturation, and creating a specialized "color density" node using HSV channel 2 [00:01:30].
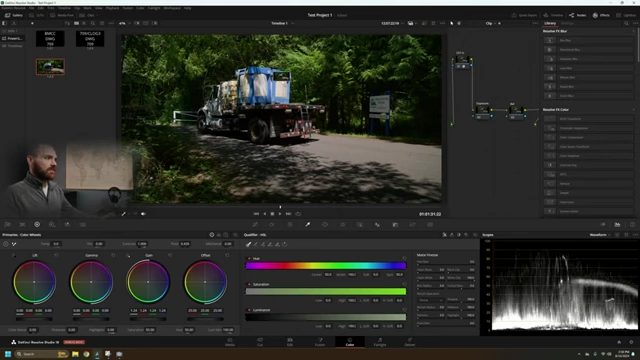
Comparison of standard saturation versus HSV channel 2 color density adjustment [ 00:02:20 ] - Further granular control is shown using custom curves like Hue vs. Luminance, Hue vs. Saturation, and Hue vs. Hue to individually adjust specific colors [00:03:07].
- The video also covers creating localized effects, such as a subtle vignette with adjusted warmth and contrast, to add depth and make subjects pop [00:04:52].
- The instructor emphasizes an iterative process, constantly reviewing adjustments and making further refinements to achieve a desired look, showcasing the final before-and-after [00:11:29].
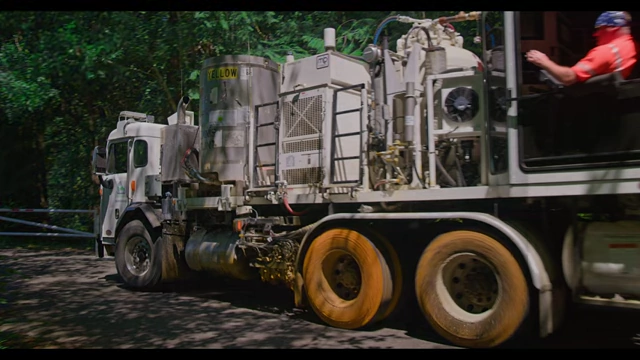
Before (original ungraded footage) and After (final color graded footage) comparison [ 00:13:40 ] 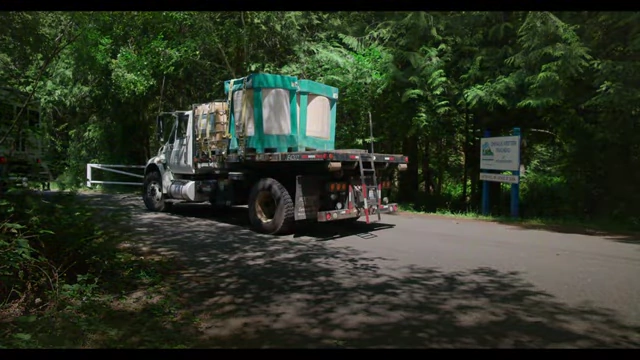
Before (original ungraded footage) and After (final color graded footage) comparison [ 00:13:35 ]
Initial Setup and Color Management [00:00:20]
The video begins by explaining the initial node tree setup in DaVinci Resolve for color management.
- The setup includes color space transforms to handle Blackmagic BW footage.
- Input footage is transformed into DaVinci Wide Gamut and DaVinci Intermediate.
- The timeline color space is set to DaVinci Wide Gamut and Intermediate.
- Output color space is transformed to Rec. 709 Gamma 2.4 for display.
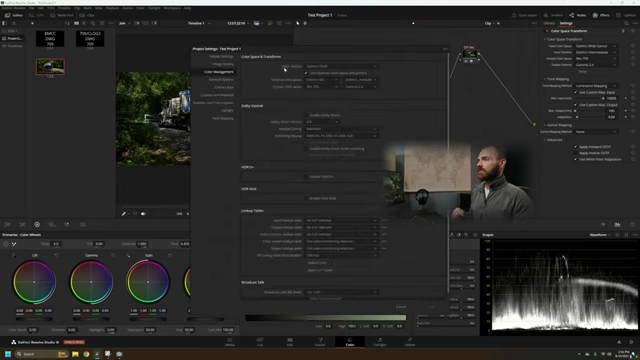
DaVinci Resolve Project Settings for Color Management [ 00:00:39 ]
Understanding Saturation vs. Color Density [00:01:04]
The instructor demonstrates the difference between applying general saturation and controlling color density using a specialized node setup.
- Standard Saturation Adjustment [00:01:06]
- Using the global saturation slider can quickly lead to an "overkill" and unnatural look, making the image appear too flat or blown out in colors.
- Custom Saturation Node (HSV Channel 2) [00:01:30]
- To achieve a denser, more controlled saturation (subtractive saturation), create a dedicated node.
- Right-click the node, change its color space to HSV.
- Right-click again and uncheck channels 1 and 3, leaving only channel 2 selected. This isolates the saturation component.
- Adjusting the 'gain' or 'gamma' in this HSV Channel 2 node allows for adding color density without the harshness of the regular saturation slider.
- This method provides a "juicy dense" result, particularly noticeable in blues, enhancing color without over-saturating.
Comparison of standard saturation (left) and HSV channel 2 density adjustment (right) [ 00:02:20 ]
Advanced Color Adjustments with Custom Curves [00:03:07]
The video explores using custom curves for more precise control over specific colors.
- Hue vs. Luminance Adjustments [00:03:15]
- Select "Hue versus Luminance" in the custom curves.
- Use the eyedropper to select specific colors (e.g., blues on a truck, greens in foliage).
- Lowering the luminance for selected hues makes them darker, adding depth.
- It's noted that greens might appear more yellow in the waveform, requiring careful selection.
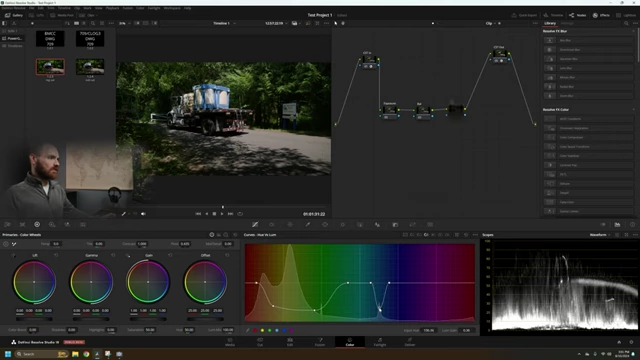
Hue vs. Luminance curve adjustment for blues and greens [ 00:03:49 ]
- Hue vs. Saturation Adjustments [00:03:55]
- Switch to "Hue versus Saturation" to control the intensity of specific color ranges.
- Drop the saturation for blues to make them muted or muted greens to enhance a specific mood.
- Alternatively, increase saturation for targeted hues if desired.
- Hue vs. Hue for Color Shifting [00:04:18]
- Use "Hue versus Hue" to shift the actual hue of specific colors.
- For example, shifting blues towards green to create a more homogenous scene or to match a specific aesthetic.
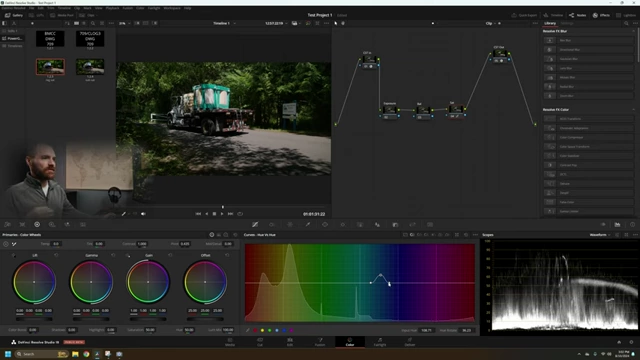
Hue vs. Hue curve adjustment for color shifting [ 00:04:43 ]
Creating Depth with Vignettes and Local Adjustments [00:04:52]
The instructor demonstrates how to add a vignette and make localized color and contrast adjustments to guide the viewer's eye and add dimension.
- Adding a Window/Vignette [00:04:52]
- Add a new node and apply a circular window (vignette).
- Invert the window to affect the areas outside the central subject.
- Soften and widen the window for a natural fall-off.
- Adjusting Contrast and Shadow Detail [00:05:25]
- Darken the vignetted area to create depth.
- Decrease contrast within the vignette to bring back shadow detail, preventing crushed blacks.
- Adding Color to the Vignette [00:05:36]
- Experiment with adding color to the lift (shadows) of the vignette.
- A subtle warm tone in the shadows can be preferred over cool shadows, making the truck in the center "pop" more effectively.
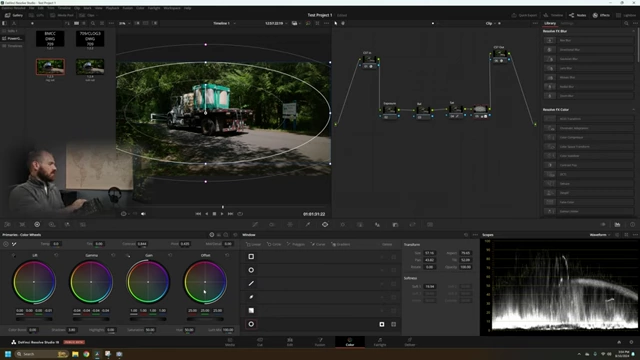
Vignette applied with adjusted warmth in shadows and overall settings [ 00:06:38 ]
Refining Specific Elements (Truck and Tires) [00:07:05]
The video continues with more detailed adjustments, focusing on specific elements in the scene.
- Adjusting Truck Wheels [00:07:44]
- Using Hue vs. Hue, shift the color of the yellow tires slightly towards red.
- Use Hue vs. Luminance to drop their brightness, preventing them from being distracting.
- Refining Greens in Foliage [00:09:59]
- Emphasizes the need for careful selection with Hue vs. Hue to target the greens without affecting other yellow elements.
- Adjust Hue vs. Saturation to deepen the greens, making them denser and richer, contrasting with an initial "pastel" appearance.
Final Review and Iterative Process [00:11:29]
The video concludes by reviewing the overall color grade and emphasizing the iterative nature of the process.
- Compare the starting footage to the final graded look, noting the improvements in depth, color density, and targeted adjustments.
Original ungraded footage of the truck [ 00:13:40 ] - The instructor highlights how different techniques were combined to achieve a unique and pleasing aesthetic.
Final color graded footage of the truck [ 00:13:35 ] - Discusses exploring options like adjusting contrast (primary vs. HDR contrast) and further fine-tuning exposure and shadow details to achieve the desired visual impact.