The Filmmaker's Guide to Crafting a Killer Edit: A Complete Breakdown of Sound Design, VFX, and Compositing Workflow
This tutorial breaks down the editing process of the "Beyond This Atmosphere" project, focusing on the creative approach rather than just step-by-step instructions.

- The video emphasizes understanding the why behind editing choices, rather than just the how.
- Mitchell demonstrates live editing in DaVinci Resolve, focusing on pacing, quick cuts, and tension-release dynamics.
- He showcases his sound design process, layering subtle sound textures, risers, and voice-overs.
- The tutorial delves into visual effects in After Effects, explaining 3D camera tracking and using Element 3D to create and animate floating rocks and glowing orbs.
- Key compositing philosophies are shared, highlighting the importance of blending VFX elements naturally into the footage.
- Advanced techniques like screen layer ramps, flicker reveals, and creating scattered 3D objects are covered.
Intro [00:00]
Mitchell Mullins introduces himself and the video, which is a breakdown of his "Beyond This Atmosphere" project. The goal is to share the approach and thought process behind the edit, focusing on how techniques apply broadly, rather than just a software tutorial.
Overview [02:11]
The speaker provides an overview of the concept piece, which was shot in 2-3 hours at sunset.
- The video aims to reveal the "secret sauce" behind effective editing, emphasizing that it's often subtle techniques and a culmination of various skills like sound design, cutting, compositing, and color grading.
- The core concept involved the talent, Elizabeth Wood, interacting with the environment as if she was morphing rocks out of the ground.
- The footage includes various takes with different lighting and angles to provide options for post-production.
- The edit layers many different elements to create a compelling visual and auditory experience.
A woman in black stands on a rock formation as dark, jagged rocks float in a circle around her against a cloudy sky. [ 00:00:10 ]
STEM Breakdown [4:13]
The video breaks down the audio into "stems" (separate tracks for different audio types) to illustrate the layering process.
- Elevated Reality Textures: These are subtle sounds like camera clicks, hits, and other environmental textures [4:33].
- These textures lay the groundwork for the edit, building a world with subtle audio cues before music or complex stems are added.
- Examples include mechanical clicks and subtle atmospheric sounds [4:39].
- Risers and Undertones: These are atmospheric sounds used to build anticipation and tension [4:58].
LIVE Editing [5:44]
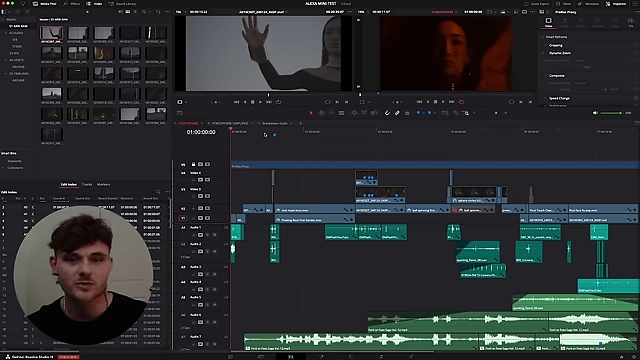
Mitchell demonstrates a live editing session in DaVinci Resolve, showing how he compiles a sequence from scratch.
- Building Tension and Release: The primary focus is on establishing motion and energy at the beginning of the edit [6:07].
- Pacing and Flow: Adjusting clip speeds [6:47] and reversing footage [7:37] to create desired visual flow.
- Flash Textures: Using exposure ramps and single white frames to introduce jarring cuts or transitions [9:33].
- Duplicating the layer and setting its blending mode to "screen" quickly ramps the exposure [9:39].
- Sometimes, a single white frame is inserted to disorient the viewer or create a quick, impactful transition [1:00:00].
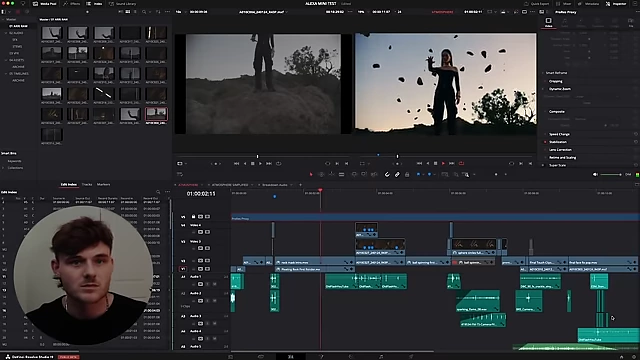
A DaVinci Resolve timeline displays video clips of a woman on a rocky landscape, with multiple audio tracks below. [ 00:04:04 ]
LIVE Sound Design [12:05]
The speaker integrates sound effects live into the editing sequence, emphasizing intentionality and subtlety.
- Tension-Release Builds: Uses sound builds and risers to enhance the visual tension leading up to a key moment, followed by a release [12:24].
- Avoids muddying the audio by allowing each sound to have its moment, rather than layering too many sounds [1:16:18].
- Subtle Impacts and Textures: Adds camera clicks and other practical sounds to make the actions feel more tangible [1:30:00].
- Introduces a "rock impact" sound effect early to subtly hint at the floating rocks [1:57:00].
- Voice-Over Integration: Incorporates a voice-over, explaining how he found suitable vocals from a SoundCloud mix and used DaVinci Resolve's voice isolation feature [1:52:12].
Elevated Reality Textures [22:00]
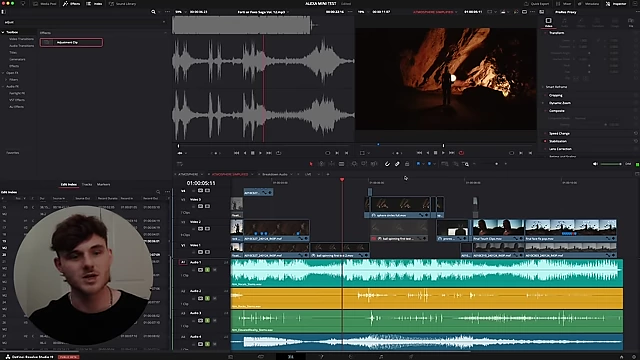
Reiterates the role of subtle sound textures in world-building.
- These elements, like camera clicks and risers, create a foundational auditory landscape before adding music or dialogue [2:29].
- They enhance pacing and add small, impactful hits throughout the edit.
Voice Over Approach [23:07]
Details the process of integrating the voice-over into the project.
- A crucial element suggested by his girlfriend, the initial vocals were extracted from a SoundCloud mix [1:52:12].
- DaVinci Resolve's voice isolation tool was used to separate the vocals from the music [2:51:00].
- EQ adjustments were made to the isolated vocals to prevent them from sounding "muddy" and to ensure they blended naturally with the other audio elements [2:51:20].
Tension & Release Philosophy [26:40]
Explains the fundamental editing principle of building and releasing tension.
- This is achieved through a combination of quick cuts, disorienting visuals, and strategic sound design.
- The goal is to create emotional highs and lows that keep the viewer engaged throughout the video.
Identifying Hero Shots [27:52]
Highlights the specific shots designated as "hero shots" where the main visual effects would be showcased.
- These are the key moments designed to create a significant impact and reveal the core concept [2:55:00].
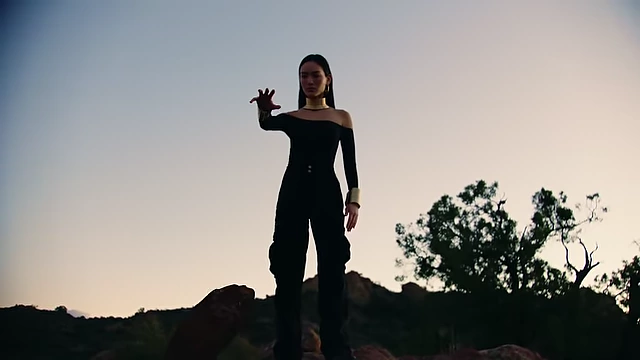
A wide shot shows a woman standing on a hill with multiple dark rocks floating around her against a cloudy sky. [ 00:43:47 ]
Flicker Reveal [29:23]
Details the use of jarring, quick transitions, often incorporating a white flash or a single frame from raw footage.
- This technique creates a disorienting effect, preparing the viewer for a new scene or a shift in focus.
- Sometimes a slightly blurred or grainy screenshot is used to provide a unique texture during the flash [1:58:00].
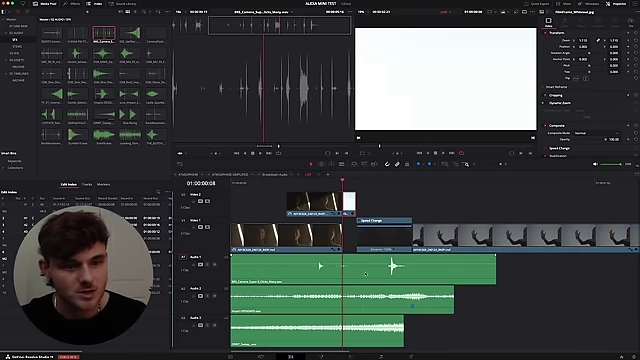
A white flash on a timeline showing a transition. [ 00:13:50 ]
Compositing Philosophy [31:01]
Introduces the approach to visual effects (VFX) in After Effects.
- The core philosophy is to blend VFX seamlessly into the footage, ensuring they look as natural as possible.
- This involves meticulously matching motion, color, and depth to avoid a "fake" or "off" appearance [3:10:00].
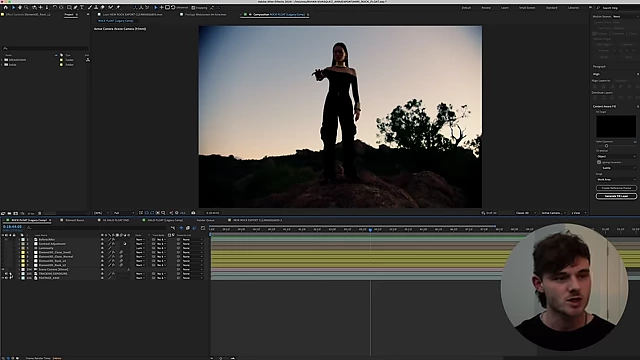
An After Effects interface displays footage of a woman with floating rocks, showcasing various layers and effects. [ 00:32:11 ]
Tracking Data [31:36]
Explains the process of generating accurate 3D camera tracking data in After Effects.
- Because the original footage was moody and dark, a boosted exposure version of the clip was exported from DaVinci Resolve to aid After Effects' tracking capabilities [3:19:00].
- This ensures After Effects has sufficient detail to create reliable tracking points, even if the boosted footage isn't the final color [3:23:00].
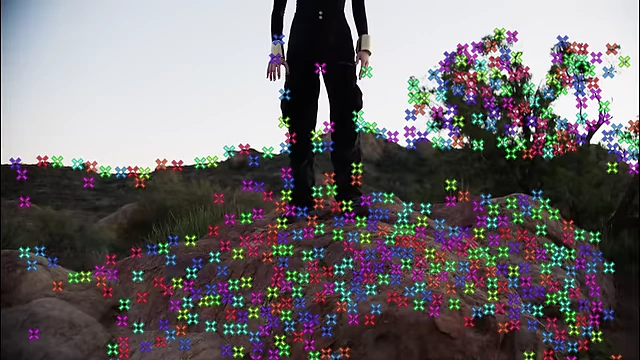
After Effects showing tracking points on footage with a boosted exposure. [ 00:33:19 ]
Element 3D [35:51]
Demonstrates how to use Element 3D to create and integrate 3D objects into the tracked scene.
- A basic cube is used as a placeholder to show how 3D objects interact with the tracked camera [3:36:00].
- The cube is positioned and scaled to align with the scene's perspective and depth.
- Element 3D allows for creating custom 3D models or importing pre-made ones, which are then added to the scene using the "Scene Setup" panel [3:40:00].
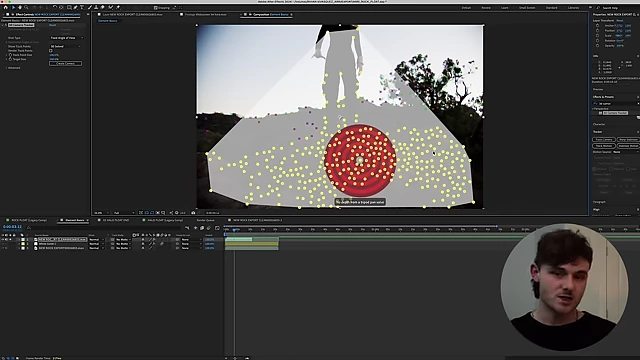
After Effects displays a red sphere on a landscape, demonstrating 3D camera tracking and object placement. [ 00:34:17 ]
Contrast Blending [40:14]
Focuses on making the 3D object blend naturally with the scene's lighting.
- Adjustments to the 3D object's brightness, contrast, and reflections are crucial to match the existing footage [4:01:00].
- An example involves using Element 3D's material editor to change surface properties and reflectivity [3:40:00].
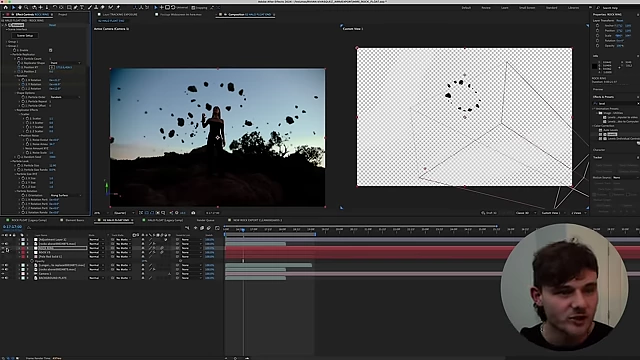
The Element 3D interface shows various material settings for rocks, with options for diffuse color, specular, and reflectivity. [ 00:51:13 ]
Adding Motion [42:51]
Animates the 3D objects to simulate dynamic movement within the scene.
- Keyframes are used to control the position of the rocks/orbs as they rise from the ground, matching the talent's hand gestures [4:29:00].
- The motion is designed to feel organic and synchronized with the live-action elements.
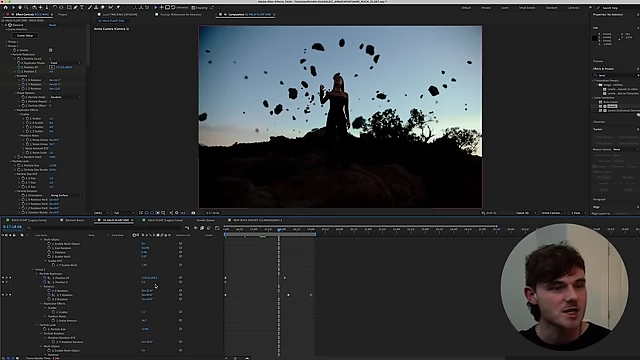
An After Effects timeline shows keyframes for the movement of 3D rocks, with layers indicating position, rotation, and scale. [ 00:51:41 ]
Main Composition Review [44:45]
Provides a comprehensive review of the final After Effects composition, bringing all elements together.
- This includes layers of scattered rocks, glowing orbs, and the underlying tracked footage [4:45:00].
- The scene is composed of multiple layers of 3D objects (rocks, orbs), each with unique movement and lighting, all interacting with the camera track.
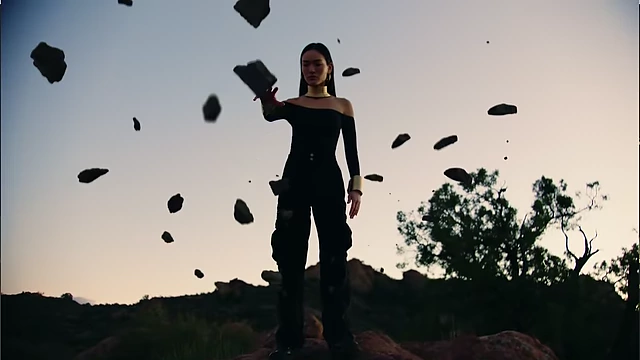
A woman in black stands on a rock formation as dark, jagged rocks float in a circle around her against a cloudy sky. [ 00:48:43 ]
HALO Review [50:40]
Explains the "HALO" effect, which refers to the glowing orb effect.
- This effect is created using a similar process to the floating rocks, but with different Element 3D materials to achieve a glowing, ethereal quality [5:00:00].
- The tutorial shows how to adjust light settings and reflections within Element 3D to make the orbs appear luminous.
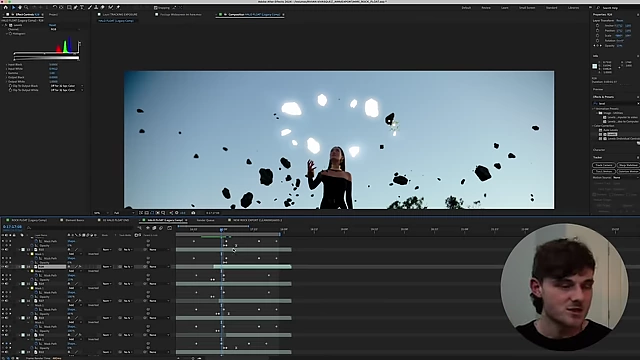
An After Effects composite shot shows a woman on a hill with multiple glowing orbs floating around her. [ 00:52:29 ]
Single Orb Breakdown [55:14]
A detailed walkthrough of creating a single glowing orb in Element 3D.
- Starting with a basic sphere model, the material properties are adjusted to emit light and create a soft glow [5:58:00].
- This involves modifying diffuse color, reflectivity, and adding glow effects within Element 3D's material settings.
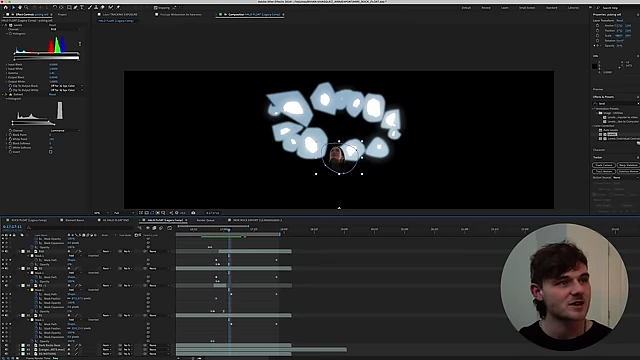
A sphere with a glow effect is edited in Element 3D settings. [ 00:53:28 ]
Multi-Scatter Spheres [1:03:00]
Demonstrates how to duplicate and scatter multiple glowing orbs throughout the scene using Element 3D's group utilities.
- The replicator settings are adjusted to control the number, distribution, and randomness of the scattered orbs [1:03:00].
- This creates the illusion of many floating elements, enhancing the magical effect.
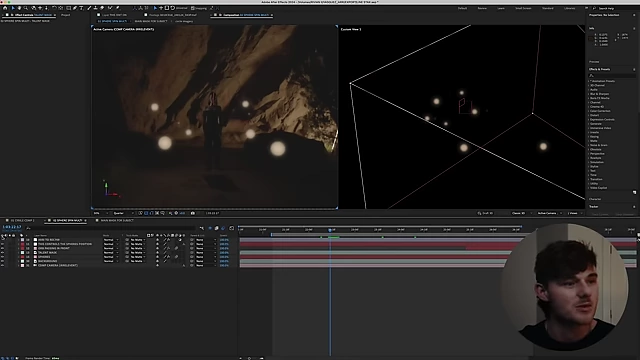
An After Effects interface shows a scene with multiple glowing orbs and various layers, including an Element 3D layer. [ 01:05:24 ]
StarStax Wipe [1:06:53]
Explains a specific transition technique called "StarStax Wipe."
- This involves using an image sequence (like a rapid white flash) and blending modes to create a unique, dynamic transition between scenes [1:06:53].
- The effect helps to disorient the viewer and adds a stylized visual element.
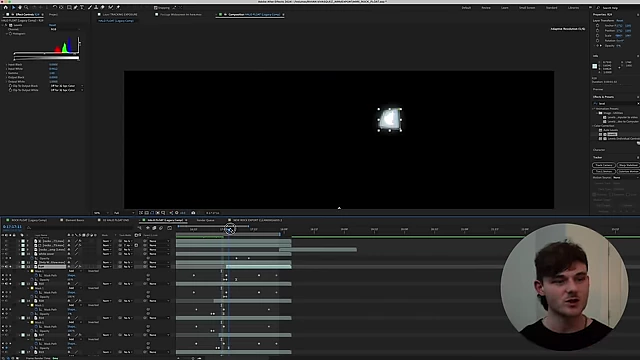
An After Effects timeline shows a white flash transition effect, with layers including alpha mask and blend modes. [ 00:52:42 ]
Outro / Newsletter [1:10:37]
Mitchell concludes the tutorial, thanking viewers and encouraging them to sign up for his weekly newsletter for more tips and content.