How a Mechanical Engineer Bootstrapped "myTMJ Pen" from Idea to $50K/Month, Overcoming PCB Design, Physical Product Iteration, and FDA Hurdles
Summary:
This video chronicles the journey of a mechanical engineer who, driven by chronic jaw pain (TMJ disorder), decided to build a product from scratch. Key aspects include:
- Motivation and Shift: Quitting a traditional engineering job to pursue product design with full ownership.
- Product Idea: Developing "myTMJ Pen," a portable heated massager, identified as an "easy mode" product due to low startup costs and a clear market gap.
- Learning PCB Design: Self-teaching Printed Circuit Board design using online tutorials, understanding schematics, layouts, and component selection.
- Prototyping & Iteration: Going through 190 prototypes to refine both electronic and mechanical aspects, making numerous mistakes from programming to component choices and addressing safety concerns like overheating with redundancy.
- Business Setup & Marketing: Establishing an LLC, deciding against patents, building an online presence through social media (Reddit, Instagram), and generating pre-orders.
- Funding & Scaling: Launching a successful crowdfunding campaign, navigating FDA regulations by classifying the device under "general wellness" guidelines, and scaling sales to $50,000/month through Meta ads.
- Continuous Improvement: Ongoing refinements to the product's design, resolving issues like vibration noise, and planning for future manufacturing and product development.

Overview of the product development journey from initial ideas to numerous prototypes, culminating in a marketable product. [ 00:00:00 ]
How it All Started and a Genius Idea! [01:03][05:35]
- Early Ambitions and Education
- The speaker always dreamed of starting a business, specifically building consumer products.
- He pursued mechanical engineering but also took computer science and electrical classes to understand the entire product design process.
- Felt disillusioned with traditional mechanical engineering roles that focused on minor component optimization.
- Job Search Challenges and a Pivotal Decision
- Faced numerous rejections from product design consultancies, 3D printer, tour, and robotics companies.
- Secured a summer internship at a five-person startup building prefabricated accessory dwelling units.
- Received a full-time offer as a junior mechanical engineer for $70,000, which he found unsatisfactory given his contributions and the low equity offer (0.25%).
- Decided to leave the startup to design his own product with full ownership, moving back to Philadelphia, working part-time for a friend's product business ($40/hour assembling and packing orders) to support himself and use their prototyping space for free.
- Emphasizes that quitting a job isn't the only way; finding a supportive job that allows side-building is a viable alternative.
- The "Easy Mode" Product Concept
- The speaker advocates for choosing a product idea that's "easy mode" to minimize risk, especially for first-time entrepreneurs.
- "myTMJ Pen" fits this criteria:
- Marketing: Has a compelling backstory (personal pain, market gap).
- Manufacturing: Small size allows economical 3D printing of casings and fitting components in an apartment.
- Electromechanical: Low minimum order quantities for suppliers.
- Logistics: Cheap shipping, ability to do everything without external investment.
- Market: Addresses a specific, underserved problem (TMJ pain) with little competition.
- The myTMJ Pen is a portable heated massager for chronic jaw pain (TMJ disorder), designed to provide convenient heated massage currently unavailable on the market.
The speaker highlights the core idea behind myTMJ Pen and its "easy mode" characteristics. [ 00:06:59 ]
Understanding and Designing PCBs [08:11]
- Self-Taught PCB Design
- Despite a mechanical engineering background, the speaker had no prior PCB design experience.
- Utilized "YouTube Induced Confidence" (YTIC) to learn through online tutorials.
- Basic electrical engineering knowledge (Ohm's Law) is sufficient to start.
- PCB Fundamentals
- A PCB is a layered "sandwich" of conductive, non-conductive, and aesthetic layers that connect and organize electronic components.
- Design Process Steps
- 1. Schematic Creation: Drawing all components and their interconnections.
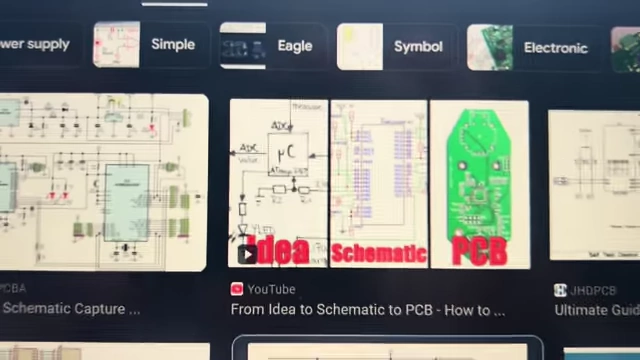
A schematic of a PCB design, illustrating the components and their connections. [ 00:09:29 ] - 2. Layout Design: Outlining the board, then dragging and dropping components and wiring them together based on the schematic, using multiple layers if needed.
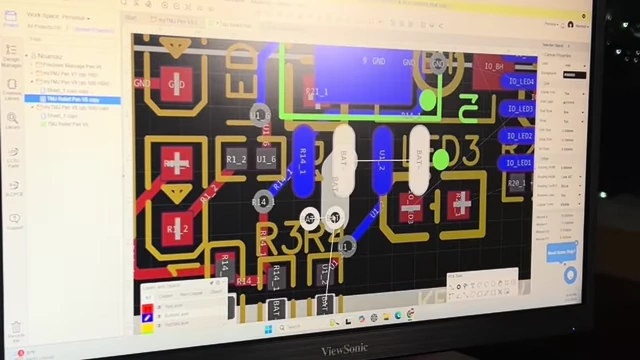
A layout of a PCB design, showing the placement of components and wiring. [ 00:09:39 ]
- 1. Schematic Creation: Drawing all components and their interconnections.
- Component Selection and Block Diagram
- Before schematics, created a functional requirements list for myTMJ Pen: adjustable heat/vibration, indicator LEDs, portable (battery-powered, rechargeable).
- Developed a block diagram:
- Power source (rechargeable battery) requires an external charging port and charging circuit.
- Needs an on/off switch.
- Vibration motor and heating element.
- Components (motor/heater) required 7.2V, so a boost converter from the 3.7V battery was necessary.
- Driving circuitry for motor/heater.
- LEDs and buttons for user interface.
- Microcontroller for programming and control, with a voltage regulator.
- Researched components that perform specific block functions (e.g., TP4056 for charging, MOSFETs for motor/heater drivers).
- Data sheets provide exact instructions for external components.
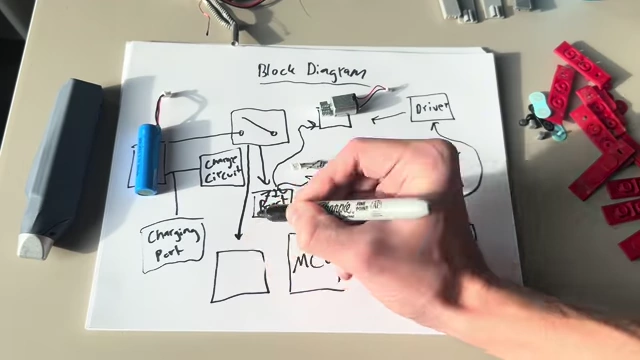
A block diagram outlining the functional requirements and electronic components for the myTMJ Pen. [ 00:10:49 ]
- Software and Manufacturing Tools
- Initially used Autodesk Eagle, but found it cumbersome for manual component management.
- Discovered a vertically integrated trio:
- LCSC: A large electronic components database and seller.
- EasyEDA: Free, online design software for schematics and layouts, integrated with LCSC's component library.
- JLCPCB: A manufacturer for PCBs, directly integrated with EasyEDA for easy ordering and competitive pricing (even for assembled boards).
Prototyping Mistakes and Safety Innovations [13:40]
- Programming Challenges
- Initially forgot to consider how to program the microcontroller, assuming serial programming like Arduino/ESP32.
- Learned about ISP (In-System Programming) requiring six pins and an external programming board, flashing binary code from Arduino IDE.
- Component Selection Errors
- Encountered "puff of smoke" issues due to selecting incorrect components that couldn't handle the load (inductor, boost converter, filter capacitor).
- Emphasizes the importance of double-checking component specifications.
- Heating Mechanism Evolution
- Initial PWM (Pulse Width Modulation) for heat control resulted in slow heating and poor temperature maintenance.
- Realized the need for temperature feedback and added a thermistor (temperature-sensitive resistor).
- Attempted a "clever" method to measure temperature via heating element resistance change (using nichrome's stable resistance), but it failed.
- Reverted to the simpler, more reliable thermistor.
- Crucial Safety Features (Redundancy)
- Addressed critical failure modes to prevent overheating and battery explosion:
- Battery Protection: Circuitry and venting to prevent explosions.
- Microcontroller Crash: Implemented a watchdog timer to reset the MCU.
- Thermistor Failure: Coded the MCU to detect thermistor disconnections or shorts and shut off power.
- Thermistor Disconnect during Assembly: Added a safety timer to check if target temperature is reached within a set time.
- MCU/Transistor Failure (stuck on): Designed a "crowbar circuit" as a last resort.
- Uses a comparator to detect unsafe thermistor voltage (high temperature).
- Triggers a triac, short-circuiting the battery to a polyfuse (resettable fuse).
- The polyfuse blows, safely cutting all power, and resets once current stops. This ensures no single component failure leads to hazardous overheating.
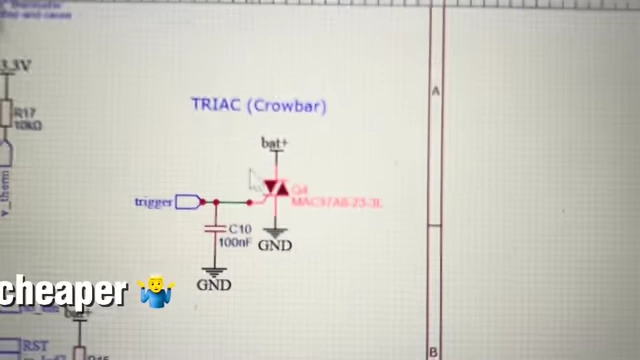
An illustration of the crowbar circuit design, showcasing the comparator, triac, and polyfuse working together for safety redundancy. [ 00:20:07 ]
- Addressed critical failure modes to prevent overheating and battery explosion:
Refining the Physical Product [20:51]
- Evolution of Mechanical Design
- The mechanical design process ran concurrently with electronics development and involved nearly 200 prototypes.
- Initial "Looks Like" Prototypes: Started with a basic pen shape, hexagonality for 3D printing ease and ergonomics, and a tip to apply pressure and heat.
- Scrapping Unnecessary Features: An early idea for mechanically isolating vibration from the casing was abandoned due to added complexity, cost, and minimal perceived benefit for an MVP.
- Iterative Casing Improvements
- Indicator Lights: Realized light-colored filament caused light diffusion; opted for dark casing with thin plastic for indicators.
- Tip Design:
- Initially used a set screw for the tip, which was problematic.
- Switched to snap-fit grooves for satisfaction, but later brought back screws for better security and to clamp the tip/thermistor.
- Tip design evolved to be rotationally symmetric for cheaper manufacturing and included a dedicated hole for the thermistor.
- Component Retention:
- Early designs used snap-fits for the battery and PCB, and screws for the cap.
- Redesigned to slide the circuit board in from the front, improving assembly ease and reducing damage risk. This led to a new cap design covering the front portion.
- Button Development:
- Started with annoying inserts, then thin plastic that bent, then a cantilevered design for better clickability.
- A planned graphic panel with membrane buttons was sacrificed for MVP; settled on a two-color 3D printed button cover.
- Manufacturing Optimization: Shifted from horizontal to upright 3D printing of casings to fit 50 units per print.
- Innovative Cable Management: Embedded a channel for a zip tie to act as both cable management and a motor holder.
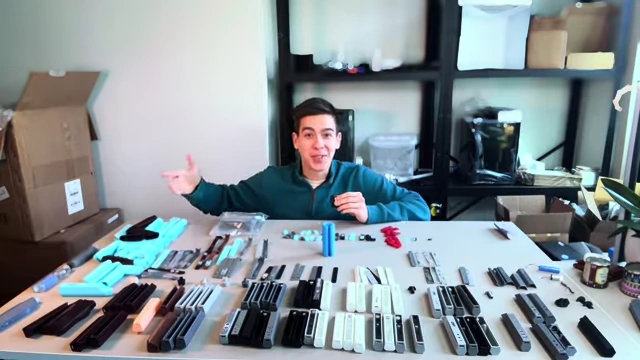
A collection of nearly 200 prototypes demonstrates the extensive iterative process for the myTMJ Pen's physical design. [ 00:21:07 ]
- Addressing Vibration Noise
- This was the biggest mechanical challenge, requiring many iterations due to multiple variables.
- Component Stability: Ensured battery and PCB were tight to prevent rattling.
- Casing Warping: Addressed issues with walls warping after printing.
- Motor Mounting: Tried various methods (screwing, gluing, foam tape) but found issues.
- Unexpected Discovery: Realized production motors had longer shafts than prototypes, causing increased vibration moment. Switched to shorter-shaft motors.
- Electrical Noise: Discovered an underpowered capacitor causing electrical motor noise and too low PWM frequency producing an audible whine, which were addressed in later PCB revisions.
- Benefits of 3D Printing
- Emphasizes that 3D printing casings in-house allowed for rapid, inexpensive iteration ($10,000 injection molds would have been prohibitive).
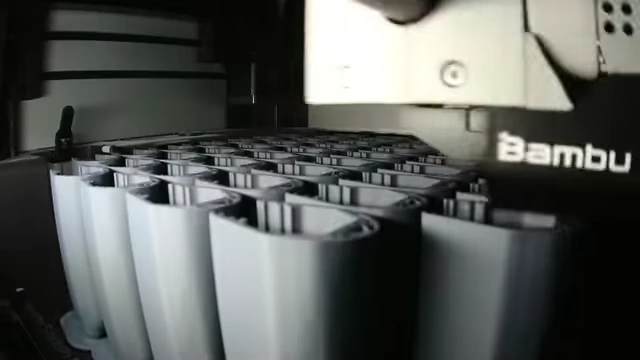
Batch of 3D printed pen casings being manufactured. [ 00:00:16 ]
- Emphasizes that 3D printing casings in-house allowed for rapid, inexpensive iteration ($10,000 injection molds would have been prohibitive).
Setting Up the Business and Marketing Strategy [29:43][34:16]
- Legal and Financial Foundations
- Formed an LLC and opened a separate business bank account early on for liability protection.
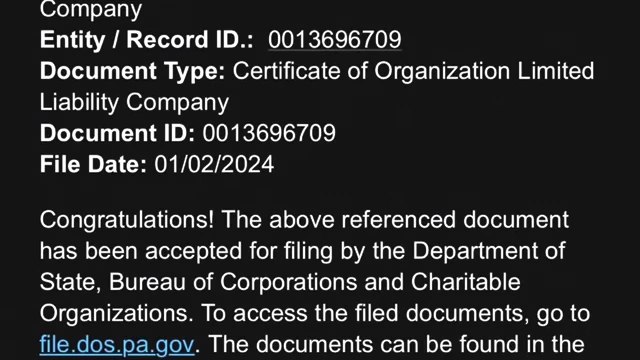
Screenshot of the LLC certification. [ 00:29:57 ]
- Formed an LLC and opened a separate business bank account early on for liability protection.
- Patent Philosophy
- Decided against pursuing a patent, viewing it as a costly right to sue rather than a true shield.
- Argued that the money saved could be better spent on product development, sales, branding, marketing, and customer service.
- For bootstrapped startups, immediate market entry and learning to compete are more valuable than expensive, limited patent protection.
- Self-manufacturing (3D printing) reduces the risk of direct copycats compared to outsourcing to China.
- Direct-to-Consumer Business Model
- Plan was to sell direct-to-consumer through a personal website, using organic social media and advertising for marketing.
- Developed a basic website with a brand name and logo (initially "yikes" designs).
- Building Momentum and First Customers
- Focused on collecting pre-order deposits ($15 for a 30% discount at launch) to build momentum.
- YouTube and Reddit: Posted videos on TMJ and engineering subreddits to share the journey and get initial followers/pre-orders.
- Instagram Strategy:
- Created "My TMJ Relief" Instagram account, initially posting educational content (blog posts, relief tips, exercises) which got little traction.
- Used a "spam-follow" tactic on big TMJ accounts to gain followers.
- Purchased 200 followers to avoid looking like a new, uncredible account.
- Directly messaged followers to encourage pre-orders.
- Viral Shift: Realized the audience was more interested in the behind-the-scenes engineering and business journey, leading to daily posts and viral videos that rapidly grew the account to 10,000+ followers (mostly engineers and entrepreneurs, not TMJ patients).
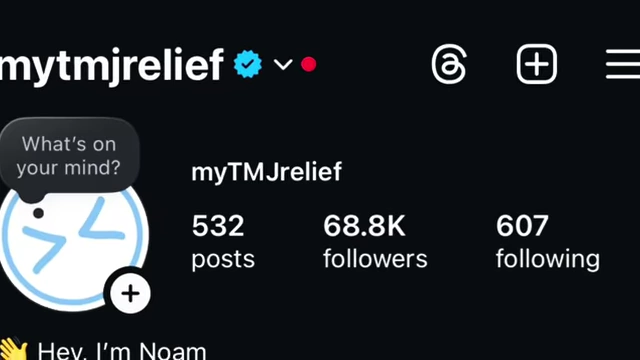
An image of the myTMJ Relief Instagram page, showing 68.8K followers and 532 posts, illustrating the growth of the social media presence. [ 00:35:05 ]
Shipping the First Batch and Going All In [37:24][39:17]
- First Production Batch
- After 11 months of development, with prototyping done and 100 PCBs ordered, it was time to ship.
- Programming and testing the first batch of PCBs confirmed functionality of heater, motor, and safety mechanisms.
- The assembly process involved unboxing circuit boards, soldering thermistors, 3D printing casings, and packaging.
- Packaging was initially very basic (folding box, bubble wrap, handwritten notes, KitKats), catering to early, understanding customers.
- Shipping the first orders was a significant personal and business milestone.
- Commitment to the Business
- Decided to "go all in" – left the part-time job, bought his own 3D printer, and moved to Washington D.C.
- Began redesigning for a second batch of 500 units, anticipating the need for certifications and trade shows, which would require significant capital.
- Crowdfunding Campaign (Indiegogo)
- With social media nearing 10,000 followers and a working product, a crowdfunding campaign seemed ideal for raising funds.
- Viewed crowdfunding as an enhanced pre-order page with social credibility, allowing broader promotion (e.g., on Reddit without being flagged as advertising).
- Bootstrapped the campaign by leveraging existing social media clout and making personal connections with TMJ accounts and individuals.
- On launch day, extensively messaged contacts, got shares on social media, and posted on relevant platforms.
- Raised $7,000 in the first two days, and a total of $13,000 by the end of the campaign.
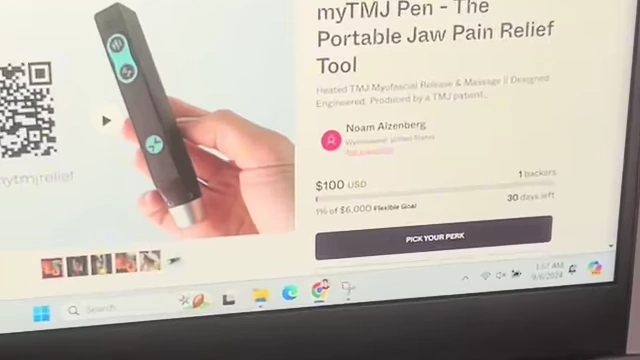
The speaker details the intense effort behind launching the Indiegogo campaign, which raised $7,000 in two days. [ 00:41:34 ]
Navigating FDA Regulations [42:09]
- Understanding FDA Classifications
- The FDA regulates medical devices, classifying them into three risk categories:
- Class III (Highest Risk): Implants, pacemakers; require Pre-Market Approval (PMA), costing tens of millions.
- Class II (Medium Risk): Blood pressure cuffs; require 510(k) Pre-Market Notification (clearance), costing hundreds of thousands.
- Class I (Lowest Risk): Band-Aids, wheelchairs; generally exempt from 510(k) but still require registration and compliance with FDA guidelines.
- The FDA regulates medical devices, classifying them into three risk categories:
- Initial Concerns and Research
- Initially didn't consider myTMJ Pen a medical device but was prompted by social media comments to research FDA regulations.
- Found that companies can self-classify their products based on "predicate device categories" (similar devices already classified).
- Identified "electric therapeutic massager" (Class I, 510(k) exempt) and "powered heating pad" (Class II, 510(k) exempt) as potential categories.
- FDA Inquiry and "General Wellness" Guidelines
- Received an unexpected email from the FDA three days into the crowdfunding campaign, accusing him of marketing a medical device without "approval or clearance" (terms for high-risk devices).
- Realized the FDA misunderstood his product, as his research indicated it didn't require high-level approval.
- Discovered "General Wellness: Policy for Low Risk Devices" guidelines, which allow marketing devices that promote general wellness without FDA registration if claims avoid "treats" or "cures" and instead use language like "promotes," "track," "encourage choices," or "may help."
- Self-massage is considered a healthy lifestyle choice.
- Adjusted website language to explicitly state "may help reduce tension" instead of definitive claims.
- This allowed him to avoid the $10,000 annual FDA registration fee for medical devices and continue marketing the product under general wellness guidelines.
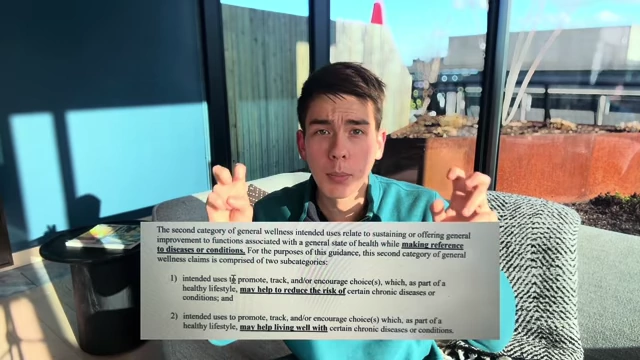
The speaker explains the FDA's General Wellness policy for low-risk devices. [ 00:47:43 ]
Ramping Things Up and Future Plans [49:10]
- Post-Crowdfunding Growth
- Used the $13,000 from Indiegogo to order Batch 2 of components.
- Redesigned the website and intensified social media efforts.
- Meta Ads Success
- Started running Meta ads, scaling from $20 to $300 per day.
- Leveraged a large backlog of Instagram reels as ad content, finding that many performed well, even those not directly focused on the product.
- Achieved a 3-4x return on ad spend, generating $25,000 and then $50,000 in monthly revenue in December and January, respectively.
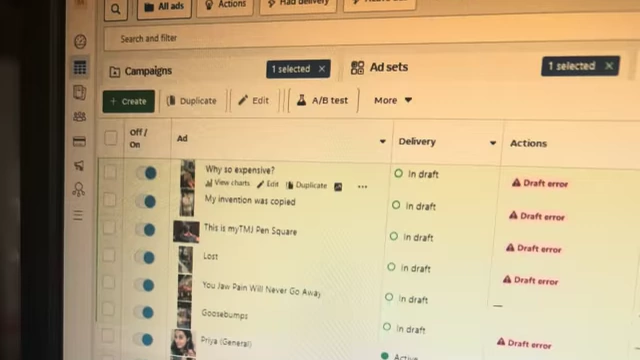
A screenshot showing Meta ad campaign results, including total amount spent and cost per result, demonstrating successful ad scaling. [ 00:49:33 ]
- Continuous Product Refinements
- Paused sales before Batch 3 (ordering 1,000 units) to implement further improvements and certifications:
- Fixed electrical noise from an underpowered filter capacitor.
- Achieved FCC certification.
- Resolved USB-C charging compatibility issues (only charged with USBA to USBC cables).
- Adjusted LED brightness with additional resistors.
- Switched to beefier rubber-insulated thermistors to prevent shorts against the aluminum tip.
- Paused sales before Batch 3 (ordering 1,000 units) to implement further improvements and certifications:
- Future Endeavors
- Wrote a book about TMJ, to be given away for free as a lead magnet.
- Acquired a Formlabs Form 4 resin printer to test transitioning from FDM 3D printing, planning a limited edition transparent myTMJ Pen.
- Aims to reach $100,000/month in sales.
- Plans to gradually outsource manufacturing, fulfillment, and marketing to focus on designing more products for the TMJ market.
The speaker showcases a variety of prototypes, highlighting the continuous development and improvement of the myTMJ Pen. [ 00:52:13 ]