Mastering Color Grading with a Single Node in DaVinci Resolve
This tutorial demonstrates an efficient color grading workflow in DaVinci Resolve, advocating for a "one node" approach at the clip level.
- Color Management Setup: The video begins by setting up DaVinci YRGB color science with DaVinci Wide Gamut and DaVinci Intermediate for the timeline, along with a group-level color space transform (CST) from Panasonic V-Log to DaVinci Wide Gamut and a timeline-level CST to Rec. 709.
- Developing the Core Look: A multi-node "look" is then built by adjusting contrast with an S-curve, balancing colors using the HDR tab, adding warmth to highlights, refining saturation, and compressing skin tones with the Color Warper.
- The One-Node Philosophy: This comprehensive "look" is applied at a group level, meaning each individual clip within that group inherits the full complex grade.
- Efficient Clip Adjustment: The core argument is that once this foundational "look" is established, individual clip adjustments for exposure and minor color balance can typically be achieved with a single node on each clip, simplifying the grading process, maintaining consistency, and speeding up re-grading.
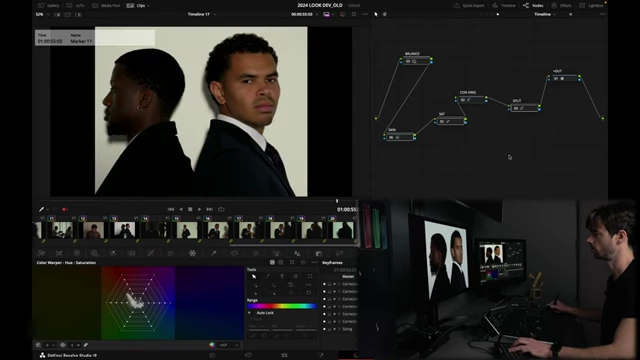
The complete DaVinci Resolve node tree demonstrating the comprehensive "look" built with multiple serial nodes. [ 00:08:36 ]
Introduction to the One-Node Grading Philosophy [00:00:00]
The video introduces the concept that complex color grading in DaVinci Resolve can effectively be managed with a "one node" approach at the individual clip level, once a comprehensive "look" has been established. This method aims to simplify the grading process and ensure consistency across a project.
DaVinci Resolve Project Settings and Color Management [00:01:11]
The tutorial begins by outlining the essential project settings to prepare for this grading workflow, specifically for footage shot in Panasonic V-Log.
- Color Science: The project is configured to use DaVinci YRGB.
- Timeline Color Space: The timeline color space is set to DaVinci Wide Gamut and DaVinci Intermediate.
- Group-Level Color Space Transform (CST):
- All clips are placed within a group named "Panasonic."
- In the group's "Pre-Clip" settings, a CST node transforms the footage from Panasonic V-Gamut/V-Log to DaVinci Wide Gamut/DaVinci Intermediate. This ensures a consistent working color space before any creative grading begins.
- Timeline-Level Color Space Transform (CST):
- A final CST node is applied at the timeline level, converting the DaVinci Wide Gamut/DaVinci Intermediate signal to Rec. 709 Gamma 2.4.
- This setup ensures a proper conversion from the log state to a display-ready format, with all creative grading happening before this final conversion.
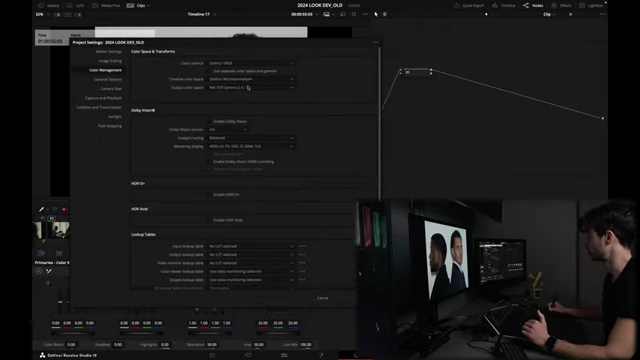
DaVinci Resolve project settings showing the color science and timeline color space configuration. [ 00:01:20 ]
Building the Creative Look with Multiple Nodes [00:02:23]
The video then demonstrates how to build a detailed creative "look" using several nodes, which will eventually be applied at a group or timeline level, making per-clip adjustments minimal.
- Initial Contrast Adjustment:
- A new node is prepended before the final Rec. 709 conversion.
- An S-curve is applied to add contrast, ensuring the middle gray point remains locked for a balanced contrast addition.
- The speaker illustrates how to manually find the middle gray point on the curve if custom power grades aren't available.
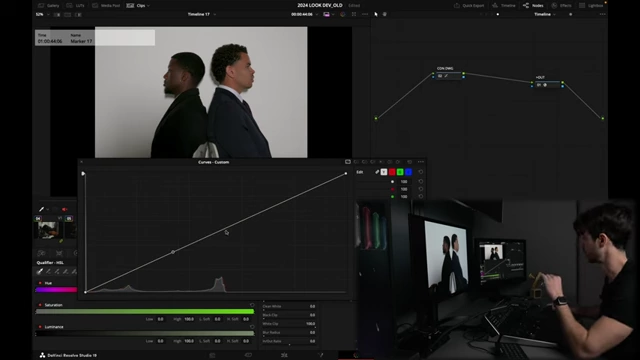
DaVinci Resolve curves tab showing an S-curve applied to adjust contrast. [ 00:03:09 ]
- Color Balance Refinement:
- Another node, named "Balance," is prepended.
- The HDR tab is used to adjust color balance, specifically reducing a reddish tint to achieve more flattering skin tones.
- The speaker notes that these adjustments contribute to the desired aesthetic.
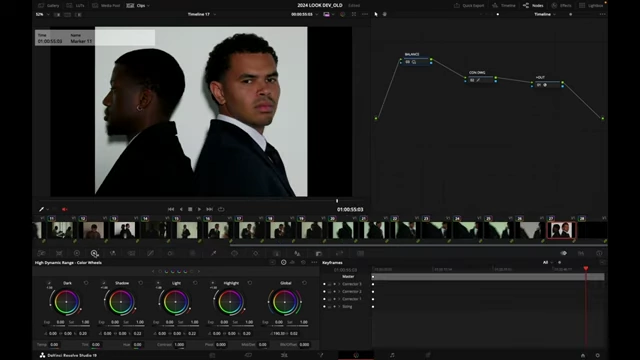
DaVinci Resolve HDR tab being used for color balancing. [ 00:05:28 ]
- Adding Split Tones/Warmth:
- A serial node is added to introduce specific color shifts in highlights.
- Warmth and a touch of red are added to the highlights, creating a "split tone" effect.
- This is described as a "node split."
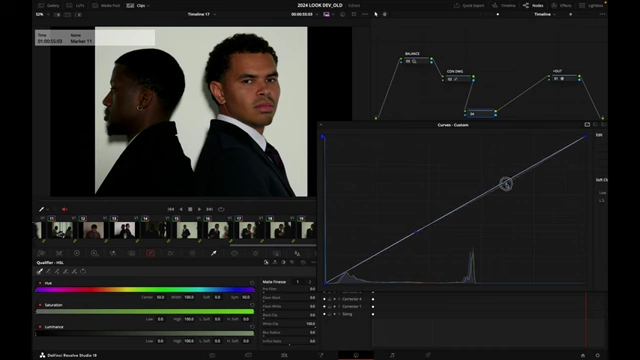
DaVinci Resolve curves tab showing adjustments for warmth and red in highlights, creating a split tone. [ 00:05:58 ]
- Saturation Control:
- A node named "Sat" is prepended before the contrast node.
- The "Sat vs. Sat" curve is used to gently reduce saturation in the highest saturated areas, which also helps clean up skin tones subtly.
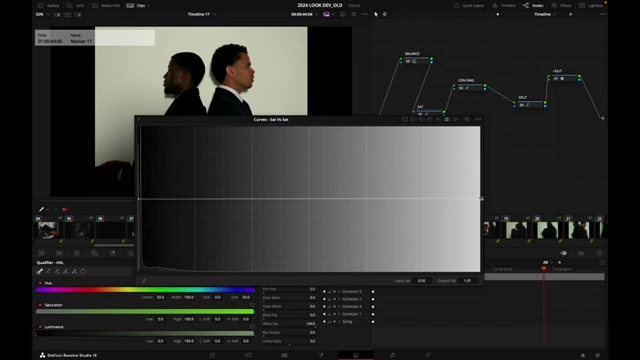
DaVinci Resolve Sat vs. Sat curve showing a reduction in the highest saturated areas. [ 00:06:47 ]
- Skin Tone Compression:
- Before the "Sat" node, a new node is added for skin tone adjustments.
- The Color Warper tool (in HSP log mode) is used to compress the skin vector.
- This involves rotating hue branches clockwise and counter-clockwise to bring the skin tones closer together on the vectorscope, improving their appearance.
- This node is named "Skin."
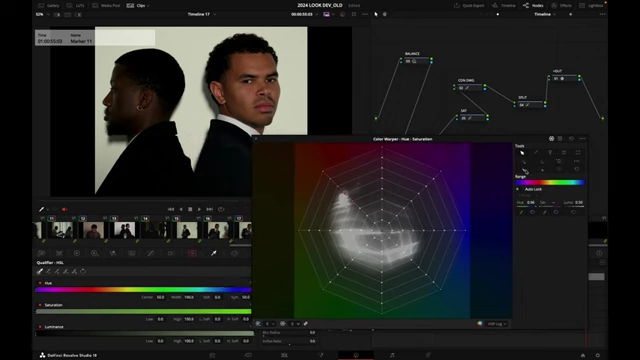
DaVinci Resolve Color Warper being used to compress the skin vector for improved skin tones. [ 00:07:47 ]
- Reviewing the Look: The full multi-node "look" is reviewed, and the speaker confirms satisfaction with the overall aesthetic. This complex series of nodes constitutes the "look" that will be applied across all clips via group grading.
The complete DaVinci Resolve node tree demonstrating the "look" built with multiple serial nodes for contrast, color balance, split tones, saturation, and skin tone adjustments. [ 00:08:36 ]
The One-Node Approach for Clip-Level Grading [00:10:03]
Once the overarching creative "look" is finalized and applied at a group or timeline level, the philosophy shifts to using only one node for individual clip adjustments.
- Principle: If the "look" is well-designed and performs the "heavy lifting," individual clips should only require minor adjustments to match and integrate seamlessly.
- Practical Application:
- For each new shot, the existing multi-node "look" is automatically applied (or pasted from a grabbed still).
- A single adjustment node is then used to make necessary changes, primarily to exposure and subtle color balance, to blend the clip with the established look.
- Examples include:
- The speaker repeatedly demonstrates how these minor adjustments are sufficient for various shots using only this single "correction" node.
- Benefits:
- Simplicity: Greatly simplifies the per-clip grading process.
- Consistency: Ensures a consistent overall aesthetic across the entire project, as the primary "look" remains uniform.
- Efficiency: Speeds up grading and re-grading, as changes to the core "look" can be made once at the group/timeline level, and individual clip adjustments are minimal.
- No Third-Party Plugins: Emphasizes that professional looks can be achieved without relying on external plugins or DCTLs, just native DaVinci Resolve tools.
- Goal: The ultimate goal is to minimize the number of nodes used at the clip level, ideally aiming for just one, while acknowledging that sometimes a power window or secondary correction might be needed.
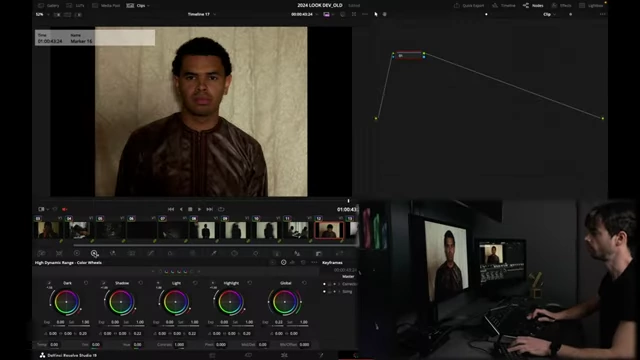
A single DaVinci Resolve node being used for individual clip adjustments, with the HDR tab open. [ 00:10:35 ]