Primary Surfacing Episode 10: Creating Curvature Continuous Ball Corners in Rhino
This video demonstrates a method for creating basic curvature-continuous ball corners in Rhino, emphasizing the importance of clean primary surfaces.
- The process begins by establishing curvature-continuous base surfaces, highlighting the common issue of a three-sided hole at the corner.
- The solution involves transforming this three-sided problem into a four-sided one by strategically moving control points of the surrounding surfaces.
- A crucial step is cleaning up uneven edges using a "pull and match surf" technique, which creates a planar and curvature-continuous edge.
- After mirroring the cleaned edge, a blend curve is created, followed by generating the final corner surface using "surface by edge curves."
- The video then details how to achieve G2 curvature continuity by applying "Match Surf" iteratively to each side of the corner.
- The importance of maintaining low point density on primary surfaces is stressed, as it provides greater flexibility for point editing and achieving smooth transitions compared to overly dense surfaces.
- Finally, Zebra analysis is used to visually confirm the smooth and curvature-continuous blend of the completed ball corner.

The completed and joined 3D model with a clean, curvature-continuous ball corner. [ 00:08:05 ]
Introduction to Ball Corners and the Three-Sided Problem [0:00]
The video introduces the common problem of creating ball corners in 3D modeling software like Rhino.
- Initial Setup: The demonstration starts with a simple box corner where all adjacent surfaces are designed to be curvature continuous (degree five by degree one).
- The surfaces have a minimum number of control points, which is crucial for flexibility.
- This "simple case" approach is preferred, allowing for gradual addition of complexity.
- The Three-Sided Hole Problem: The challenge arises at the actual corner where three curvature-continuous surfaces meet, forming a three-sided opening.
- Directly filling this three-sided hole with a surface often results in a corner that is not curvature continuous, leading to visual imperfections.
- The goal is to transform this three-sided problem into a four-sided one, which is easier to manage and achieve continuity.

An initial 3D model of a box with rounded edges, highlighting the three-sided corner problem. [ 00:01:35 ]
Transforming the Corner to Four-Sided [1:29]
To convert the three-sided hole into a four-sided one, control points are manipulated.
- Dragging Control Points: The presenter demonstrates dragging the control points of the adjacent surfaces to "open up" the corner area.
- This process effectively creates a wider, more manageable opening at the corner.
- Maintaining Curvature Continuity: A key advantage of starting with simple, low-density surfaces is that moving these outer control points on flat planes can maintain curvature continuity with the main surfaces.
- This flexibility allows for precise adjustment without disrupting the smooth flow of the existing surfaces.

Control points being adjusted on the rounded edge of the 3D model to transform the three-sided corner into a four-sided opening. [ 00:01:50 ]
- This flexibility allows for precise adjustment without disrupting the smooth flow of the existing surfaces.
Cleaning Up Edges Using Pull and Match Surf [2:50]
Before creating the final ball corner surface, any inconsistencies along the edge must be cleaned.
- Addressing Wobble/Inconsistencies: Sometimes, even with careful point manipulation, the edges might have slight "wobbles" or not be perfectly planar.
- This technique is vital for achieving perfectly crisp and clean edges.
- The Cleanup Process:
- A straight line curve is drawn from the start to the end of the problematic edge.
- This curve is then extruded in a convenient direction to create a temporary planar surface.
- The 'Pull' command is used to project the original wobbly edge curve onto this new planar surface, effectively straightening it.
- Subsequently, 'Match Surf' is applied by position to match the existing surface to the newly pulled curve, ensuring the edge is perfectly planar and curvature continuous.
- This method results in a perfectly crisp edge where desired.

The 'Pull' command being used to project an existing curve onto a planar surface, followed by 'Match Surf' to create a clean, planar, and curvature-continuous edge. [ 00:03:35 ]
Creating the Ball Corner Surface [3:58]
With the edges prepared, the next step is to construct the ball corner itself.
- Mirroring Edges: The cleaned-up edge is mirrored to the opposite side of the corner, ensuring symmetry.
- Blend Curve: A 'Blend Curve' is created between the two mirrored edges.
- This blend curve is set to "curvature" continuity on both ends, establishing a smooth transition.

The 'Adjust Curve Blend' dialog box showing "Curvature" continuity selected for the blend curve between two mirrored edges. [ 00:04:13 ]
- This blend curve is set to "curvature" continuity on both ends, establishing a smooth transition.
- Surface by Edge Curves: The final ball corner surface is generated using the 'Surface by Edge Curves' command.
- This method creates a clean and tidy surface, leveraging the pre-existing, well-defined edges and blend curve.
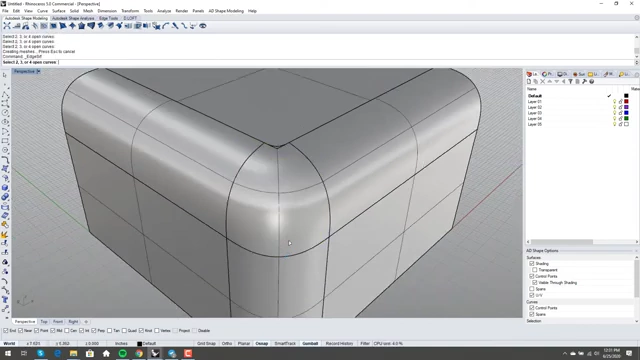
The newly created ball corner surface, generated using 'Surface by Edge Curves', filling the corner of the model. [ 00:04:25 ]
- This method creates a clean and tidy surface, leveraging the pre-existing, well-defined edges and blend curve.
Achieving G2 Curvature Continuity [4:36]
Initial inspection of the new surface may reveal G2 continuity issues, which need to be resolved for a perfect blend.
- Initial Check: Turning on control points or using analysis tools immediately shows if the surface is not tangent or G2 continuous with its neighbors.
- Iterative Match Surf: While 'Match Surf' can be used for multiple matches at once, the video suggests that for complex blends, it is often more effective to apply 'Match Surf' individually to each side.
- Match each boundary of the new corner surface to its corresponding adjacent surface by "curvature," ensuring "match target iso curve direction."
- This methodical approach helps resolve G2 discontinuities.
- Point Editing: Even after achieving G2 continuity, minor aesthetic adjustments can be made by point editing the control points of the new surface.
- This allows for fine-tuning the visual flow and ensuring the surface "looks right."

A global matching analysis confirms G2 curvature continuity has been achieved on the ball corner surface after iterative 'Match Surf' applications. [ 00:05:55 ]
- This allows for fine-tuning the visual flow and ensuring the surface "looks right."
Importance of Clean Primary Surfaces [6:35]
The video strongly emphasizes the benefits of starting with clean, low-density primary surfaces.
- Flexibility with Low Point Density: Surfaces with a minimum number of control points (low density) offer significant flexibility.
- Control points can be moved and adjusted (as demonstrated with the edge cleanup) while maintaining curvature continuity.
- This allows for dynamic adjustments and refinements throughout the modeling process.
- Limitations of High Point Density: In contrast, surfaces with high point density, often resulting from operations like 'Network Surf' or rebuilding with many points, offer little to no flexibility for point editing.
- Moving individual points on a dense surface has a negligible impact on the overall edge shape, making fine adjustments extremely difficult.
- Overly dense surfaces lead to denser trims and subsequently denser ball corner surfaces, complicating the entire process.

A highly dense surface, illustrating the limited flexibility for point editing on such surfaces. [ 00:07:10 ] 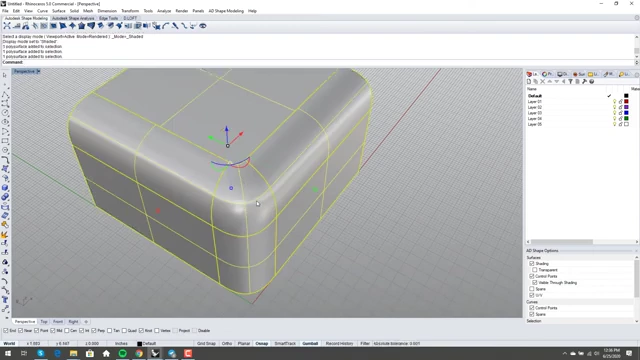
The final model with control points displayed, demonstrating the low point density of the primary and corner surfaces for optimal flexibility. [ 00:09:12 ]
Final Review of the Ball Corner [7:50]
The completed ball corner is reviewed to ensure it meets quality standards.
- Joining Surfaces: All individual surfaces are joined together to form a single, cohesive solid or polysurface.
- Zebra Analysis: Zebra stripe analysis is used to visually inspect the curvature continuity across the entire model.
- Smooth, continuous zebra stripes indicate a perfect G2 curvature blend, signifying a high-quality surface.
- Any disruptions or breaks in the stripes would indicate areas of discontinuity.
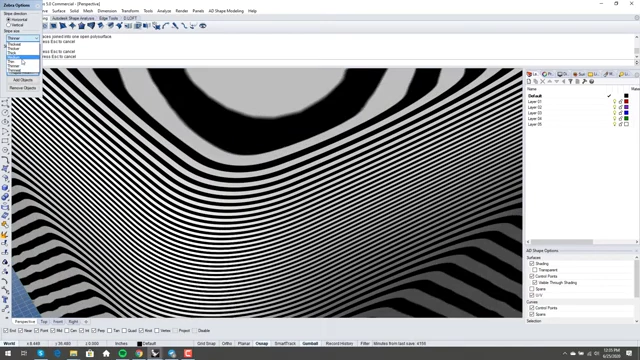
A detailed zebra stripe analysis of the entire model confirms a smooth and continuous reflection pattern across all joined surfaces, indicating G2 curvature continuity. [ 00:08:30 ]
- Summary of Method: By paying attention to primary surfacing techniques and transforming a three-sided problem into a four-sided one through strategic control point manipulation and cleanup, a smooth, curvature-continuous ball corner can be achieved quickly and effectively.