DaVinci Resolve Color Grading: Beginner-Friendly and Advanced Workflows for Cinematic Looks
This guide offers two distinct color grading workflows in DaVinci Resolve, catering to both beginners and advanced users aiming for a cinematic aesthetic.
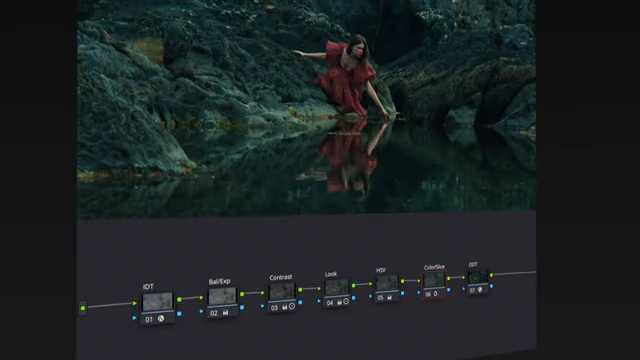
- Beginner Workflow (7 Nodes):
- Starts with essential DaVinci Resolve color management settings for consistent results.
- Details setting up an input and output color space transform (e.g., Sony S-Gamut 3 / S-Log 3 to DaVinci YGamut Intermediate and then to Rec.709) to maximize image potential.
- Covers basic contrast adjustments using sliders and pivots to add dimension.
- Explains color balancing with the vectorscope to neutralize tints, achieving a natural base.
- Introduces creating a "look" by establishing a cinematic palette of warmer highlights and cooler shadows using lift, gamma, and gain, alongside log wheel adjustments.
- Demonstrates how to use HSV to enhance color saturation without affecting luminance.
- Concludes the beginner section by applying ColorSlice for deep, rich film density.
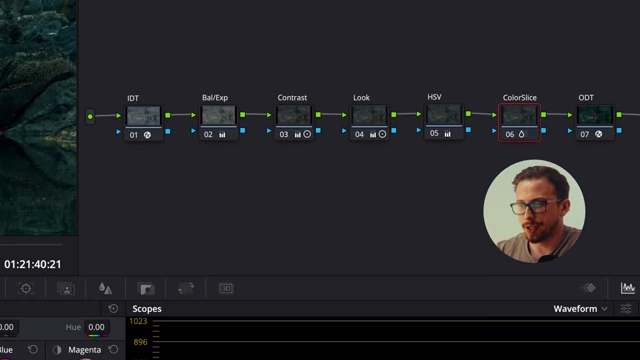
The complete 7-node beginner workflow in DaVinci Resolve [ 00:07:58 ]
- Advanced Workflow (Pro-Level Film Texture):
- Explores adding professional film texture elements such as chromatic aberration, film halation, and custom film grain.
- Each step aims to replicate the characteristics of film, going beyond basic color adjustments to achieve a polished, high-end look.
Introduction [00:00:00]
This video provides a comprehensive guide to color grading in DaVinci Resolve, presenting two distinct workflows: a beginner-friendly 7-node setup and an advanced workflow for achieving pro-level film texture. The goal is to simplify the color grading process, enabling users to achieve cinematic results more efficiently.
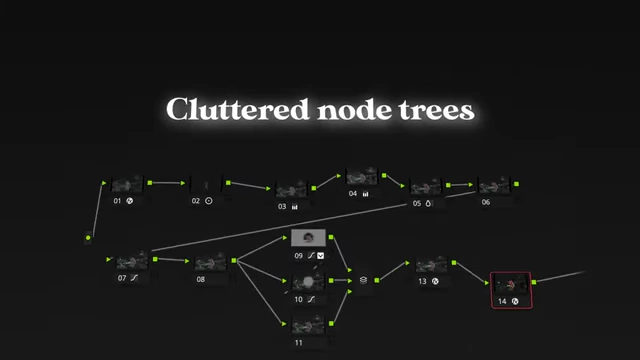
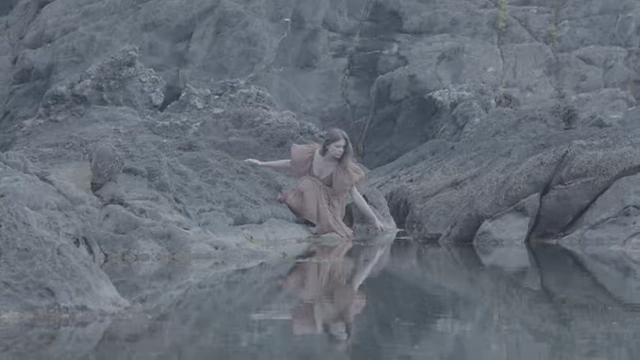
Node Tree Setup [00:01:00]
The tutorial begins by outlining the construction of a beginner-friendly node tree, emphasizing a streamlined approach compared to overly complex setups.
- Initial DaVinci Resolve Project Settings [00:01:07]
- Navigate to color management settings.
- Set
Timeline Color SpacetoDaVinci YRGB Intermediate. - Set
Output Color SpacetoRec.709 Gamma 2.4(orRec.709Afor MacBook users). This ensures consistent color representation across different viewing platforms.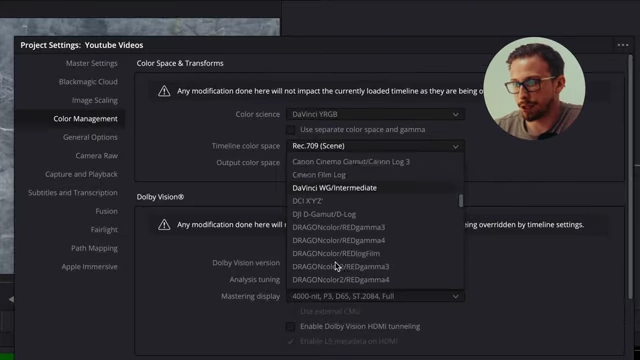
DaVinci Resolve Project Settings showing `Timeline Color Space` set to `DaVinci YRGB Intermediate` and `Output Color Space` options [ 00:01:11 ]
- Building and Labeling the 7-Node Tree [00:01:30]
- Add seven serial nodes (using
Option+Son Mac). - Label each node based on its intended function for clarity and organization:
Color Space,Contrast,Balance,Look,HSV,ColorSlice, etc.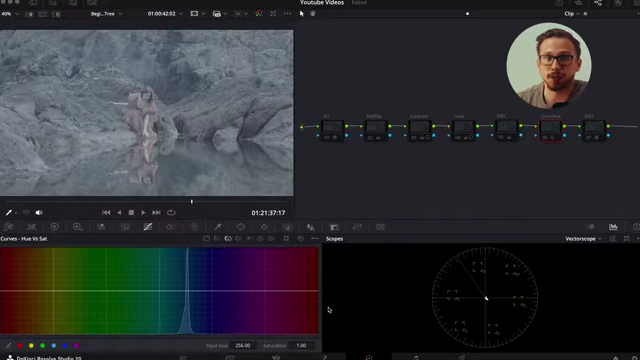
The complete 7-node beginner workflow in DaVinci Resolve, with vectorscope and curves visible [ 00:02:00 ]
- Add seven serial nodes (using
Color Space Transform [00:02:03]
The first critical step involves correctly transforming the footage into a working color space, which allows for maximum creative control and dynamic range.
- Applying Color Space Transform (CST) [00:02:10]
- Drag the
Color Space Transformeffect into two nodes: anIDT(Input Device Transform) node and anODT(Output Device Transform) node. - This creates a wide working range, providing more flexibility for color grading.
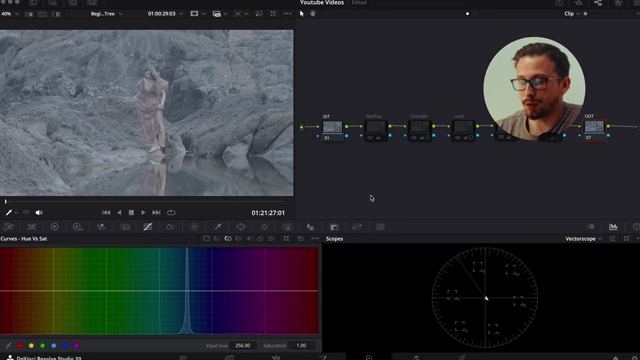
DaVinci Resolve node graph with the IDT (Input Device Transform) node selected [ 00:02:07 ]
- Drag the
- Configuring IDT Node (Input) [00:02:31]
- For Sony footage, set
Input Color SpacetoSony S-Gamut3andInput GammatoSony S-Log3. - Set
Output Color SpacetoDaVinci Wide GamutandOutput GammatoDaVinci Intermediate. - This converts the camera's log footage into DaVinci Resolve's native wide gamut color space.
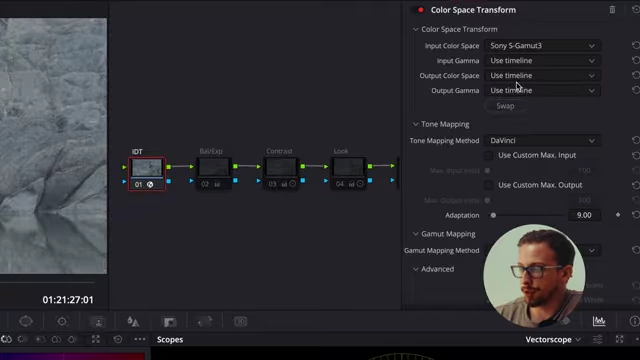
DaVinci Resolve's Color Space Transform settings for the IDT node, configured for Sony S-Gamut3 and S-Log3 input [ 00:02:32 ]
- For Sony footage, set
- Configuring ODT Node (Output) [00:02:44]
- Set
Output Color SpacetoRec.709andOutput GammatoRec.709 Gamma 2.4(orRec.709Afor MacBook). - This transforms the wide gamut footage back into a standard viewing space for consistent output.
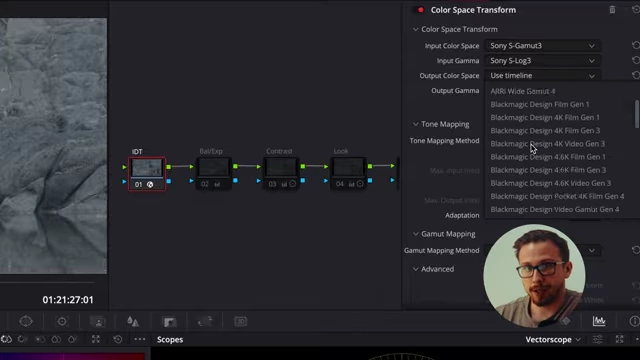
DaVinci Resolve's Color Space Transform output settings, showing `DaVinci Wide Gamut` and `DaVinci Intermediate` as output options [ 00:02:40 ] 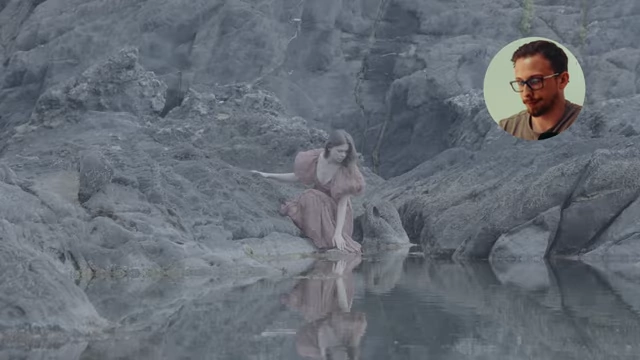
Footage after the initial Color Space Transform, showing a more normalized image [ 00:02:55 ]
- Set
- Understanding Rec.709 and DCI [00:02:56]
Rec.709is the standard for High Definition Television (HDTV), defining color gamut, luminance, and signal characteristics for HD content, ensuring consistency across various screens and platforms.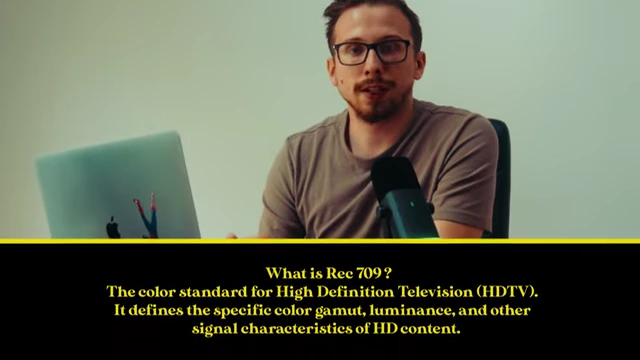
Definition of Rec.709 as the color standard for High Definition Television (HDTV) [ 00:02:59 ] P3-DCIis the color standard for digital theatrical projection, used for projects intended for cinema release.
Contrast Adjustment [00:03:34]
After establishing the color space, the next step is to add contrast, bringing dimension and depth back into the image.
- Adjusting Contrast and Pivot [00:03:48]
- Utilize the contrast slider to increase or decrease contrast.
- Use the pivot slider to control where the contrast adjustment is centered.
- Pivoting right darkens the image (targeting shadows), while pivoting left brightens it (targeting highlights).
- Example Settings [00:04:12]
- Set contrast around
1.4and pivot around.563to achieve desired depth and texture.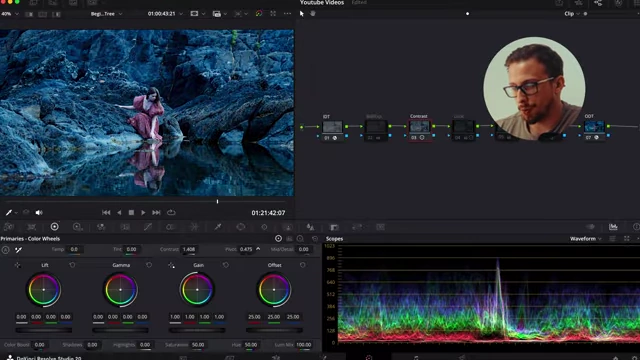
DaVinci Resolve's color wheels with Contrast set to 1.458 and Pivot to 0.475 [ 00:04:14 ]
- Set contrast around
- Impact on Image [00:04:21]
- This single node can significantly enhance the image, adding texture to elements like rocks and depth to faces.
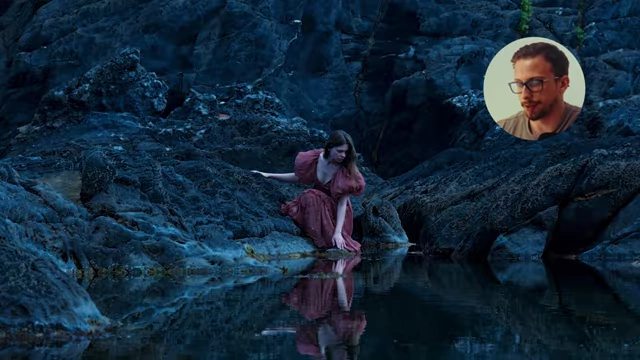
Footage after contrast adjustments, showing increased depth and dimension [ 00:04:21 ]
- This single node can significantly enhance the image, adding texture to elements like rocks and depth to faces.
Color Balance [00:04:33]
Addressing any unwanted color casts is crucial for a natural-looking image, even if the final look will be stylized.
- Neutralizing Color Tints [00:04:44]
- Go to the
Balancenode. - Use the
Vectorscopeto identify and neutralize dominant color tints. - Adjust the
Offsetwheel in the opposite direction of the dominant tint (e.g., shift away from blue to balance a blue cast).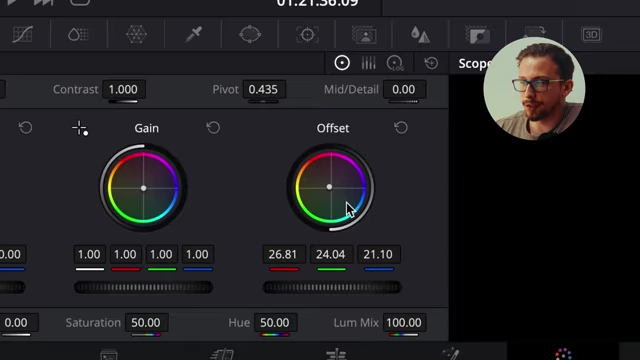
DaVinci Resolve Color Wheels showing the Offset control being adjusted to neutralize a color tint [ 00:04:49 ]
- Go to the
- Result [00:04:53]
- The image becomes more neutral and balanced, making the subject stand out and surroundings appear more natural.
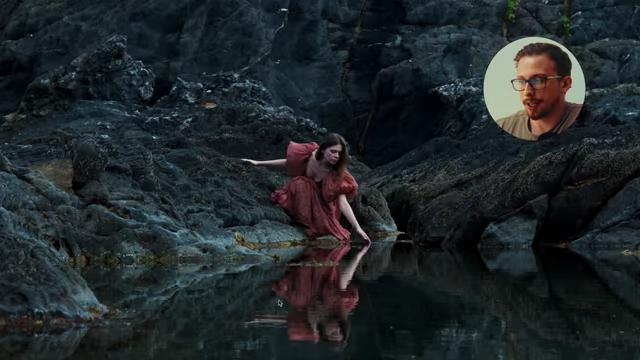
Footage after color balance, achieving a neutral and natural base image [ 00:04:54 ]
- The image becomes more neutral and balanced, making the subject stand out and surroundings appear more natural.
Creating the "Look" [00:05:27]
This stage involves shaping the image to achieve a specific cinematic aesthetic, often through intentional color separation.
- Cinematic Color Palette [00:05:29]
- Aim for warmer highlights to draw attention to the subject.
- Introduce cooler midtones and shadows to add depth and mood.
- This contrast between warm and cool tones is key to a cinematic feel.
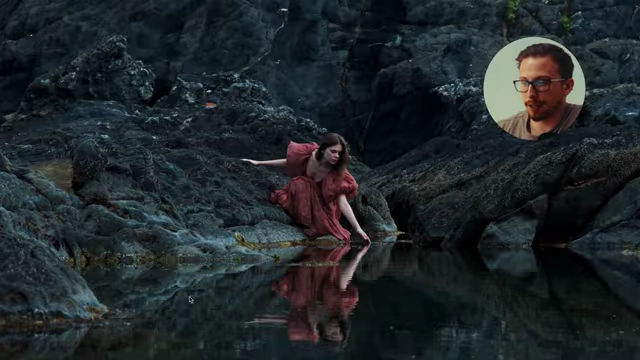
Footage after applying the 'Look' node, showing warmer highlights on the subject and cooler shadows in the environment [ 00:05:39 ]
- Adjusting Lift, Gamma, and Gain [00:05:48]
- Use the
Lift,Gamma, andGainwheels to apply these color shifts. - Example settings provided for
Lift(0.02, -0.02, 0.00),Gamma(0.00, 0.00, 0.00), andGain(1.07, 1.07, 0.91).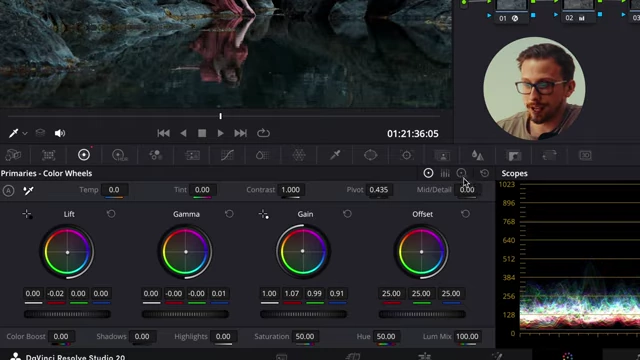
DaVinci Resolve Color Wheels with specific Lift, Gamma, and Gain settings for creating the cinematic 'look' [ 00:05:48 ]
- Use the
- Refining with Log Wheels [00:05:50]
- Decrease the low and high ranges in the log wheels to gain more precise control over highlight and shadow areas.
- This helps DaVinci Resolve better detect and adjust shadows and highlights based on the overall exposure.
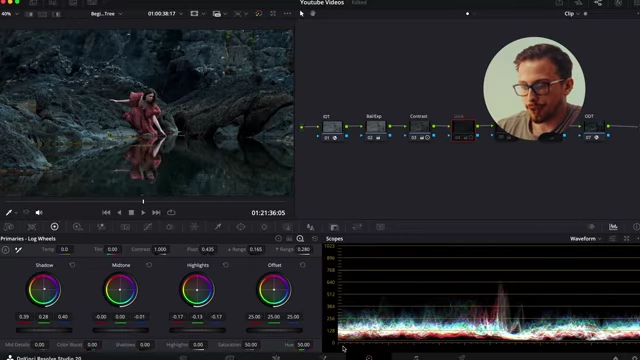
DaVinci Resolve Log Wheels interface, showing adjusted low and high ranges for precise control over shadows and highlights [ 00:06:13 ]
HSV (Hue, Saturation, Value) [00:06:28]
This technique allows for independent control of color intensity without affecting the image's luminance.
- Gamma for Saturation [00:06:34]
- Enable
HSVin the color wheels. - Disable channels 1 and 3 to allow
Gammato control saturation instead of brightness. - Increase
Gammato make colors richer without over-exposing highlights. - This method controls color intensity without altering luminance, preventing blown-out highlights that might occur with the standard saturation slider.
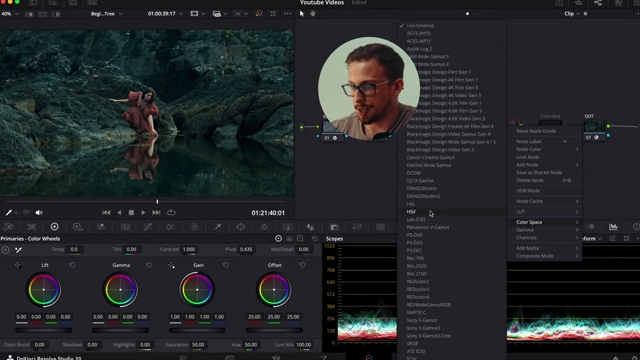
DaVinci Resolve's context menu showing the option to enable HSV (Hue, Saturation, Value) mode for color wheels [ 00:06:40 ]
- Enable
- Adjusting Gamma and Gain [00:07:03]
- Increase
Gammaand slightly lowerGain(e.g., Gamma to 1.00, Gain to 0.94, 0.94, 0.84) to achieve rich overall density and saturation.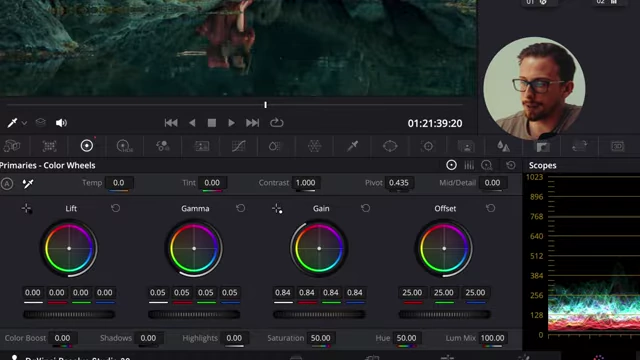
DaVinci Resolve Color Wheels with HSV enabled, showing Gamma set to 1.00 and Gain to 0.84 for saturation control [ 00:07:08 ]
- Increase
ColorSlice [00:07:16]
The final step in the beginner workflow adds a layer of deep film density.
- Enhancing Film Density [00:07:17]
- Enable
ColorSliceto add deep, rich film density. - ColorSlice amplifies the effects of the previous
HSVnode, making colors deeper rather than simply replacing previous adjustments. - This deepens the saturation of elements like the woman's dress and the rocks, creating a more pronounced film look.
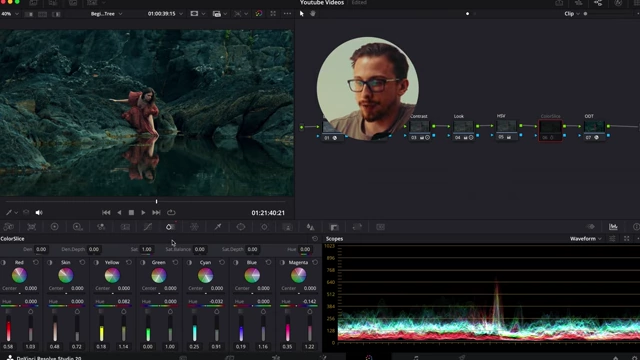
DaVinci Resolve's ColorSlice effect interface, showing controls for deep film density adjustments [ 00:07:20 ] 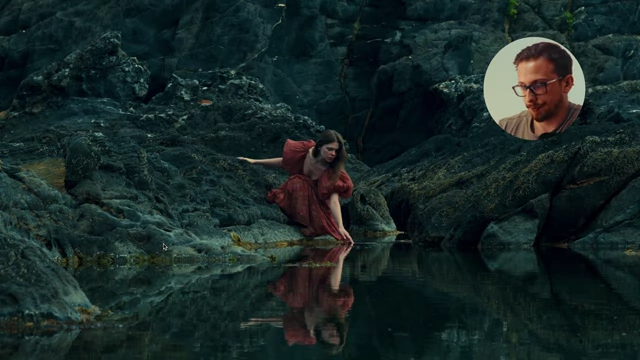
Footage after applying ColorSlice, showing enhanced deep and rich film density [ 00:07:23 ]
- Enable
- Outcome [00:07:47]
- The result is a deeply rich film look that is easily replicable.
- It's important to remember that these are foundational tools, and adjustments may be necessary for different projects.
The complete 7-node beginner workflow in DaVinci Resolve [ 00:07:58 ]
Advanced Workflow [00:08:03]
This section introduces professional techniques to elevate footage to a high-end, film-like texture.
- Chromatic Aberration [00:08:31]
- Definition: An optical distortion where the lens fails to focus all colors (reds, greens, blues) at a single point, creating color fringes around edges, a characteristic of older film lenses.
- Application:
- Create a
Power Windowaround the subject. - Invert the window and soften its edges.
- Apply chromatic aberration in the effects tab with specific settings (e.g.,
Red - Blue Edge: -0.344,Green - Purple Edge: 0.264,Blue - Yellow Edge: -0.587). - This effect is applied to the periphery, making the distortion subtle and not distracting from the subject.
- Lower the exposure in curves to make the subject stand out further.
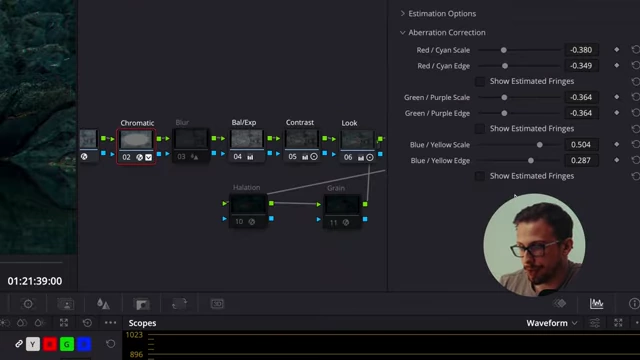
DaVinci Resolve node graph with the Chromatic Aberration node selected, showing specific correction settings in the effects tab [ 00:09:02 ]
- Create a
- Film Blur [00:09:24]
- Adjust the
H/V Ratioto focus primarily on the edges of the shot. - Increase the
Radiusby a few points to remove digital sharpness. - This softens the digital edges, contributing to a more organic, film-like appearance.
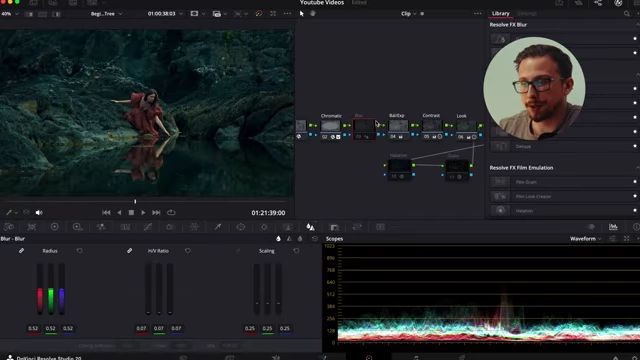
DaVinci Resolve node graph with the Blur node selected, showing H/V ratio and Radius settings for film blur [ 00:09:24 ]
- Adjust the
- Film Halation [00:09:42]
- Definition: The spreading of light beyond its proper boundaries on film, creating a soft glow, especially around bright areas.
- Application:
- Use Resolve's built-in
Halationeffect found in the effects tab. - The key is to keep the halation subtle.
- Adjust
StrengthandSpreadso the effect is noticeable only upon close inspection, preventing an overly harsh or artificial look. - This subtle application helps sell the cinematic texture without overwhelming the image.
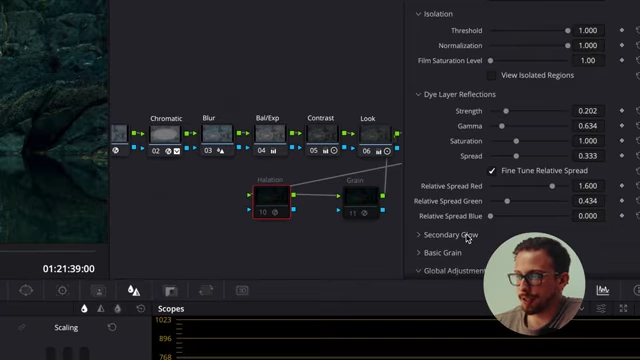
DaVinci Resolve's Halation effect settings, showing controls for strength and spread to add subtle film halation [ 00:09:42 ] 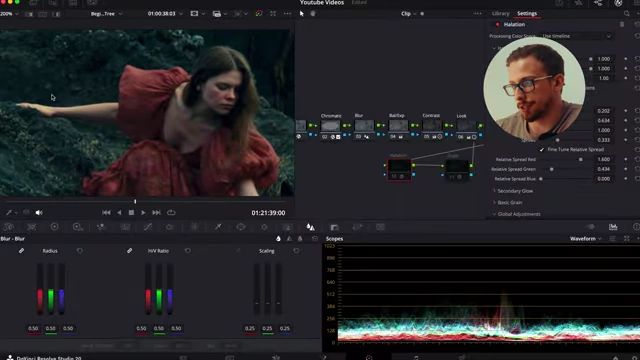
Close-up of footage demonstrating subtle film halation effect around bright areas [ 00:10:00 ]
- Use Resolve's built-in
- Custom Film Grain [00:10:16]
- While Resolve offers many grain presets, creating a custom build allows for precise control.
- Adjustments: Focus on
Grain Size,Grain Strength, andSoftness. - Example settings for custom grain:
Grain Size: 0.258,Grain Strength: 1.000,Softness: 0.500.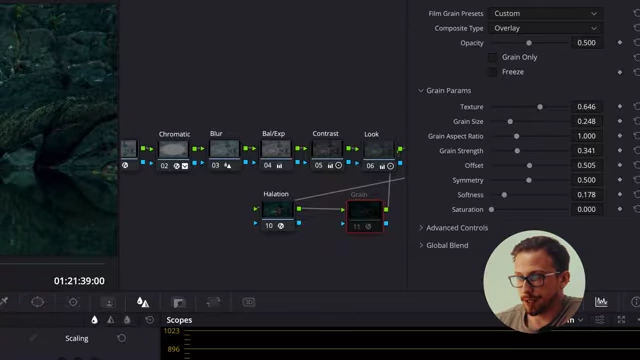
DaVinci Resolve's custom film grain settings, showing adjustments for Grain Size, Grain Strength, and Softness [ 00:10:27 ] - Applying film grain is the final touch to enhance the overall film aesthetic.
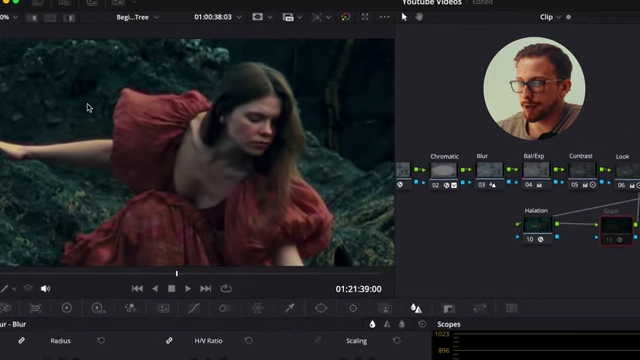
Close-up of footage before and after applying custom film grain, adding film-like texture [ 00:10:36 ]
Conclusion [00:10:38]
These beginner and advanced node tree variations are designed to make color grading quicker and more effective. By using a structured workflow, there's no need for guesswork or adding unnecessary nodes for adjustments. Specific issues like darkness or saturation can be addressed within their dedicated nodes (Exposure, HSV, respectively).