Essential DaVinci Resolve Settings and UI Customizations for an Optimized Workflow
Thom Lyons | Visual+Aid Productions
Summary:
This video provides a comprehensive guide to essential DaVinci Resolve settings and UI customizations to enhance workflow efficiency. Key adjustments covered include:
- User Interface (UI) Optimization: Enabling vertical video layouts, focus indicators, and neutral gray backgrounds for accurate color perception.
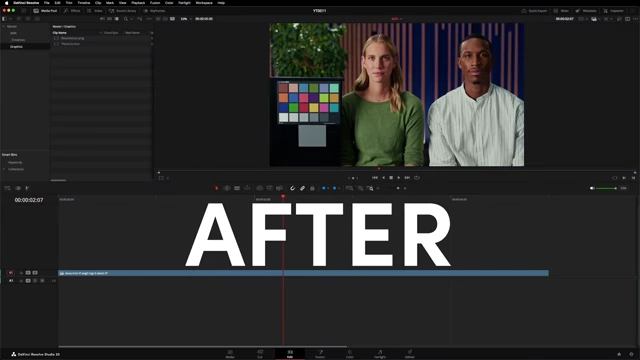
DaVinci Resolve UI with neutral gray background [ 00:01:05 ] - Project Management: Configuring auto-save settings and disabling automatic timeline loading for faster project opening.
- Cache Management: Setting up automatic deletion of old cache files to free up disk space.
- Editing Page Enhancements: Adjusting viewer backgrounds, enabling media pool auto-resync, searching across all bins, and utilizing dual-pane or floating windows for improved organization.
- Page-Specific Tweaks: Customizing node arrangement in Fusion, enabling high-visibility power window outlines in Color, and optimizing the Fairlight mixer and Deliver page render settings.
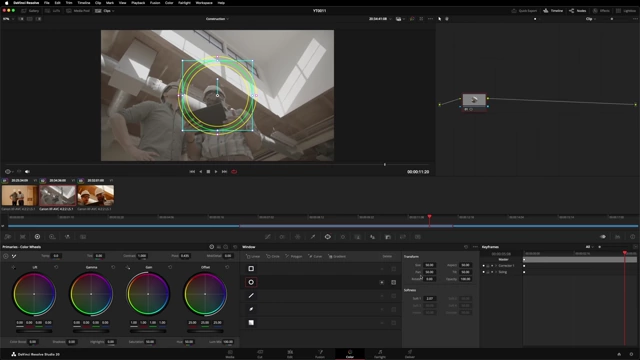
Color page power window outlines with high visibility enabled [ 00:07:42 ] - Addressing Inconsistencies: Highlighting feature disparities between the Cut and Edit pages, such as Dynamic Zoom presets and voiceover teleprompter functionality.
Introduction [0:00]
- The presenter expresses frustration with some default DaVinci Resolve settings and UI layouts, aiming to share crucial adjustments for new machines.
UI Settings [0:09]
- Optimized UI Layouts for Vertical Video:
- Introduced in Resolve 20, this option, when enabled, provides a button in the UI that significantly expands the timeline viewer when working with vertical timelines.
-
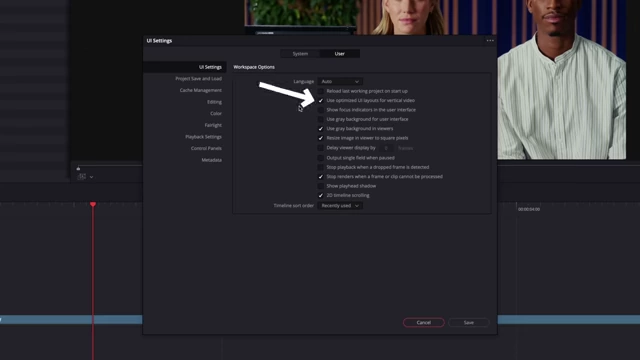
DaVinci Resolve UI Settings with Vertical Video Layout option [ 00:00:16 ] - This feature is available on the Cut, Edit, and Color pages, making it easier to see vertical content.
-
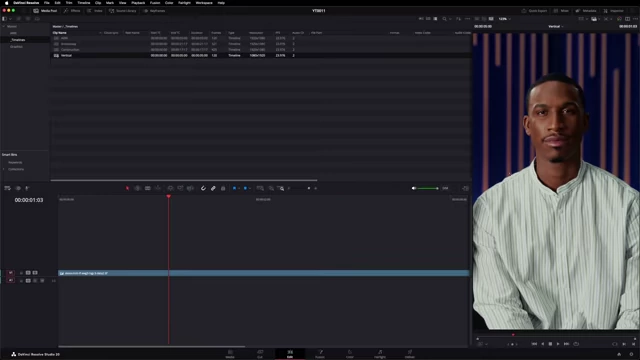
Expanded vertical video viewer in DaVinci Resolve [ 00:00:25 ]
- Show focus indicators in the user interface:
- This adds a thin red line at the top of the currently active panel.
-
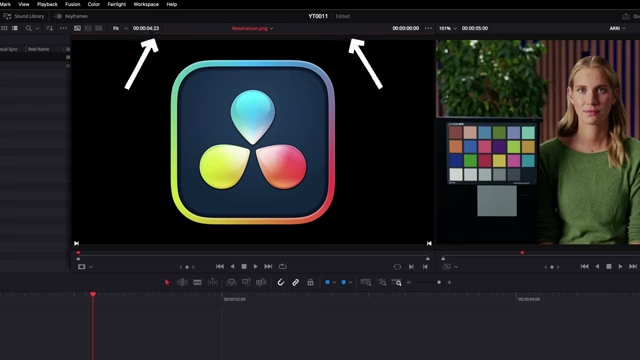
UI focus indicators highlight the active panel [ 00:00:35 ] - It is particularly useful for keyboard shortcut users, clarifying which panel (e.g., source viewer or timeline) is active for actions like marking in/out points.
- Use gray background for user interface:
- By default, Resolve uses a blue-gray UI background.
- Enabling this switches the UI to a neutral, desaturated gray.
- A neutral gray background is recommended for color accuracy, preventing eye fatigue and accidental color compensation during grading, similar to having neutral gray walls in an edit suite.
-
DaVinci Resolve UI with neutral gray background [ 00:01:05 ]
- Use gray background in viewers:
- Turning this on sets the background of all viewers to gray.
- This aids in evaluating image edges during sizing adjustments, as a dark background can obscure where the viewer's edge begins.
-
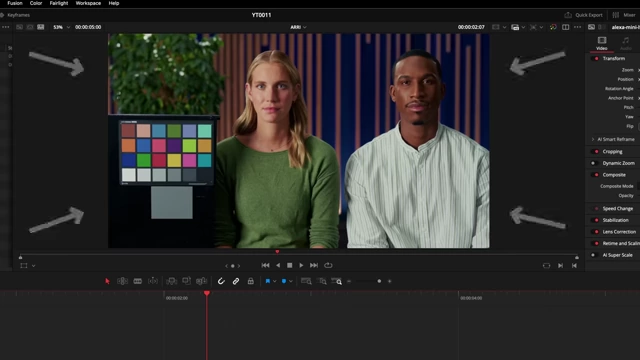
Gray background in viewers to aid in image edge evaluation [ 00:01:20 ]
- 2D timeline scrolling:
- This is a personal preference setting.
- When checked, scrolling the mouse wheel moves the timeline vertically through video and audio tracks.
- When unchecked, it scrolls the entire timeline horizontally. Users should choose what feels more natural to them.
- Timeline sort order:
- Allows setting the default sorting order for timelines displayed in viewer drop-down menus across Resolve.
-
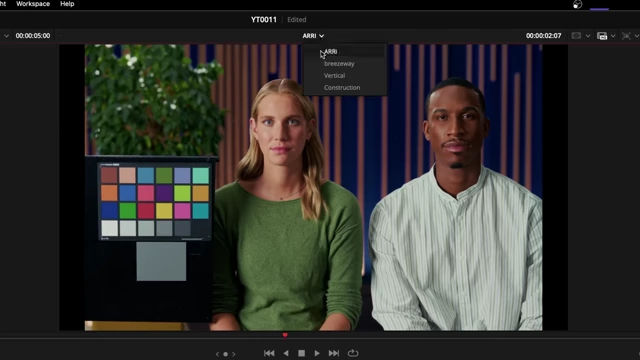
Timeline sort order options in DaVinci Resolve [ 00:01:51 ]
Project Save and Load [1:53]
- Load all timelines when opening projects:
- Keep this setting off.
- Disabling it makes projects open quicker, especially those with numerous timelines.
-
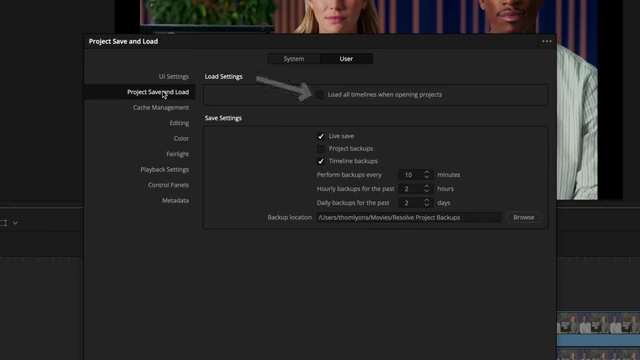
Project Save and Load settings, including auto-save and timeline loading [ 00:01:55 ]
- Save settings (Auto Save):
- Turn all auto-save options on (Live Save, Project backups, Daily backups).
- Configure the backup frequency and duration to personal preference for peace of mind, as even stable editors can crash.
Cache Management [2:16]
- Automatically delete any cache files older than:
- Check this box to automatically delete old cache files.
- Set the number of days after which cache files should be removed.
- This helps prevent hard drive clutter and ensures efficient storage usage.
-
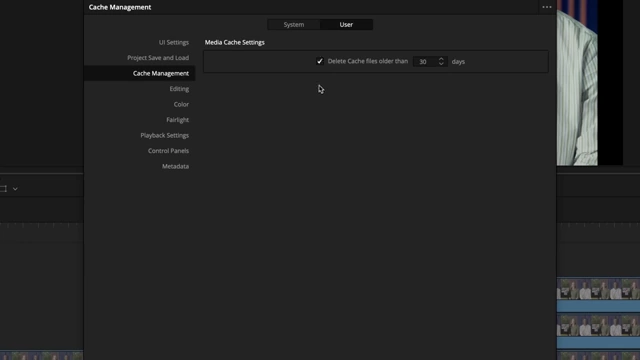
Cache Management settings for automatic cache file deletion [ 00:02:24 ]
Editing [2:25]
- New Timeline Settings - Start timecode:
- This sets the default starting timecode for new timelines.
- While broadcast files often use 01:00:00:00 or 10:00:00:00, online platforms often start at zero. Adjust according to project needs.
-
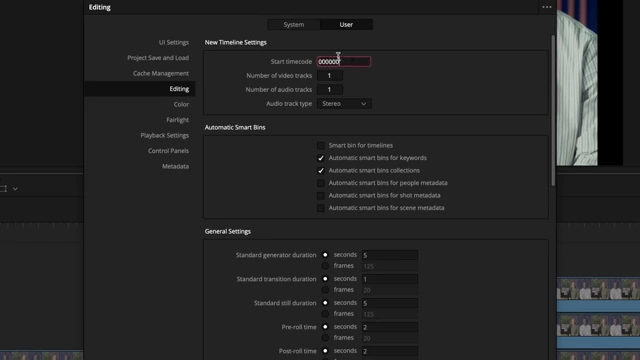
Setting the default start timecode for new timelines [ 00:02:39 ]
- Automatic Smart Bins:
- If using Smart Bins, enable automatic ones to organize clips based on their metadata.
Inconsistencies Between Cut and Edit Pages [2:53]
- The presenter highlights instances where the Cut page offers better functionality for tools also available on the Edit page, without clear justification.
- Dynamic Zoom presets:
- The Cut page includes presets for side-to-side panning or corner-to-corner dynamic zooms.
-
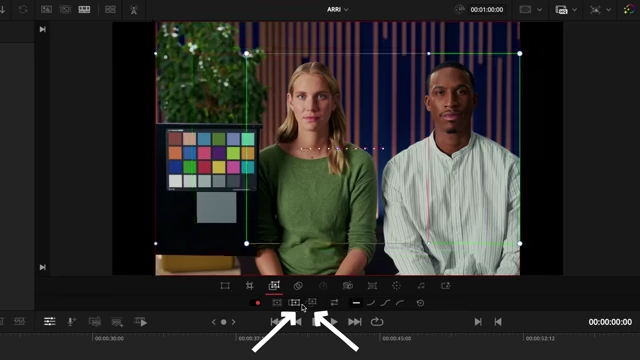
Dynamic Zoom presets available on the Cut page [ 00:03:14 ] - These convenient presets are still absent from the Edit page, making manual setup more fiddly.
- Voiceover recording with built-in teleprompter:
- While both pages allow direct voiceover recording, the Cut page version is more powerful.
- It includes a built-in teleprompter that allows importing text scripts to scroll over the picture during recording. This feature is missing from the Edit page.
-
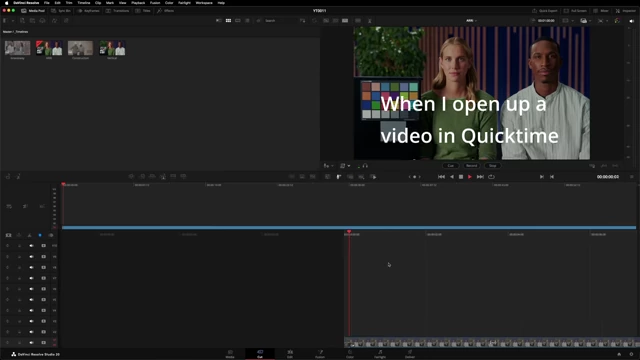
Voiceover recording with a built-in teleprompter on the Cut page [ 00:03:48 ]
General UI and Edit page settings [3:56]
- Viewer background settings (Timeline View Options):
- To better see the edges of your frame when resizing, change the viewer background.
- Options include "checkerboard" or the new "alert red" (in Resolve 20) to highlight transparency issues.
-
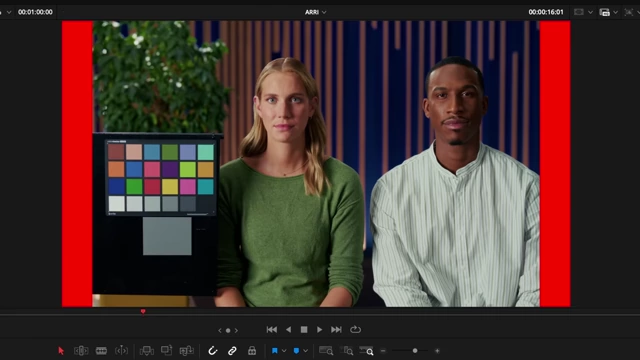
Alert red viewer background highlights transparency issues [ 00:04:09 ]
- Media Pool - Automatically resync media files:
- Right-click in the media pool on a folder and enable this option.
- If you add new files to that folder outside Resolve, they will automatically appear in the media pool.
-
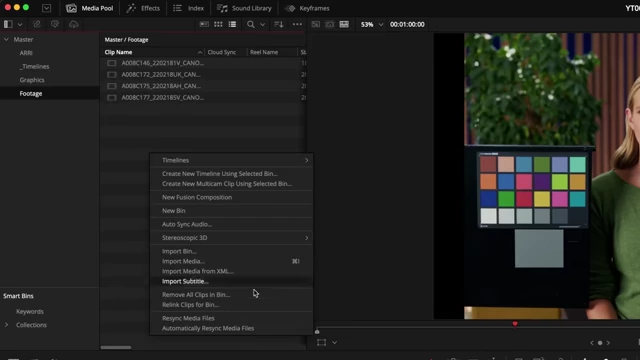
Media Pool context menu to enable automatic media file resync [ 00:04:19 ]
- Media Pool and Effects panel search:
- The default search only searches the current bin.
- Change this setting (via the drop-down next to the search icon) to "All bins" for comprehensive search functionality.
-
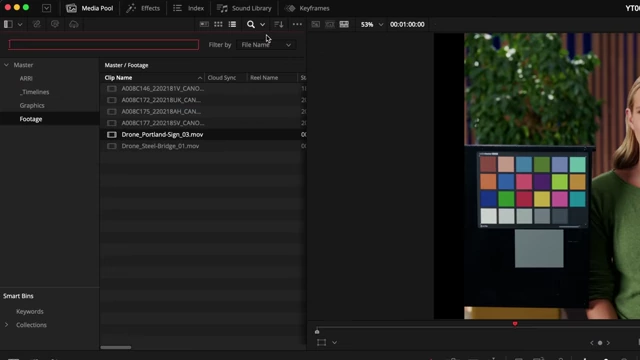
Media Pool search options to search "All bins" [ 00:04:43 ]
- Dual Pane Media Pool:
- Enable this option to have two media pools open simultaneously, useful for bouncing between different bins.
-
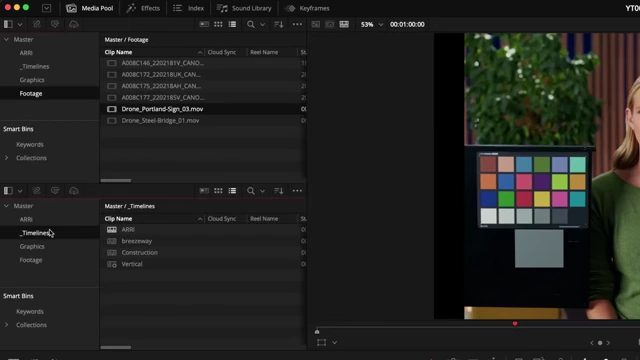
Dual Pane Media Pool displaying two bins simultaneously [ 00:04:53 ]
- Floating Media Pool Window:
- Right-click on a bin and select "Open as new window" to turn the media pool into a floating window.
- This allows repositioning it anywhere on screen, including on a second monitor.
- Project Notes (File > Project Notes):
- Resolve has a built-in basic text pad for project notes.
- It lacks formatting but is useful for keeping notes directly within Resolve, avoiding switching to external applications.
-
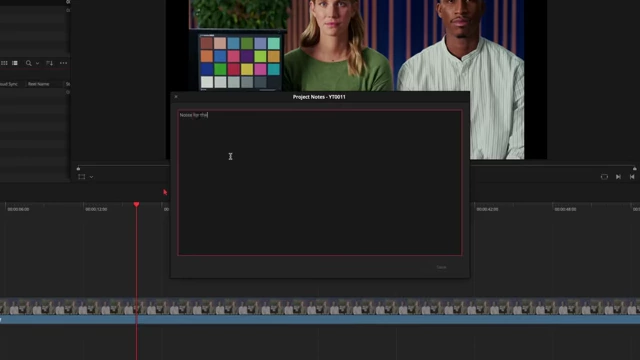
Built-in Project Notes window in DaVinci Resolve [ 00:05:18 ]
- Track EQ, Dynamics, and Track Effects:
- Both the Edit and Cut pages can now access these audio controls directly from the mixer, eliminating the need to go to the Fairlight page first.
-
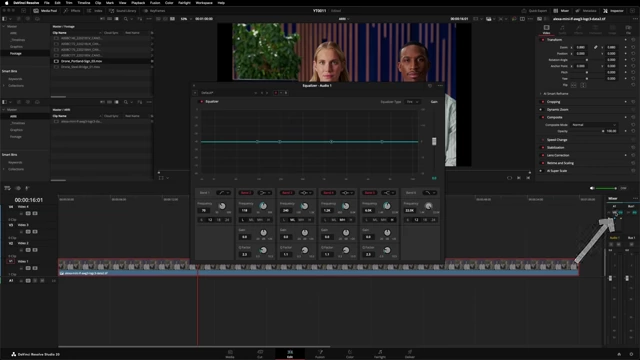
Edit page mixer providing direct access to track EQ and dynamics [ 00:05:23 ]
- Optimize Screen Real Estate:
- Show icons only: Right-click the bottom of the UI and select "Show icons only" to remove page labels.
- Hide Page Navigation: Go to Workspace > Show Page Navigation and turn it off. Pages can still be switched using keyboard shortcuts (e.g., Shift+1 for Media, Shift+2 for Cut, etc.).
-
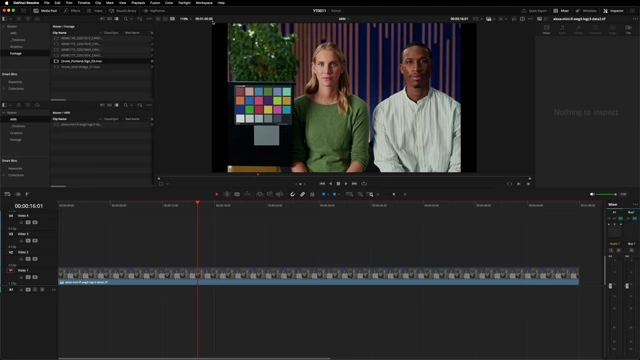
DaVinci Resolve UI with hidden page navigation for more screen real estate [ 00:05:43 ]
Fusion page [5:59]
- Node Editor Settings:
- Arrange tools to grid: Snaps nodes to a grid for cleaner organization.
- Orthogonal pipes: Makes node connections appear in straight lines.
-
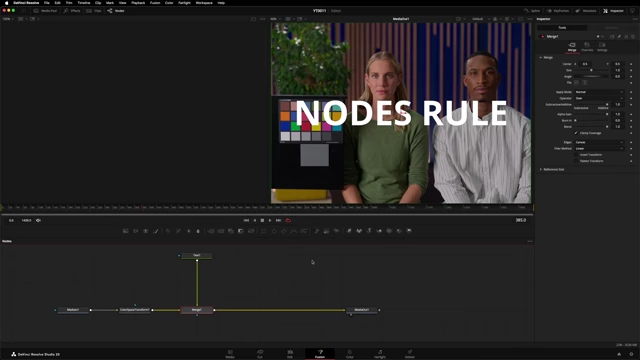
Fusion node editor with orthogonal pipes for clean node connections [ 00:06:13 ] - Add pipe points: Hold Option (Alt on PC) and click a pipe to add a draggable point, allowing custom pipe routing.
- Show tile pictures: Displays a visual representation of what each node is doing.
- Build flow vertically: Arranges node trees from top to bottom instead of side to side.
- Combine this with Workspace > Layout Presets > Fusion Presets (e.g., vertical presets) for optimized vertical video workflows.
- Viewer Guides:
- Toggle guides on/off with Command/Control + G.
- Right-click in the viewer to individually turn guides on or off.
-
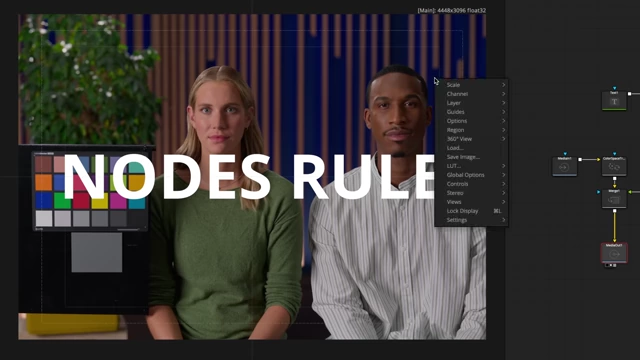
Fusion viewer right-click menu showing guide options [ 00:06:53 ] - Custom guides cannot be created natively, requiring third-party DCTLs like Compositioneer (for Studio version users).
-
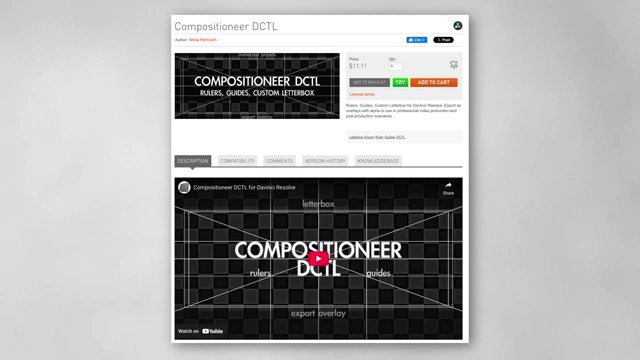
Compositioneer DCTL for custom viewer guides in Fusion [ 00:07:05 ]
- Sub View:
- Click the sub-view icon to access various useful scopes.
-
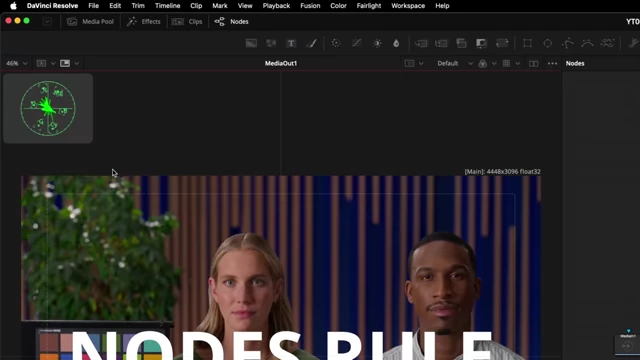
Fusion page sub-view displaying various scopes [ 00:07:22 ] - Scopes can be resized, moved, and made full screen by hitting Shift + V.
Color page [7:30]
- High visibility power window outlines:
- Go to Preferences > User > Color and enable this.
- On-screen power window controls will change colors: green for the window shape, yellow for softness feathering, and blue for resizing, making interactions clearer.
-
Color page power window outlines with high visibility enabled [ 00:07:42 ]
- Keyframes panel - Copying Grades and Stabilization:
- When copying grades from one shot to another using middle-mouse click, stabilization can be accidentally removed if the Keyframes panel setting is on "All."
- Change the setting in the Keyframes panel from "All" to "Color" to prevent sizing information (like stabilization) from being overwritten.
-
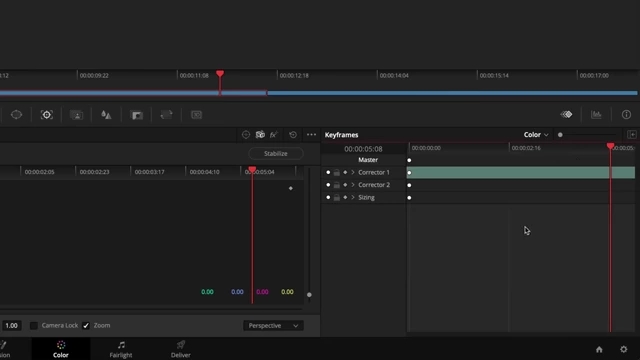
Keyframes panel setting changed to "Color" to prevent stabilization overwrites [ 00:08:02 ]
Fairlight page [8:07]
- Mixer Visibility Options:
- The mixer can be overwhelming on smaller monitors.
- Click the three-dot menu to choose which sections of the mixer are visible, optimizing screen real estate.
-
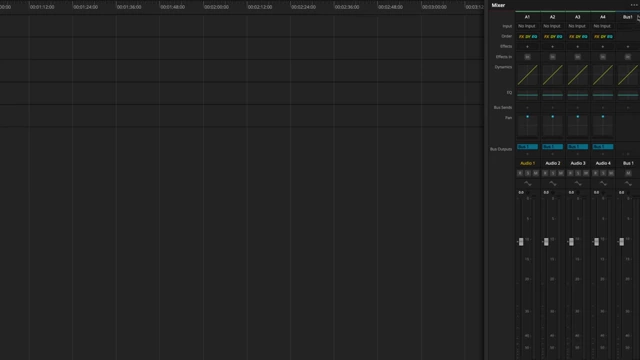
Fairlight mixer options for customizing visible sections [ 00:08:12 ]
- Floating Viewer Window:
- Hit the icon in the bottom right corner of the viewer to turn it into a floating window.
- This allows resizing and repositioning the viewer anywhere you want.
-
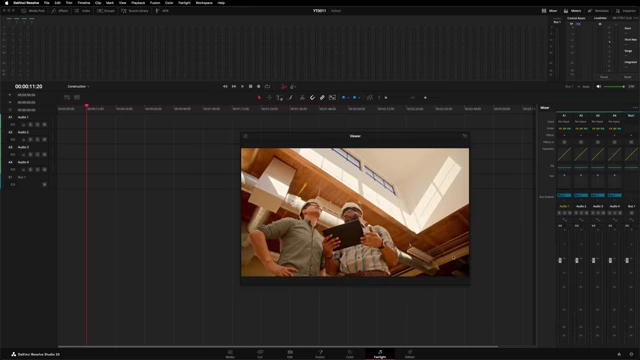
Fairlight page viewer as a floating window [ 00:08:22 ]
Deliver page [8:25]
- Show job details:
- In the Render Queue, click the three-dot menu and select "Show job details" to see more information about render jobs.
-
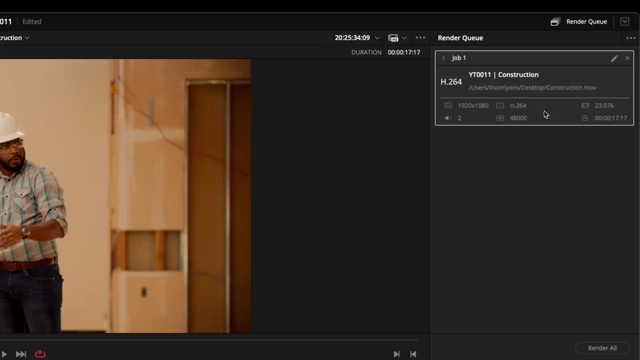
Deliver page render queue with expanded job details [ 00:08:32 ]
- Updates during renders:
- In the viewer's three-dot menu, pick an option under "Updates during renders."
- Turning this off or reducing updates can slightly boost performance on less powerful machines by reducing the preview display during export.
-
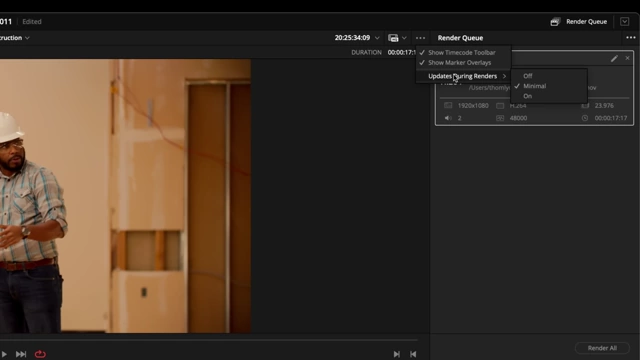
Deliver page viewer options for updates during renders [ 00:08:37 ]