How to Color Grade in DaVinci Resolve: Project Settings, Film Emulation, Exposure, White Balance & Contrast
This video offers a beginner-friendly guide to color grading in DaVinci Resolve, emphasizing foundational techniques for achieving a cinematic aesthetic. It covers essential project settings, including the use of DaVinci Wide Gamut for universal color handling across diverse camera footage and Rec.709 Gamma 2.2 for optimal web output. The tutorial details building a robust film emulation look through a specific node tree featuring Color Space Transforms (CSTs) and a Look Up Table (LUT) applied at a reduced strength. It then transitions into primary adjustments, introducing photometric methods for precise exposure control using linear gain in the HDR tab, allowing for stop-based corrections that maintain natural contrast. White balance is also addressed photometrically via the gain color wheel in linear gamma, discouraging the use of less accurate Temp/Tint sliders. Finally, it explains proper contrast adjustment, highlighting the critical role of setting a mid-gray pivot point to ensure contrast is effectively applied to highlights and shadows. These techniques lay a solid groundwork for professional-quality color grading.
Overview [0:45]
- The speaker shares his journey of learning color grading over 800 days in DaVinci Resolve.
- The inspiration came from observing the beautiful footage of "The Creator," shot on an ARRI ALEXA 3 (which uses a similar sensor to the speaker's A7S3).
- This series, "Cracking the DaVinci Code," is structured into multiple episodes.
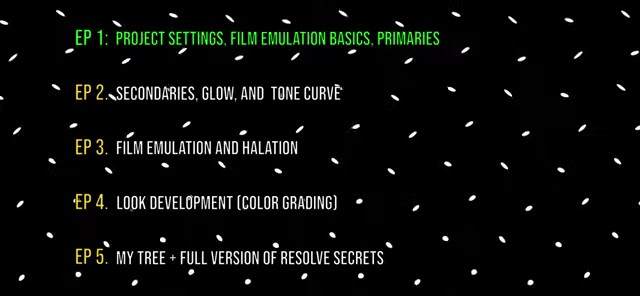
- This first episode will cover project settings, foundational aspects of the node tree, and primary color grading adjustments.
Series roadmap for "Cracking the DaVinci Code" series [ 00:01:20 ]
- This first episode will cover project settings, foundational aspects of the node tree, and primary color grading adjustments.
Project Settings [1:21]
- Access project settings by navigating to File > Project Settings.
- Color Management
- Set Timeline Color Space to DaVinci Wide Gamut.
- This acts as a universal color space, allowing consistent grading of footage from different cameras (e.g., Canon C70 and Sony A7S3) without worrying about individual camera color sciences.
- DaVinci Wide Gamut offers a broader color and dynamic range compared to standards like Rec.709, Rec.2020, and ACES.
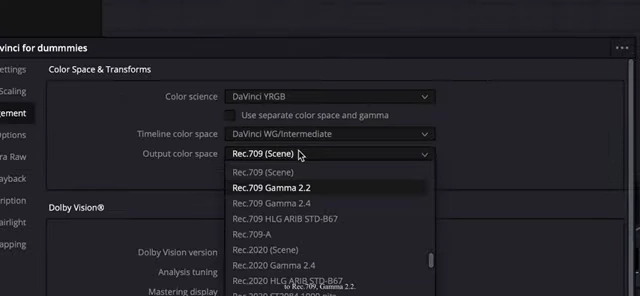
DaVinci Resolve project settings showing DaVinci Wide Gamut selected for Timeline Color Space [ 00:01:40 ] 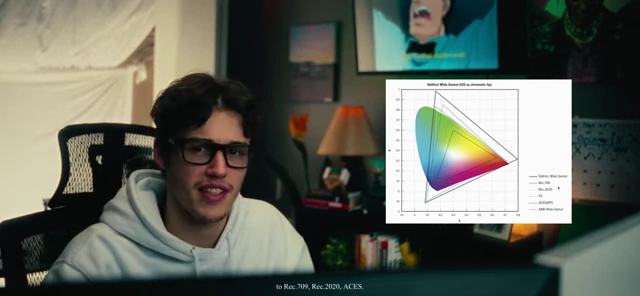
Comparison of color ranges in different color spaces, highlighting DaVinci Wide Gamut [ 00:02:10 ]
- Set Output Color Space to Rec.709 Gamma 2.2.
- This is optimal for outputting to web and mobile platforms such as YouTube, Instagram, and TikTok, which are typically optimized for Gamma 2.2.
- Using Rec.709 Gamma 2.4 would result in a discrepancy between what is seen on the display and the final posted content.
- Set Timeline Color Space to DaVinci Wide Gamut.
- Lookup Tables (LUTs) [2:51]
- Change the 3D Lookup Table Interpolation from Trilinear to Tetrahedral.
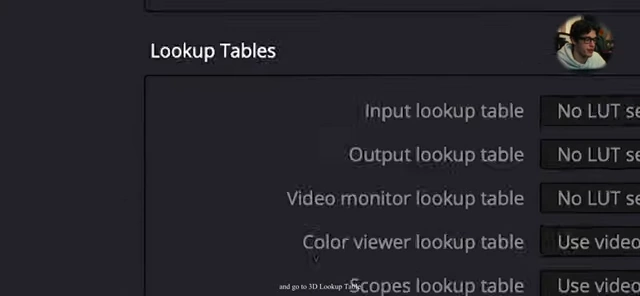
Dropdown menu for 3D Lookup Table Interpolation [ 00:02:52 ] - This provides higher quality interpolation for LUTs.
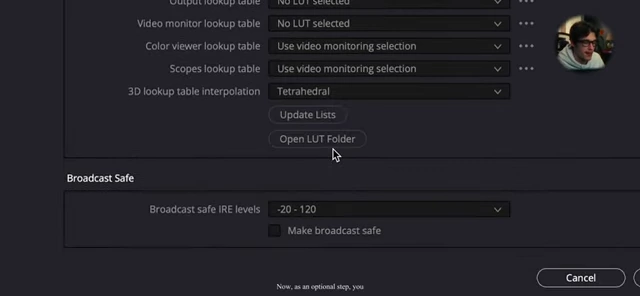
3D Lookup Table Interpolation set to Tetrahedral [ 00:02:57 ]
- This provides higher quality interpolation for LUTs.
- Optionally, check "Make broadcast safe" to ensure IRE levels stay within limits, though the speaker notes it's not strictly necessary.
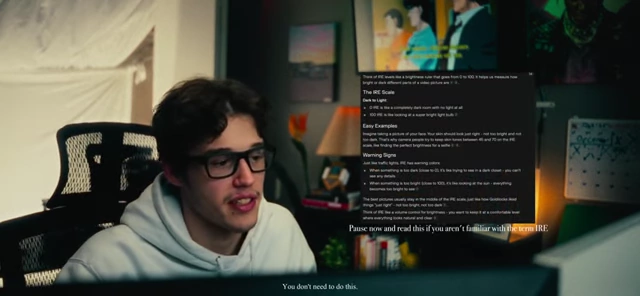
Explanation of IRE Scale [ 00:03:04 ]
- Change the 3D Lookup Table Interpolation from Trilinear to Tetrahedral.
- General Options [3:09]
- Set Luma Mixer defaults to 0.
- This prevents artifacts when adding saturation, especially when using the specific node tree method demonstrated in the series.
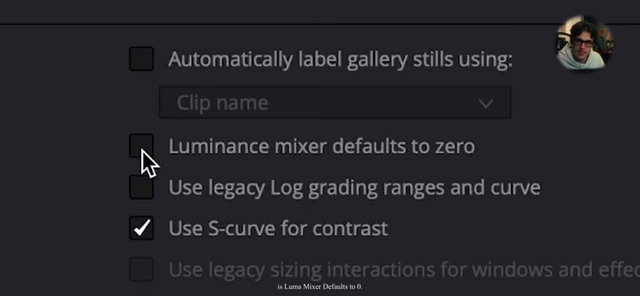
Luminance mixer defaults to zero setting [ 00:03:13 ] - A brief explanation of additive vs. subtractive saturation is also shown.
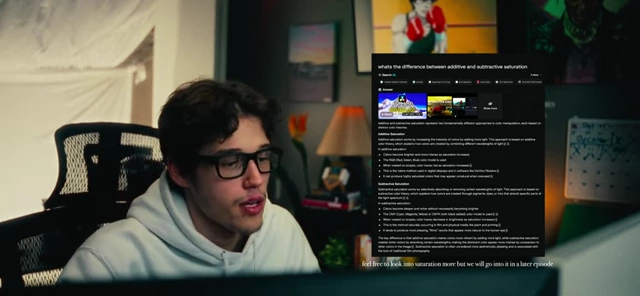
Explanation of additive and subtractive saturation [ 00:03:22 ]
- This prevents artifacts when adding saturation, especially when using the specific node tree method demonstrated in the series.
- Set Luma Mixer defaults to 0.
- Save all changes to the project settings.
Film Emulation Basics [3:35]
- The film look is achieved through a sequence of nodes: a Color Space Transform (CST), a Look Up Table (LUT), and another CST.
- First CST (Input Device Transform - IDT)
- Converts the footage from its original camera color space (e.g., Sony S-Log3) into DaVinci Wide Gamut.
- Then, it converts from DaVinci Wide Gamut to Cineon Film Log, entering a log state suitable for LUT application.
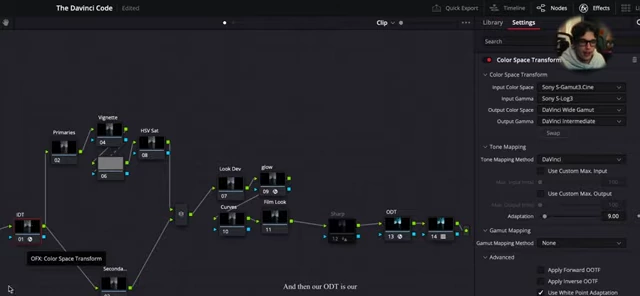
Input Device Transform converting Sony S-Log3 to Cineon Film Log [ 00:04:50 ]
- LUT Application
- The LUT is applied, but its strength is reduced to 30%.
- Applying a LUT at 100% strength can result in an over-processed, "wild" look that is undesirable.
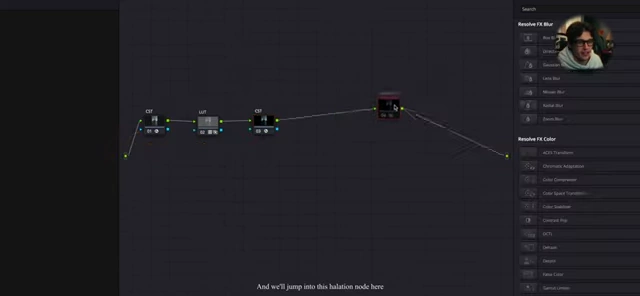
Node tree showing CST, LUT (at 30% strength), and another CST [ 00:03:40 ]
- Second CST (Output Device Transform)
- Converts the footage from Cineon Film Log back to DaVinci Wide Gamut.
- This step brings the footage out of its log state after the LUT has been applied.
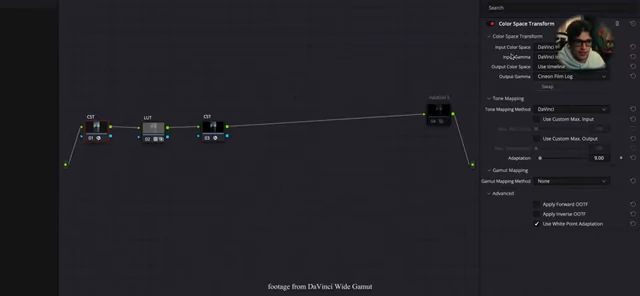
Color Space Transform converting Cineon Film Log to DaVinci Wide Gamut [ 00:03:49 ]
- Final ODT (Output Device Transform)
- A final CST node is placed at the end of the node tree.
- This converts the footage from DaVinci Wide Gamut to Rec.709 for final delivery.
- Performing this conversion earlier within the film look process would yield incorrect results.
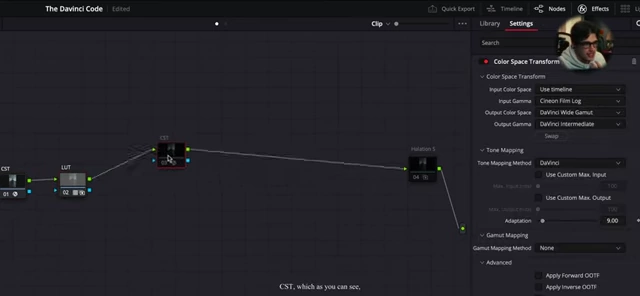
Full node tree including the final Output Device Transform [ 00:04:29 ] 
Output Device Transform converting DaVinci Wide Gamut to Rec.709 Gamma 2.2 [ 00:04:55 ]
- Establishing this foundational film emulation is critical for building a consistent and appealing cinematic aesthetic.
Exposure [5:34]
- Traditional exposure adjustments using Lift, Gamma, and Gain sliders often do not behave photometrically, meaning they don't mimic how light interacts in the real world.
- The video demonstrates an underexposed shot of a museum.
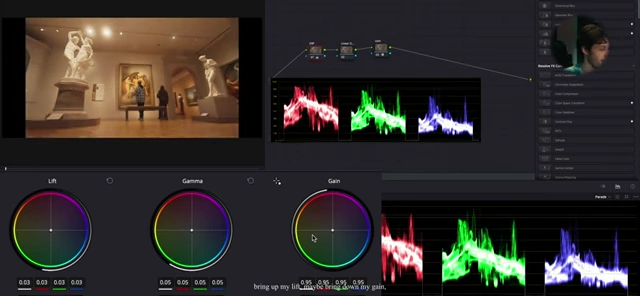
Underexposed museum interior with RGB parade scopes [ 00:06:50 ] - An attempt to correct exposure using the Offset wheel results in a flat image.
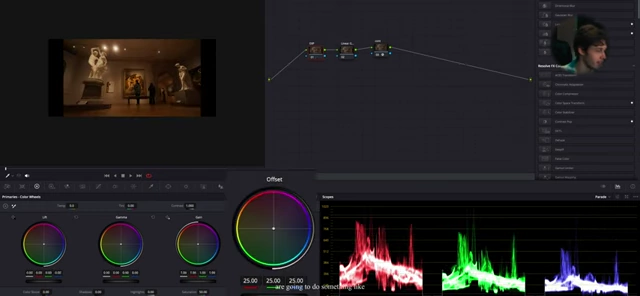
Offset wheel adjustment leading to a flat image [ 00:07:24 ] - Photometric Exposure Adjustment Methods
- Using Linear Gamma [8:11]
- In your exposure adjustment node, hold Control, click the node, go to Gamma, and select Linear.
- Adjust exposure by manipulating the Gain color wheel.
- This method ensures that adjustments brighten the image naturally without undesirably crushing shadows or blowing out highlights.
- Using the HDR Tab (Recommended) [9:53]
- Open the HDR tab (found near the color wheels).
- Utilize the "Exposure" slider (previously named "Global").
- This slider allows precise, stop-based exposure adjustments (e.g., +0.75 adds three-quarters of a stop, +1 adds one full stop of light).
- This method offers the most accurate and intuitive way to control exposure photometrically, preserving image integrity.
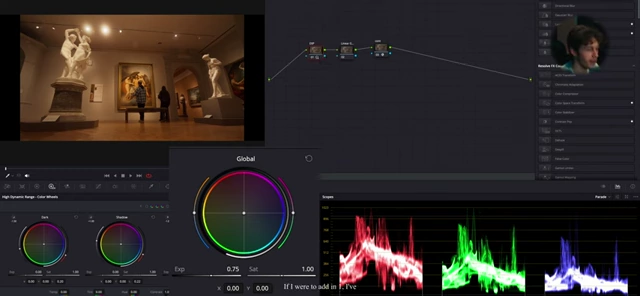
HDR tab with exposure slider at +0.75, showing exact stops of light [ 00:10:30 ] - For the example, the speaker adjusts the exposure by 1.25 stops to brighten an underexposed museum shot.

Exposure adjustment to 1.25 stops on the HDR tab [ 00:17:10 ]
- Using Linear Gamma [8:11]
- Fine-tuning with Lift, Gamma, and Gain [11:21]
- After initial photometric exposure, use Lift (shadows), Gamma (midtones), and Gain (highlights) to subtly "massage" the image.
- This helps to manage noise and reintroduce contrast in specific tonal ranges without affecting the overall brightness or "stopping" of the image.
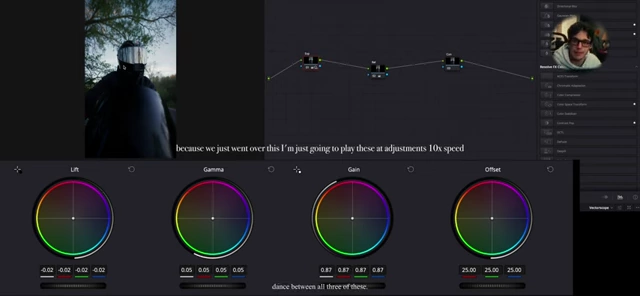
Lift, Gamma, and Gain wheels for fine-tuning after HDR adjustment [ 00:17:46 ] - Color grading is an iterative process; it's normal to go back and forth between different nodes and adjustments.
White Balance [12:29]
- Avoid Temp/Tint Sliders [12:29]
- The speaker strongly advises against using the traditional Temperature and Tint sliders for white balance, calling them inaccurate and based on a "guessing game."
- An example demonstrates the poor results when using traditional non-photometric methods.
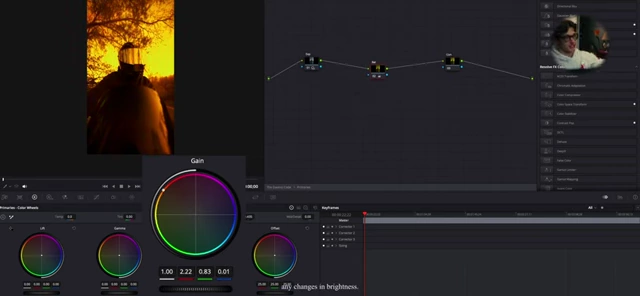
Overly yellow/orange image after incorrect white balance adjustment [ 00:17:09 ]
- Photometric White Balance [13:06]
- Ensure your white balance adjustment node is set to Linear Gamma.
- Use the Gain color wheel: drag the ball directly towards the color needed to neutralize any color cast (e.g., drag towards blue to remove yellow/orange casts).
- This method allows for a single, precise adjustment that recovers true whites and neutral tones while preserving the natural hues of other colors and skin tones in the image.
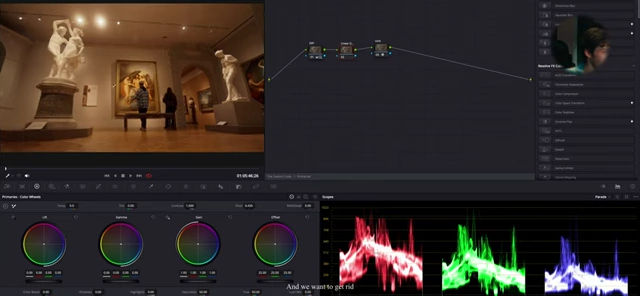
Underexposed museum shot with an orange cast before white balance adjustment [ 00:13:49 ] 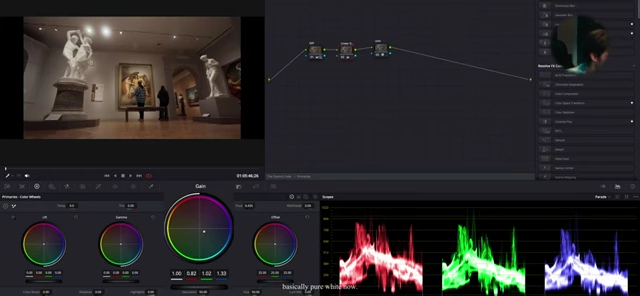
White balance adjustment using the gain wheel in linear gamma, showing a corrected image [ 00:14:30 ] - Compared to Temp/Tint, this approach is more effective and delivers a more natural and accurate white balance.
Contrast [18:05]
- Adjusting contrast involves two main sliders: Contrast and Pivot.
- Contrast Slider: Increases or decreases the overall contrast of the image.
- Pivot Slider: Determines the midpoint around which the contrast adjustment is applied.
- For footage in DaVinci Intermediate color space, the ideal mid-gray pivot point is 0.336.
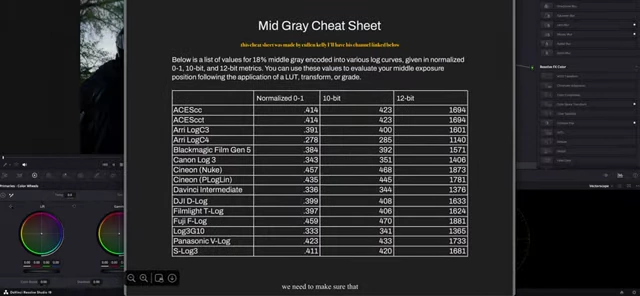
Mid Gray Cheat Sheet table showing pivot values for different color spaces [ 00:18:22 ]
- For footage in DaVinci Intermediate color space, the ideal mid-gray pivot point is 0.336.
- Adjust the Contrast slider to the desired level, then fine-tune the Pivot slider to ensure that the contrast is applied correctly, primarily affecting the bright and dark areas without significantly altering the mid-gray tones.
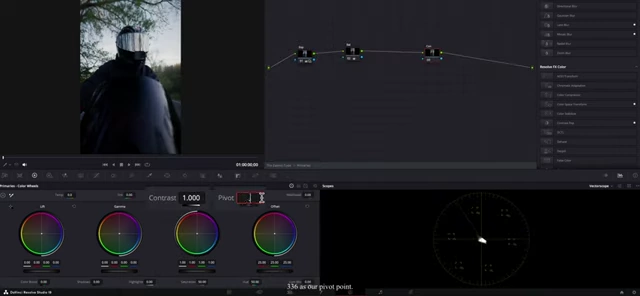
Contrast adjustment with pivot set to 0.336 [ 00:18:29 ] 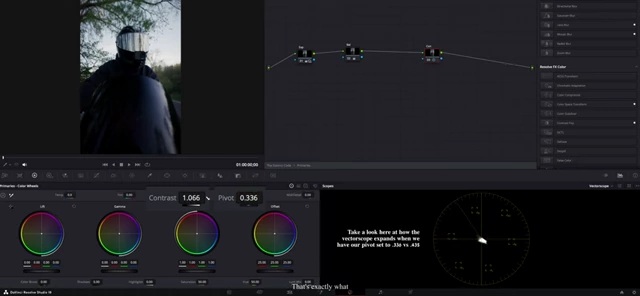
Vectorscope showing contrast adjustment with pivot set to 0.336 [ 00:18:34 ] - An incorrect pivot point can lead to undesirable results.
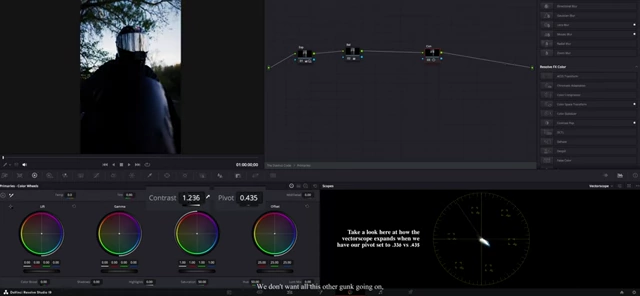
Vectorscope showing contrast adjustment with an incorrect pivot of 0.435 [ 00:18:40 ]
- An incorrect pivot point can lead to undesirable results.
- This targeted approach ensures that contrast is added where it's most effective and natural for the footage.