Mastering Professional Color Grading in DaVinci Resolve: 5 Advanced Techniques for Skin Tone, Sharpness, Contrast, Color Shifts, and Shot Matching
Summary:
This video reveals five professional color grading techniques in DaVinci Resolve:
- Learn to precisely evaluate and correct skin tones using a masking trick with the vector scope.
- Discover how to add perceived sharpness to highlights without damaging shadow texture for a filmic look.
- Implement a filmic S-curve contrast method by enabling a specific project setting and adjusting gain, offset, and lift.
- Utilize the Color Warper's point-to-point mode to cleanly change specific colors in an image while isolating other tones like skin.
- Master efficient shot matching across multiple clips using DaVinci Resolve's split-screen mode and primary wheels.
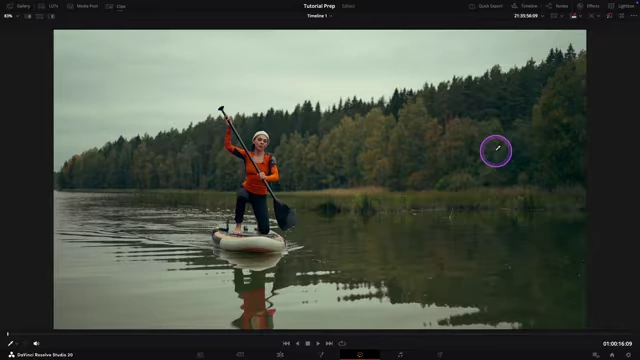
Image showing the outfit color successfully changed using the Color Warper, while the skin tone remains natural. [ 00:08:32 ]
1. Precise Skin Tone Evaluation [00:00:42]
- Importance of Consistent Skin Tones
- While color grading is subjective, skin tones require consistency and realism for viewer comfort.
- The vector scope can be cluttered, making it difficult to accurately assess skin tone.
- Technique: Isolating Skin for Accurate Vector Scope Reading
- Add a corrector node at the very beginning of the node tree [00:01:31].
- Create a small power window mask to isolate only the skin area [00:01:40].
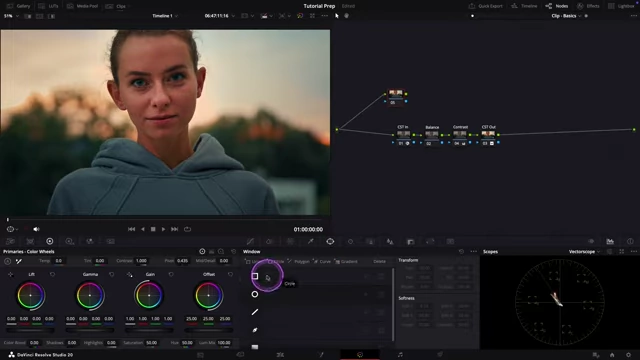
DaVinci Resolve interface showing a circular mask being drawn to isolate skin. [ 00:01:40 ] - Remove the softness of the mask for a precise selection [00:01:43].
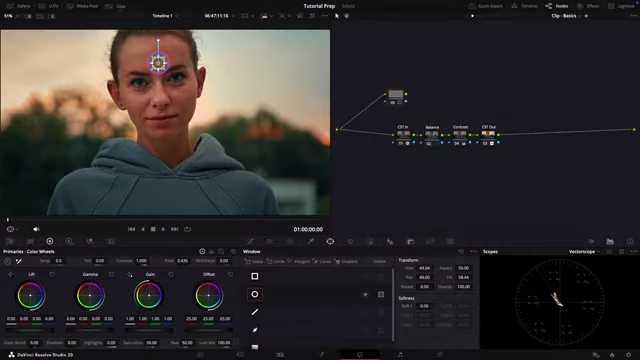
DaVinci Resolve interface with a circular mask on the subject's skin. [ 00:01:50 ] - Connect the alpha (blue) output of this corrector node to the alpha channel of the CSD output node [00:01:53].
- This action effectively isolates the masked skin area, making its color distribution clearly visible on the vector scope [00:02:04].
- Ensure the skin tone indicator is enabled in the vector scope settings if not already visible [00:02:21].
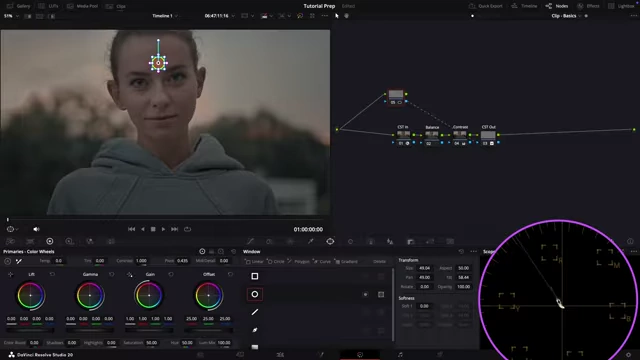
Vector scope displaying the isolated skin tone accurately aligned with the skin tone indicator line. [ 00:02:20 ]
- Correction: Adjusting Skin Tone Towards the Ideal Line
2. Perceived Sharpness Without Destroying Shadows [00:03:02]
- Goal: Filmic Highlight Snap
- Achieve a crisp, filmic sharpness in highlights without introducing digital noise or harshness into the creamy, soft shadows.
- Problem with Global Sharpening
- Sharpening globally often ruins shadow textures, leading to noisy and crunchy images [00:03:33].
- Technique: Sharpening Only the Highlights
- Keying the Highlights:
- Create a new node and key only the brightest areas (highlights) of the image [00:03:48].
- Turn on highlight mode to visually confirm the isolation [00:03:50].
- Adjust the low slider in the keyer until all shadow areas turn completely black, leaving only the desired bright parts (e.g., face, clothing highlights) visible in white [00:03:56].
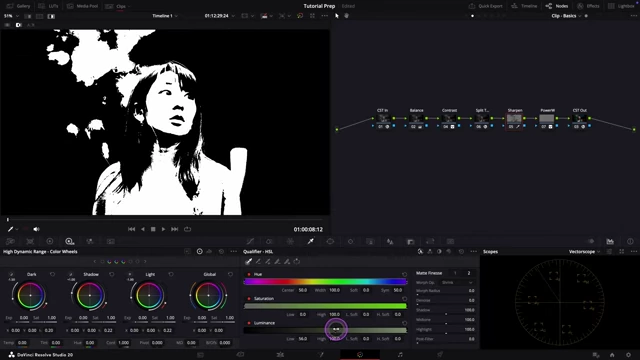
Highlight mode demonstrating the selection of only the bright areas (highlights) of the image. [ 00:04:04 ] - Soften the selection slightly to prevent hard edges in the mask, ensuring a smooth transition [00:04:08].
- Applying Filmic Sharpening:
- Navigate to the blur/sharpen panel [00:04:22].
- Change the softness and level settings to 50. This specific adjustment helps the sharpening behave more like film, protecting fine grain and preventing noise amplification for a cleaner, more organic response [00:04:24].
- Gently lower the radius slider. As the radius decreases, highlights will visibly tighten, enhancing details in areas like eyes, hair edges, and clothing, while keeping shadows untouched and creamy [00:04:41].
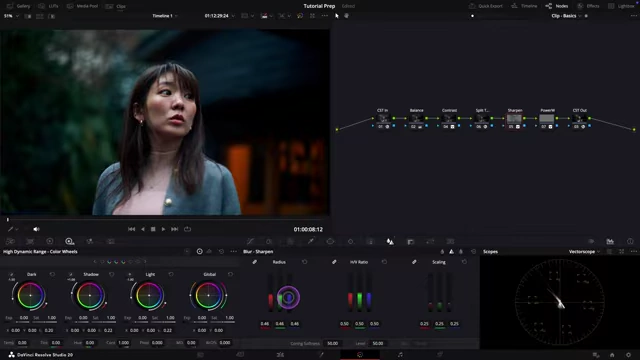
DaVinci Resolve interface showing blur/sharpen panel with an image after enhancing highlight sharpness. [ 00:04:44 ]
- Keying the Highlights:
3. Filmic S-Curve Contrast [00:05:23]
- Prerequisite: Enabling S-Curve Contrast
- Go to DaVinci Resolve's Project Settings > General Options.
- Ensure "Use S-Curve for Contrast" is checked [00:05:33].
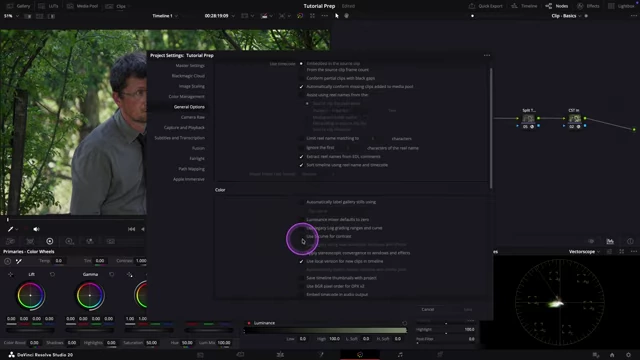
DaVinci Resolve Project Settings window with "Use S-Curve for Contrast" option highlighted. [ 00:05:38 ] - This setting makes the primary wheels apply a subtle S-curve, resulting in blacks that roll off softer, highlights that don't clip aggressively, and an overall more organic feel compared to linear contrast [00:05:40].
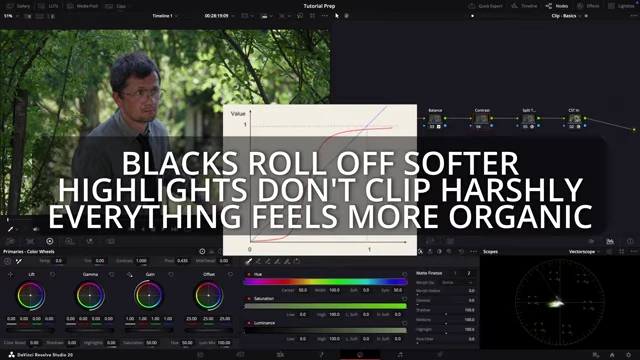
Graph explaining that blacks roll off softer, highlights don't clip harshly, and everything feels more organic with the S-curve enabled. [ 00:05:58 ]
- Technique: Shaping Contrast Using Primary Wheels
- The strategy involves using gain and lift to shape contrast, with offset serving as the pivot point to determine where the contrast tilts [00:06:16].
- Switch to the waveform scope for visual guidance [00:06:28].
- Increasing Gain: Gently increase the gain to open up the midtones. The enabled S-curve ensures that the highlight rolloff remains smooth, providing a very filmic characteristic [00:06:31].
- Adjusting Offset: Pull the offset control down to bring the overall exposure back into a more balanced and reasonable range [00:06:47]. Iteratively adjust gain and offset to achieve the desired contrast [00:06:55].
- Settling Shadows with Lift: Use the lift control for a final, tiny adjustment to settle the shadows, adding density [00:07:02].
- The result is an image that gains presence, depth, and density without a harsh or "video-like" contrast [00:07:09].
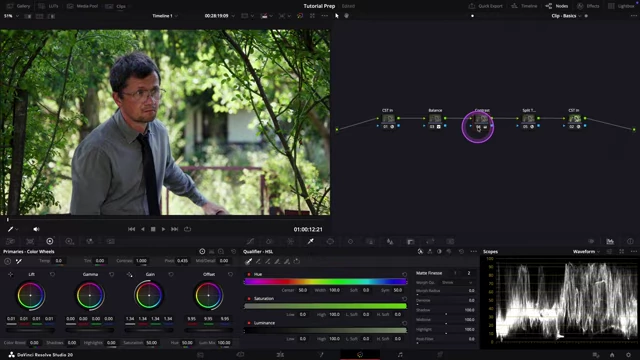
DaVinci Resolve interface showing waveform scope and the image with filmic S-curve contrast applied. [ 00:07:08 ]
4. Cleanly Changing Specific Colors [00:07:22]
- Tool: Color Warper
- The Color Warper in DaVinci Resolve allows for precise and isolated color adjustments.
- Goal: Shifting a Specific Color Without Affecting Others
- This technique focuses on changing one specific hue (e.g., an outfit color) while protecting other important tones, such as skin.
- Technique: Point-to-Point Color Adjustment
- Switch the Color Warper into point-to-point mode [00:07:43].
- Click directly on the specific color in the image that you wish to change (e.g., the subject's red outfit). This action selects the hue in the Color Warper interface [00:07:49].
- To prevent unintended color shifts, especially in skin tones, go to the isolation option within the Color Warper and click on the skin to add a pinpoint there. This locks the skin color, preventing it from shifting with the outfit adjustment [00:07:58].
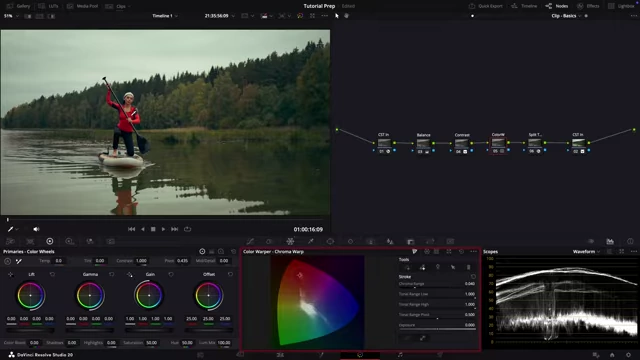
Color Warper interface with a specific hue selected (red outfit) and a pinpoint locking the skin tone. [ 00:07:52 ] - Go back to the selected outfit color point and simply drag it toward the desired new hue (e.g., warmer oranges) [00:08:15].
- This method provides a clean, isolated, and natural-looking color shift without the need for complex keys or masks [00:08:28].
Image showing the outfit color successfully changed using the Color Warper, while the skin tone remains natural. [ 00:08:32 ]
5. Fast Shot Matching Across a Scene [00:10:44]
- Tool: DaVinci Resolve's Split-Screen Mode
- This feature is incredibly powerful for ensuring visual consistency across multiple clips within a sequence.
- Goal: Unifying Look and Mood Across Multiple Shots
- The objective is to make all shots in a scene feel like they belong together, sharing the same world and mood.
- Technique: Visual Comparison and Adjustment
- After performing a quick primary balance on individual clips, use split-screen mode to compare them [00:10:51].
- Access the split-screen viewer options and select "Selected Clips" [00:11:04].
- Hold Command (Ctrl on Windows) and select all the clips you want to match. They will immediately display side-by-side in the viewer, allowing for direct comparison [00:11:10].
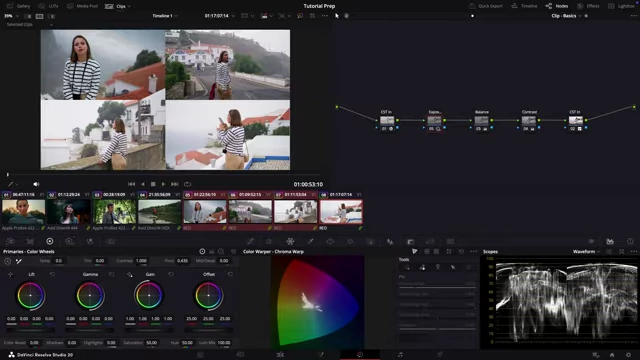
DaVinci Resolve's split-screen mode displaying four selected clips side-by-side for shot matching. [ 00:11:16 ] - To adjust a specific shot, simply click on it directly in the split-screen viewer [00:11:21].
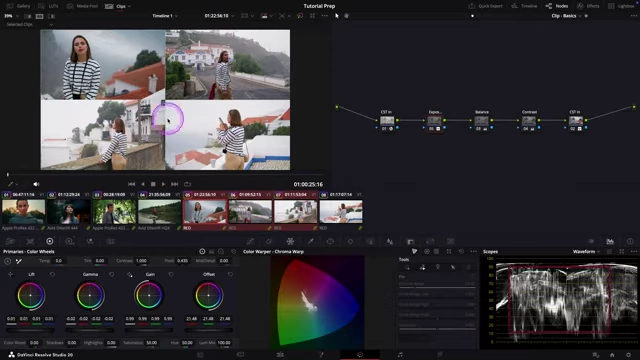
DaVinci Resolve's split-screen mode with a specific clip selected for adjustment. [ 00:11:29 ] - Use primary grading controls like the gain wheel to adjust brightness [00:11:33] or the offset wheel to nudge the color balance [00:11:58] until all clips appear unified in terms of exposure and color [00:12:07].
- This process quickly brings all four shots into the same visual world, ensuring continuity [00:12:13].
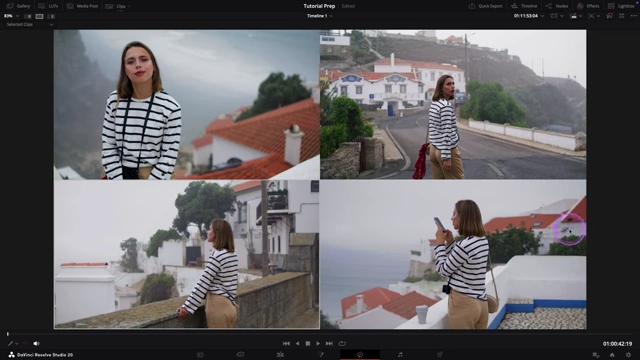
The four clips shown in split-screen mode after adjustments, now appearing unified. [ 00:12:11 ]