Claude Code Beginner's Guide: Installation, Setup, and Kanban To-Do App Development
This tutorial provides a comprehensive guide to setting up and using Claude Code, an AI coding agent that allows direct interaction with your codebase.
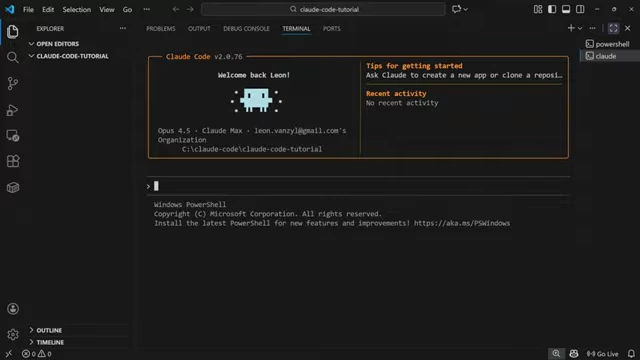
- Installation: Learn how to install Claude Code on various operating systems (macOS, Linux, Windows) using recommended native installers.
- Initial Setup: Configure your theme and choose between a Claude account subscription for fixed costs or an Anthropic API key for pay-as-you-go billing.
- IDE Integration: Set up Claude Code within VS Code or Cursor, including installing the VS Code extension for a more user-friendly interface.
- Key Commands: Understand essential commands like
/terminal setupfor new lines,/contextto monitor token usage,/clearto reset conversations, and/exitto close Claude Code. - Model and Mode Settings: Discover how to change the AI model (
/model) and toggle between thinking mode for better code quality and auto-accept edits mode for faster changes. - Planning Mode: Utilize planning mode to collaboratively design projects with Claude Code, which then generates a detailed implementation plan.
- Kanban To-Do App Example: Follow a practical demonstration of building a React-based Kanban to-do list app, from planning to implementation and debugging.
- Deep Dive Agents: Learn about using multiple deep dive agents for comprehensive code review and bug identification.
Why Use Claude Code? [00:00]
Claude Code is a powerful AI coding agent that allows direct access to your codebase, enabling agents to see projects, execute commands, and implement features without manual copy-pasting.
What is Claude Code? [00:17]
Claude Code is an AI tool that deeply integrates with your codebase, allowing AI agents to interact directly with your project files to build, debug, and ship software faster. It's beneficial for both novice and experienced developers.
Installing Claude Code [00:51]
The video demonstrates how to install Claude Code using terminal commands, with specific instructions for different operating systems.
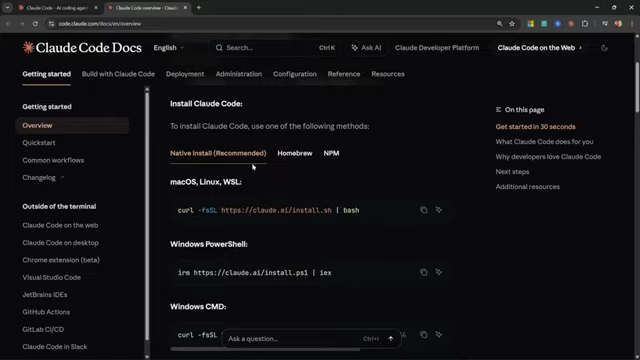
- Installation Commands:
- For macOS, Linux, or Windows WSL terminal:
curl -fsSL https://claude.ai/install.sh | bash - For Windows PowerShell:
iwr -useb https://claude.ai/install.ps1 | iex - For Windows CMD:
curl -fsSL https://claude.ai/install.cmd | install.cmd
- For macOS, Linux, or Windows WSL terminal:
- Recommended Installers: The native installs via
curloriwrare recommended over legacy methods like Homebrew or npm.
Opening Claude Code in Your Project [01:47]
After installation, Claude Code should be opened within your specific project folder.
- Starting Claude Code: Navigate to your project directory in the terminal and run the command
claude. - Initial Setup: The first time you run
claude, it will guide you through theme selection (e.g., dark mode) and login options.
First Time Setup and Login Options [02:15]
Users must choose a login method, either a Claude account subscription or an Anthropic API key.
- Claude Account with Subscription:
- Benefits: Full access to claude.ai website and features, including the web-based Claude Code.
- Cost: Fixed monthly cost (e.g., $20 for Pro, $100+ for Max), with usage limits that automatically reset. No unexpected overage charges.
- Recommendation: The presenter strongly recommends the subscription for its predictable costs.
- Anthropic API Key (API usage billing):
- Purpose: Ideal for experimenting with Claude Code without a recurring subscription.
- Cost: Billed based on API usage, which can quickly become expensive.
- Setup: Requires signing in/up at console.anthropic.com, authorizing API access, and adding credits (minimum $5).
Setting up VS Code or Cursor [04:23]
For a better development experience, it's recommended to integrate Claude Code with an IDE like VS Code or Cursor.
- IDE Recommendation: VS Code is the presenter's choice for this tutorial series, but Cursor is also highlighted as a popular AI code editor.
- Opening Project: In VS Code, open your project folder via
File > Open Folder. - Benefits of IDE Integration:
- Easy viewing of all project files.
- Simplified source control for commits and change tracking.
Claude Code VS Code Extension [05:33]
The Claude Code VS Code extension provides a more user-friendly interface than the terminal.
- Installation: Search for "Claude Code" in the VS Code extensions tab and install it.
- Interface: The extension opens Claude Code in a dedicated window within VS Code, offering a more visual and easier-to-navigate experience, especially for non-developers.
- Commands: Still allows access to slash commands, similar to the terminal version.
Terminal Setup Slash Command [06:25]
To enable multi-line input in the terminal for better prompt structuring, use the /terminal setup command.
- Problem: By default, pressing Enter sends the message to Claude.
- Solution: Run
/terminal setupto enable Shift + Enter for creating new lines within a message.
Using the Context Command [07:01]
The /context command is crucial for monitoring your conversation's token usage and understanding the agent's capabilities.
- Token Limit: Each conversation has a 200,000 token limit.
- Information Displayed:
- Current token utilization percentage.
- Tokens used by system prompt, MCP tools, conversation history, and auto-compact buffer.
- List of available MCP servers and skills.
- Managing Context: Keep the context window lean by implementing small features. If it gets too large, clear the conversation and start fresh to avoid compaction (summarization of conversation history).
Clear and Exit Commands [08:15]
Manage your Claude Code sessions with /clear and /exit.
/clear: Clears the current conversation window, effectively resetting the context./exit: Closes the Claude Code session.- Resuming Sessions: Run
claude resumeto view and select previous conversations.
Changing Models and Thinking Mode [09:30]
Customize Claude Code's behavior by changing the AI model and enabling/disabling thinking mode.
- Changing Models: Use
/modelto select between different Anthropic models likeset,haiku, oropus(Opus 4.5 is the flagship model). - Thinking Mode (Alt + T):
- Enabled: Agent responds slower but produces higher quality code.
- Disabled: Agent responds faster and consumes fewer tokens, but code quality might be lower. Recommended to keep it enabled for better results.
Auto Accept Edits Mode [10:16]
Control Claude Code's autonomy with permission modes.
- Default Behavior: Claude Code asks for permission for most actions (using tools, running commands, editing files).
- Accept Edits On Mode (Shift + Tab):
- Automatically makes changes to files or creates new ones without asking for permission.
- Still asks for permission before running potentially risky commands.
- "Yolo" Mode (
claude --dangerously-skip-permissions):- Completely bypasses all permission requests.
- Not recommended for beginners due to potential risks but can be used by experienced users for speed.
Planning Mode Explained [10:43]
Planning mode allows you to collaborate with Claude Code on project design without immediate code modifications.
- Activation: Access planning mode by pressing Shift + Tab.
- Functionality: The agent does not make changes to your codebase but helps outline the project.
- Output: Generates a complete implementation plan by the end of the conversation.
Building a Kanban To-Do App [11:03]
A practical demonstration of using Claude Code to build a React-based Kanban to-do list application.
- Initial Prompt: Describe the desired app (Kanban board, three columns: To-Do, In Progress, Completed, task details: title, description, priority, tags).
Creating the Implementation Plan [12:30]
Claude Code asks clarifying questions to refine the project plan and then generates a detailed implementation strategy.
- Clarifying Questions: Claude asks about front-end framework (React recommended), data persistence (local storage recommended), drag-and-drop functionality, and styling approach (Tailwind recommended). These questions help refine the project scope.
- Web Search: Claude may perform web searches to gather necessary information, requiring user permission. This permission can be auto-approved for future requests.
- Implementation Plan File: The generated plan is stored in a
.claude/plan/file within your project directory, allowing for future reference.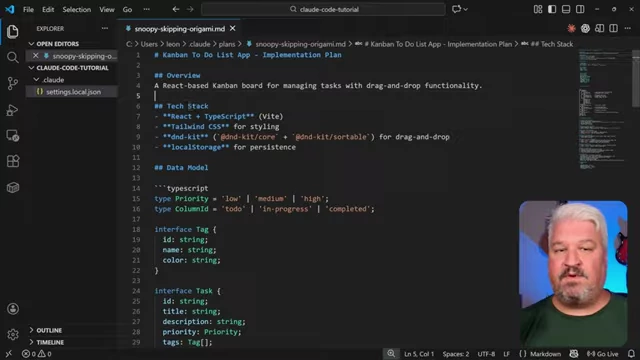
Detailed implementation plan for the Kanban To-Do App, outlining the tech stack, data model, and core features. [ 00:14:06 ]
Implementing the Plan [14:19]
After reviewing and approving the plan, Claude Code proceeds with code generation and modification.
- Approving Plan: Switch to "accept edits mode" (Shift + Tab) and instruct Claude to implement the plan.
- To-Do List Tracking: Claude generates a visible to-do list (toggle with Ctrl + T) to track its progress.
- Background Tasks: Claude Code can run commands asynchronously in the background (e.g., starting a dev server), allowing the agent to continue working without interruption.
Testing the To-Do App [16:20]
After implementation, the app is tested, and any issues are reported to Claude Code for debugging.
- Initial Test: Creating a "Buy Bread" task and moving it.
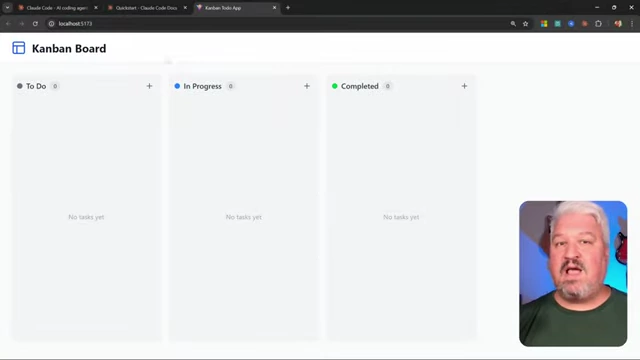
The initial, empty Kanban Board UI of the React to-do application. [ 00:16:11 ] 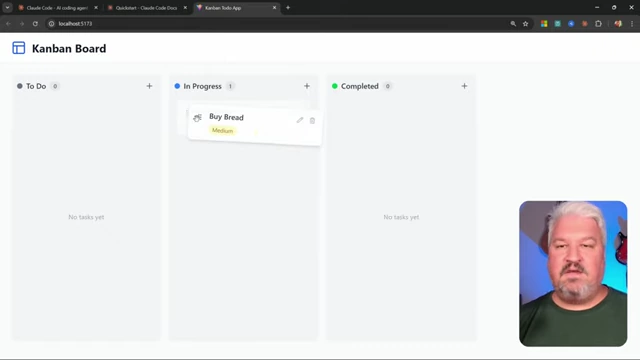
A 'Buy Bread' task successfully moved to the 'In Progress' column on the Kanban board. [ 00:16:24 ] - Bug Identification: Data was not persisted after a browser refresh, indicating a bug.
- Reporting Bug: Explain the bug to Claude Code. Claude then identifies a race condition where data is loaded from local storage asynchronously.
- Fixing the bug and re-testing: After the fix, the app persisted the data.
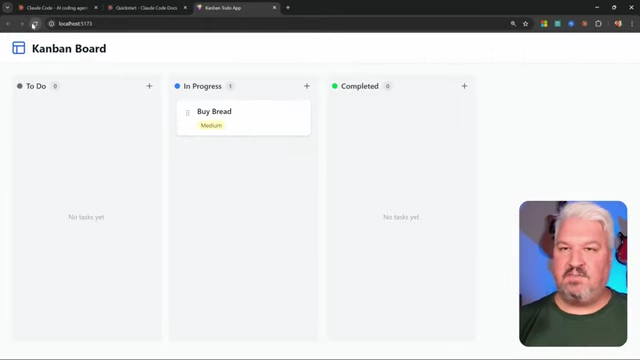
The Kanban board displaying the 'Buy Bread' task in 'In Progress' after a browser refresh, demonstrating data persistence. [ 00:18:27 ]
Deep Dive Agents for Code Review [17:00]
Utilize multiple deep dive agents to conduct thorough code reviews.
- Purpose: To identify bugs, gaps, and areas for improvement in the implemented solution.
- Execution: Open a new Claude Code session, drag the implementation plan file into the conversation, and instruct Claude to use three deep dive agents to review the implementation for completeness, bugs, and gaps.
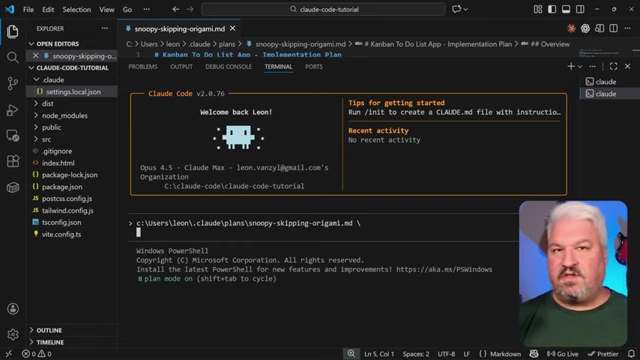
A new Claude Code session where the implementation plan file is dragged in to be reviewed by deep dive agents. [ 00:17:24 ] - Parallel Processing: Claude spins up multiple agents (e.g., "Review React components," "Review state management," "Review drag-drop features") that run in parallel with their own context windows.
- Summary: The main agent synthesizes feedback from the deep dive agents, identifying critical and medium priority bugs and listing what is working well.
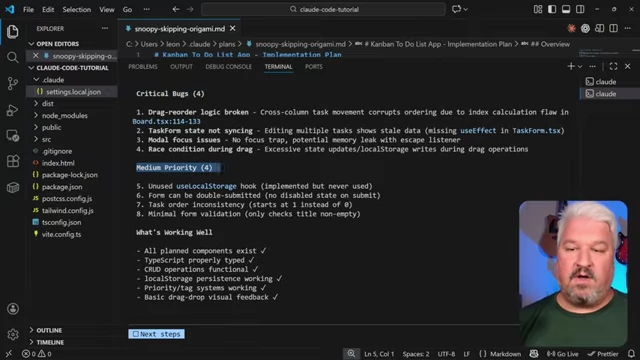
Summary of critical and medium-priority bugs identified by deep dive agents, along with working features. [ 00:18:45 ] - Bug Fixing: Instruct Claude to "fix all critical bugs," and it will create a new implementation plan specifically for those fixes.
What's Next in This Series [19:29]
The series will further explore advanced features of Claude Code, including sub-agents and background agents.