Comprehensive Guide to Cinematic Color Grading in DaVinci Resolve: Camera Setup, Shooting Techniques, and Post-Processing Workflow
This video offers a comprehensive guide to improving cinematic color grading, starting with critical camera settings and on-set shooting techniques, then moving into post-production in DaVinci Resolve.
- Camera Settings: Learn to set optimal frame rates (30, 60, 120fps), shutter speed using the 180° rule with ND filters, proper aperture for subject separation (recommending a prime lens like Sigma 24mm f/1.4), locking white balance, and shooting in 10-bit LOG (e.g., Slog 3) with native base ISO values (800, 3200 for Sony).
- On-Set Techniques: Discover how shooting "shadow side" creates natural cinematic contrast and the importance of intentional color composition by integrating desired colors into your shots.
- Composition Practice: Emphasize practicing with tripods to refine composition skills, which translate to all types of shots.
- Dehancer Plugin Review: Explore how the Dehancer film emulation plugin works in DaVinci Resolve, including its film profiles, grain, halation, and other filmic effects.
- CineKit Powergrade Workflow: Understand a structured node tree system in DaVinci Resolve, utilizing DaVinci Wide Gamut, for consistent color grades across various footage types (night, talking head, sunset) using custom LUTs and effects.

Before and after comparison of color grading applied to a motocross shot [ 00:00:20 ]
Camera Setup/Settings [0:38]
Before opening editing software, having correct camera settings is crucial for perfect color grades. The speaker uses a Sony A7IV but emphasizes that the camera model is less important than understanding settings.

- Resolution [0:54]
- Always shoot in the highest possible resolution, typically 4K on most modern cameras.
- Frame Rate System [0:59]
- 30fps: Recommended for smoother playback on social media and YouTube.
- 60fps: Used for slow-motion footage.
- 120fps: Used for extra slow-motion footage.
- The goal is consistent frame rates across all projects for proper setup.

Recommended frame rates for normal, slow motion, and extra slow motion video [ 00:01:30 ]
- Shutter Speed [1:41]
- 180° Shutter Rule: Double your frame rate for shutter speed (e.g., 1/60 for 30fps, 1/120 or 1/125 for 60fps, 1/240 for 120fps).
- This rule creates realistic, smooth motion blur.

The 180° shutter rule applied to 30fps footage (1/60 shutter speed) [ 00:01:50 ] 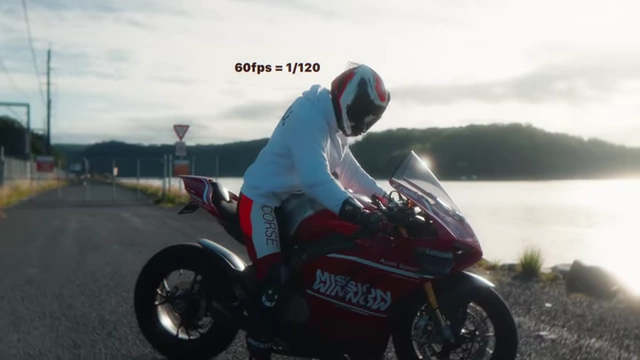
The 180° shutter rule applied to 60fps footage (1/120 shutter speed) [ 00:01:53 ] 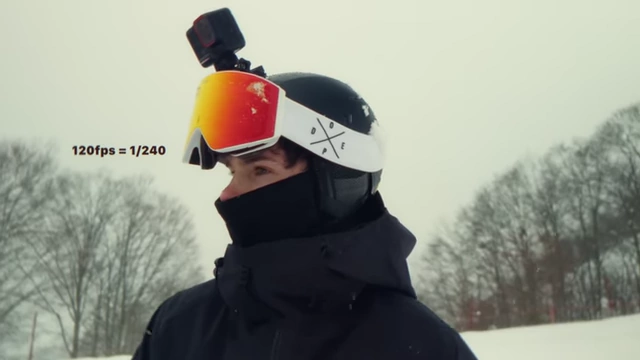
The 180° shutter rule applied to 120fps footage (1/240 shutter speed) [ 00:01:58 ] - ND Filters: Essential for bright outdoor conditions to maintain the 180° shutter rule without overexposing. Variable ND filters are highly recommended for adjustable exposure.
- Aperture [2:32]
- Lower Aperture: Allows more light into the camera, creating subject separation (blurrier background) and a more cinematic look.
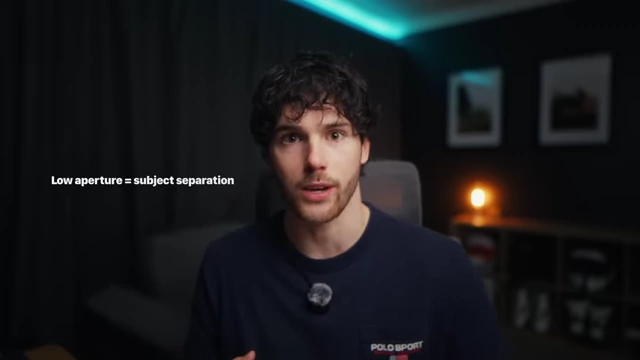
Explanation of how low aperture leads to subject separation [ 00:02:40 ] 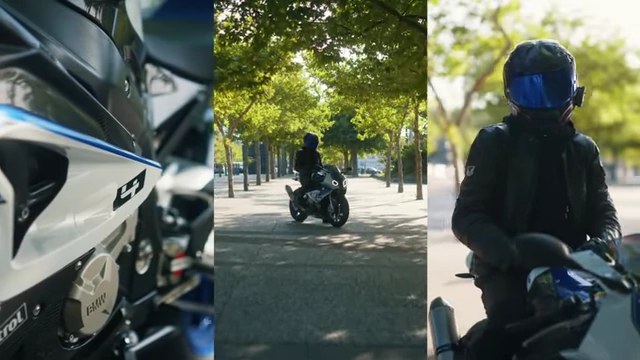
Split screen illustrating subject separation with low aperture [ 00:02:46 ] - ND filters enable using lower apertures in bright conditions.
- Lens Recommendation: The Sigma 24mm f/1.4 prime lens is recommended for its low aperture [1] and performance, especially in low light.

The recommended Sigma 24mm f/1.4 prime lens on a camera [ 00:03:00 ]
- Lower Aperture: Allows more light into the camera, creating subject separation (blurrier background) and a more cinematic look.
- White Balance [3:13]
- Set and Lock: Always set and lock your white balance using camera presets (sunny, cloudy, shade) according to the lighting situation.

Camera menu displaying white balance presets like Sunny, Shade, Cloudy [ 00:03:24 ] - Avoid Auto White Balance: Auto white balance constantly adjusts, leading to inconsistent color temperatures across shots and more work in post-production.
- Set and Lock: Always set and lock your white balance using camera presets (sunny, cloudy, shade) according to the lighting situation.
- Shoot in LOG (10-bit Color Profile) [3:50]
- Log Color Profile: Crucial for color grading as it provides a much wider dynamic range than standard Rec. 709 profiles.
- 10-bit Slog 3 (Sony A7IV example): Enables greater flexibility to manipulate colors in post-production.
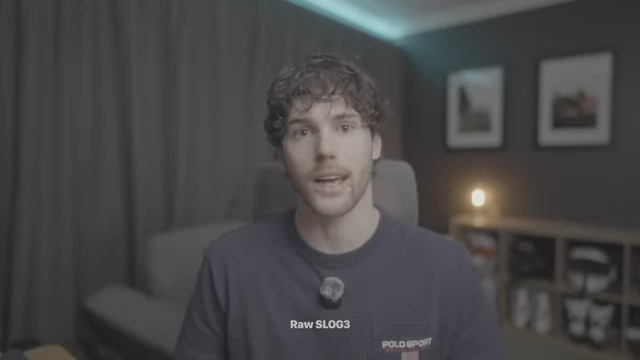
The speaker explaining raw SLOG3 footage [ 00:03:59 ] 
Before (raw SLOG) and after (graded with CineKit) comparison of motorcycle footage [ 00:04:11 ]
- ISO Settings [4:12]
- Native Base ISO: Stick to your camera's specific native base ISO and dual base ISO values to achieve the cleanest image with minimal noise.

Explanation of sticking to camera-specific native base ISO for clean images [ 00:04:29 ] - Sony Slog 3 Example: Base ISO is 800, and dual native base ISO is 3200.
- Use 800 ISO for daytime and 3200 ISO for nighttime shots.

Google search results showing native and dual base ISO values for a camera [ 00:04:51 ]
- Native Base ISO: Stick to your camera's specific native base ISO and dual base ISO values to achieve the cleanest image with minimal noise.
Shooting Techniques for Better Shots
Before grading, improve your raw footage with these techniques.
Shoot Shadow Side [5:08]
- Concept: Position your subject between the camera and the light source (e.g., the sun).
- Result: Creates a beautiful cinematic and natural style of contrast in your footage.
- The camera should be on the shadow side of the subject relative to the light source.

Diagram illustrating how to shoot on the "shadow side" for cinematic contrast [ 00:05:19 ] 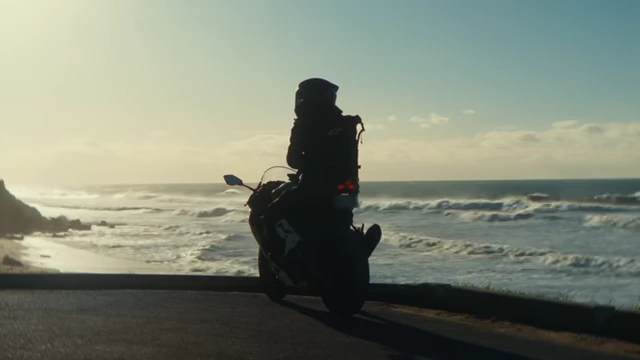
An example shot demonstrating the "shadow side" shooting technique [ 00:05:27 ]
Intentional Color Composition [5:50]
- Pre-planning Colors: Deliberately include specific colors in your scene or choose locations that inherently have the colors you want to emphasize.
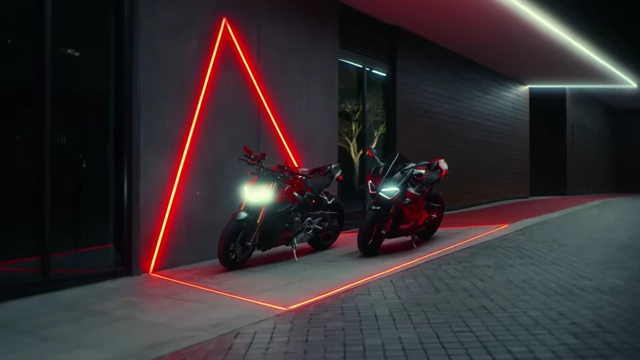
Motorcycles in a scene with intentional red lighting for color composition [ 00:06:21 ] - Example: Placing an orange lamp and a blue light strip in a talking head shot to create a strong color contrast.
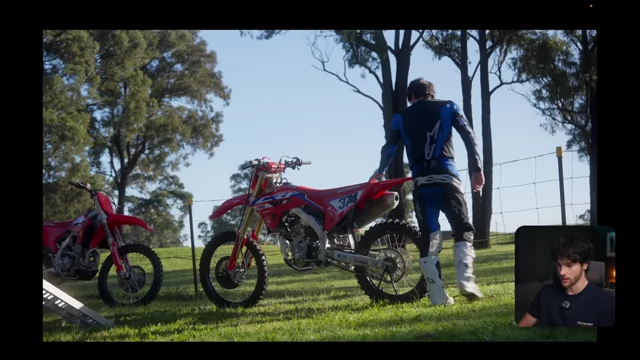
- Gear Selection: Purchase gear (e.g., red goggles for snow, blue motocross gear for a red bike against green) that creates visually appealing color contrasts.
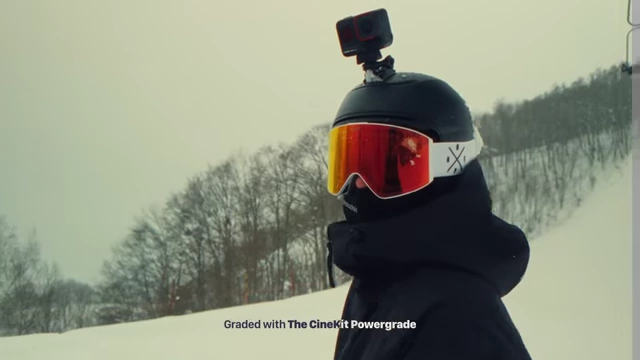
Snowboarder with red goggles creating intentional color contrast against the snow [ 00:06:29 ] 
Motocross rider in blue gear with a red bike against a green background, shown in raw SLOG [ 00:06:38 ] - Without these colors present in real life, no LUT or color grade can effectively "pull" them into the shot.
Practise Tripod Shots [7:03]
- Composition Focus: Shooting on a tripod or handheld forces you to concentrate on the actual composition of the shot, unlike gimbals which primarily focus on smoothness and centering.
- Skill Transfer: Improving compositional skills through tripod shooting makes you a much better videographer and cinematographer, enhancing all future gimbal or other types of shots.
Dehancer Plugin Review [7:41]
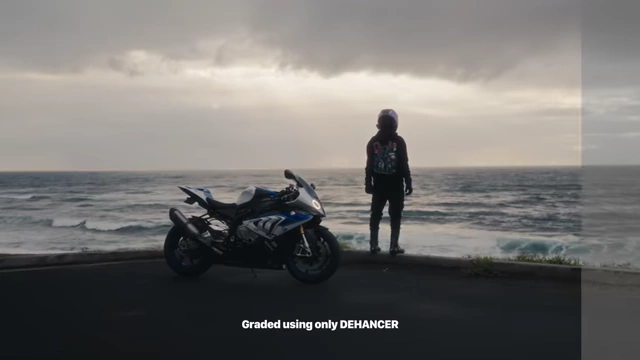
Dehancer is a film emulation plugin for color grading, compatible with DaVinci Resolve, Premiere Pro, Final Cut, and Photoshop.
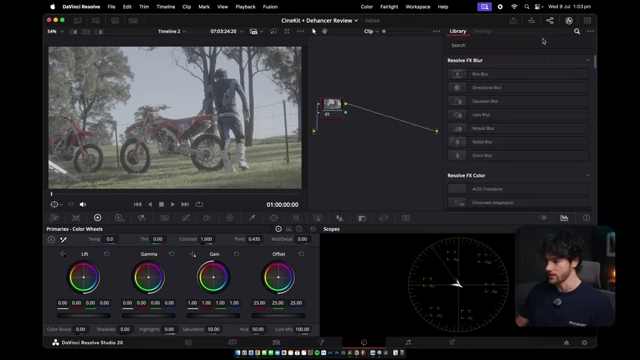
- Workflow Integration: It can transform log footage to Rec. 709 directly within the plugin, eliminating the need for separate Color Space Transforms (CSTs).
- Select source camera vendor (e.g., Sony) and log profile (e.g., Slog 3/S-Gamut3.Cine).
- Adjust exposure, temperature, and tint within the plugin.
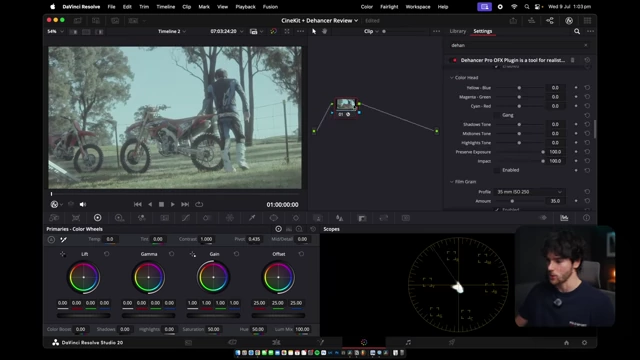
DaVinci Resolve interface demonstrating the Dehancer plugin's various film emulation settings [ 00:08:08 ]
- Film Profiles: Offers various film profiles (e.g., Kodak Portra 400) with adjustable "push" and "pull" to affect the look.
- Film Developer: Adds contrast and boosts saturation.
- Film Compression: Applies a filmic compression to highlights and adjusts color density.
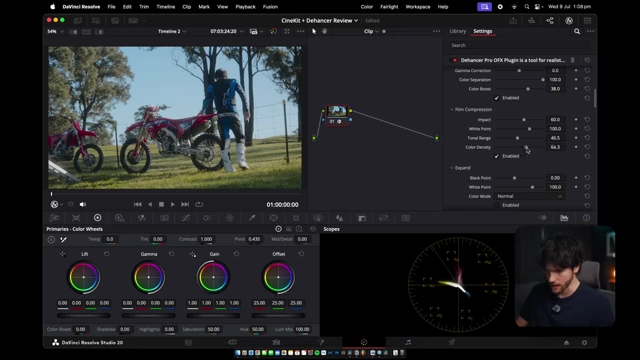
Dehancer plugin settings for film compression, including tonal range and color density [ 00:09:45 ] - Print Film: Emulates specific print films (e.g., Fujifilm 3513 Print Film) for distinct color and contrast characteristics.
- Color Head: Allows for detailed color grading, adjusting tones in shadows, midtones, and highlights (e.g., cool shadows, warm highlights).
- Filmic Effects:
- Film Grain: Offers highly realistic and customizable film grain options (e.g., 16mm ISO 50).

Dehancer plugin settings for realistic film grain, showing profile and amount controls [ 00:11:17 ] - Halation: Creates a distinctive glow around bright light sources.

Dehancer plugin settings for halation, creating a glow around bright light sources [ 00:11:26 ] 
Before and after applying halation effect to the footage using Dehancer [ 00:11:33 ] - Bloom: Mimics the effect of a mist filter on a lens, softening highlights.
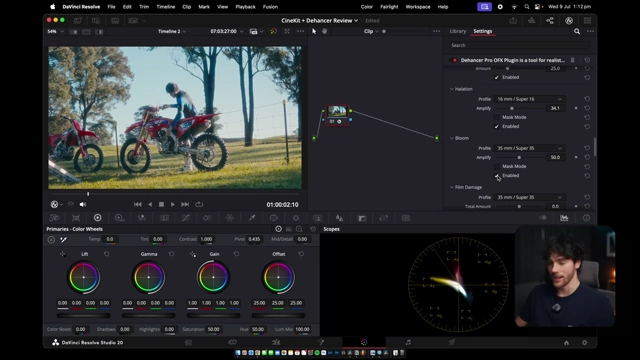
Dehancer plugin settings for bloom, mimicking a mist filter effect [ 00:11:41 ] - Film Damage: Adds subtle flickers and imperfections like old film.
- Film Breath: Reproduces the slight flicker characteristic of film.
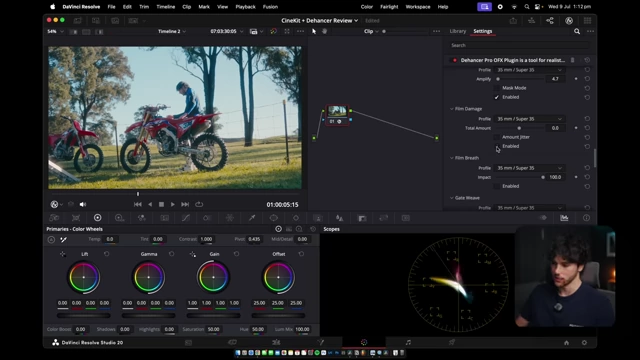
Dehancer plugin settings for film breath, reproducing subtle film flicker [ 00:11:57 ] - Gate: Adds a subtle "shake" effect, simulating a film projector.
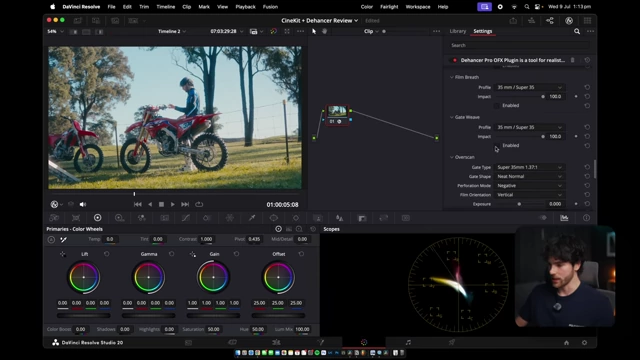
Dehancer plugin settings for gate weave, adding a subtle shake effect [ 00:12:07 ] - Overscan: Creates a vintage film camera look with a black border and other filmic characteristics, often used for cinematic social media posts.
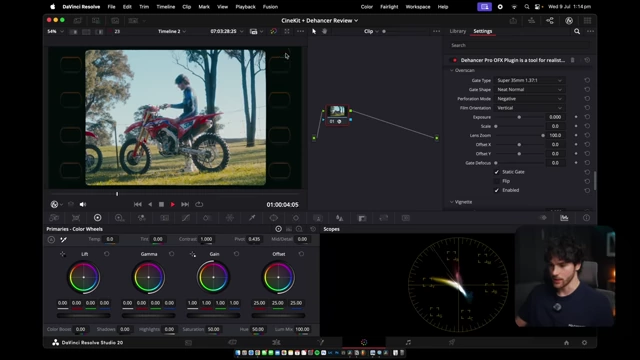
Dehancer plugin settings for overscan, creating a vintage film camera look with borders [ 00:12:30 ] 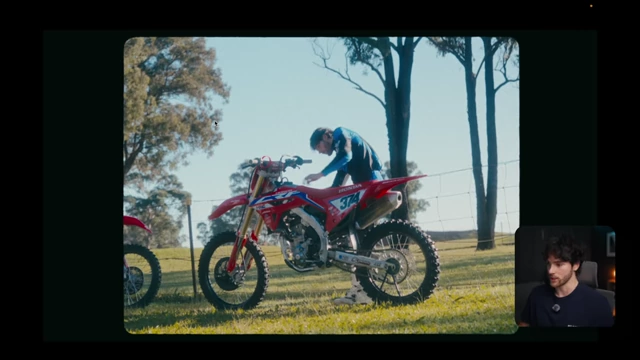
Final graded image utilizing Dehancer's overscan effect for a vintage film look [ 00:12:42 ]
- Film Grain: Offers highly realistic and customizable film grain options (e.g., 16mm ISO 50).
JAY's CineKit Powergrade [13:00]
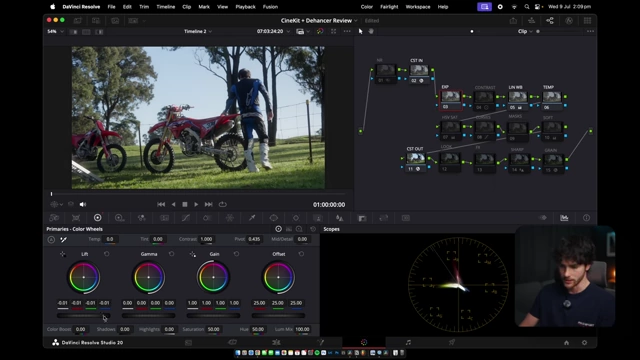
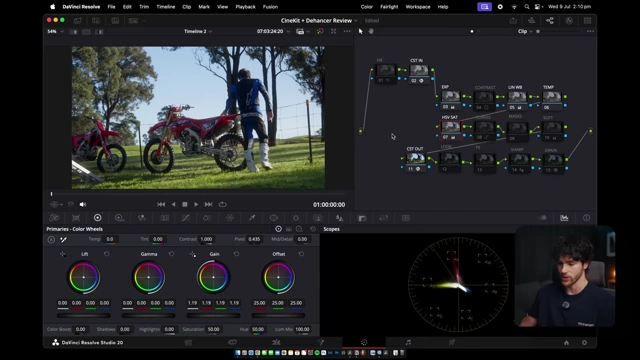
The CineKit Powergrade is a DaVinci Resolve node tree system designed for consistent and confident color grades across various projects and cameras.
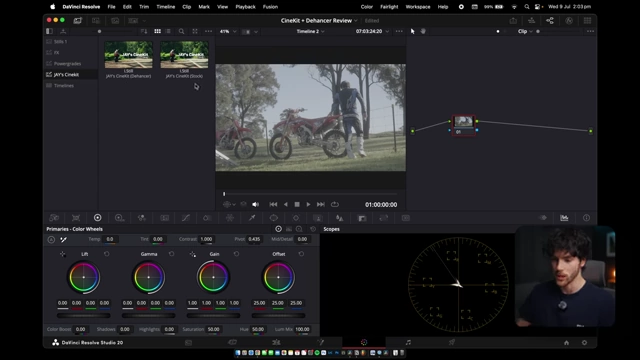
- Structure: It's a pre-built node tree that logically organizes color grading steps.
- Includes both a Dehancer version (if you own the plugin) and a stock version (using DaVinci Resolve's native tools).

The CineKit Powergrade node tree structure in DaVinci Resolve, illustrating the organized workflow [ 00:13:26 ]
- Includes both a Dehancer version (if you own the plugin) and a stock version (using DaVinci Resolve's native tools).
- DaVinci Wide Gamut: The system works within DaVinci Wide Gamut color space, offering a wider dynamic range than individual camera log profiles (e.g., Slog 3).
- Utilizes a Color Space Transform (CST) "in" node to convert log footage to DaVinci Wide Gamut and a CST "out" node to convert back to Rec. 709.

Before and after applying the CineKit Powergrade to motocross footage [ 00:14:05 ]
- Utilizes a Color Space Transform (CST) "in" node to convert log footage to DaVinci Wide Gamut and a CST "out" node to convert back to Rec. 709.
How I Color Grade (Step by Step) [14:07]
The core workflow using the CineKit Powergrade involves a structured approach to color correction and creative grading.

- 1. Color Space Transform (CST) In [14:07]
- Convert camera log footage (e.g., Sony S-Gamut3.Cine / S-Log3) into DaVinci Wide Gamut for maximum dynamic range.
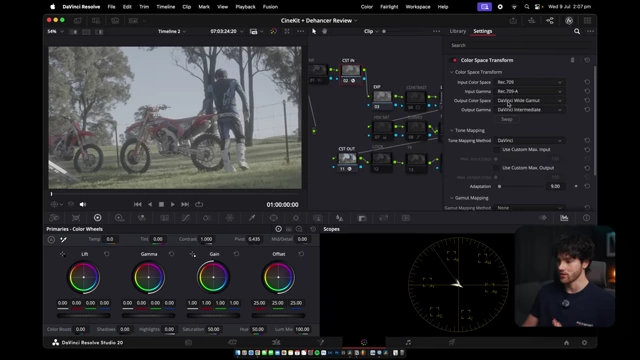
CineKit Powergrade's Color Space Transform (CST) in node, converting footage to DaVinci Wide Gamut [ 00:14:08 ] 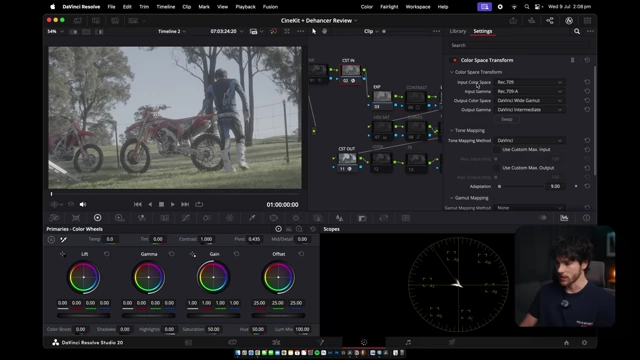
Setting the input color space and gamma to Sony S-Gamut3.Cine / S-Log3 in the CST node [ 00:14:41 ]
- Convert camera log footage (e.g., Sony S-Gamut3.Cine / S-Log3) into DaVinci Wide Gamut for maximum dynamic range.
- 2. Exposure Adjustment [14:55]
- 3. Contrast Node (Optional) [15:21]
- Adds additional contrast if needed, but often naturally achieved through exposure adjustments.
- 4. Linear White Balance [15:27]
- Accurately adjust white balance in post-production using the gain wheel, referencing the vectorscope for centering.

Adjusting white balance in the linear white balance node using the gain wheel and vectorscope [ 00:15:32 ]
- Accurately adjust white balance in post-production using the gain wheel, referencing the vectorscope for centering.
- 5. Temperature Adjustment (Creative, Optional) [15:49]
- A creative adjustment for overall shot temperature after primary white balance is set.
- 6. Saturation (HSV Technique) [15:57]
- 7. Curves Node (Optional) [16:17]
- Provides highlight roll-off, blacks lift, and an S-curve for a more filmic look.
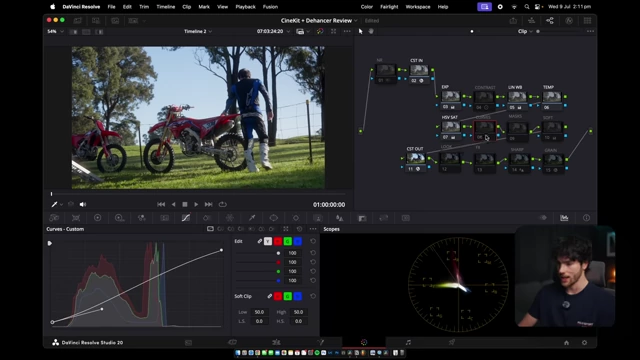
The curves node, used for highlight roll-off, blacks lift, and an S-curve [ 00:16:26 ]
- Provides highlight roll-off, blacks lift, and an S-curve for a more filmic look.
- 8. Masks Compound Node (Optional) [16:28]
- Used to add power windows or other masks for isolated adjustments.
- 9. Softness Node [16:34]
- Subtly softens the image, often in preparation for grain application.
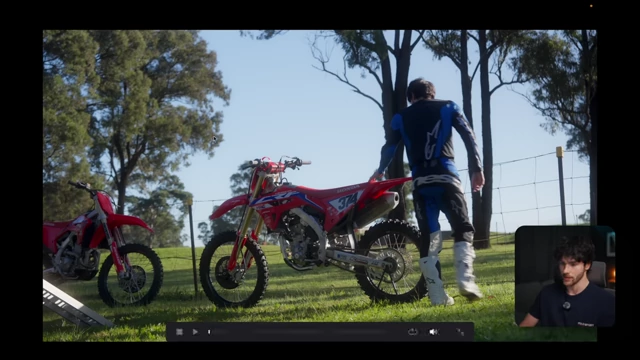
Applying a subtle softness to the image, preparing for grain application [ 00:16:38 ]
- Subtly softens the image, often in preparation for grain application.
- 10. Color Space Transform (CST) Out [16:45]
- Converts footage from DaVinci Wide Gamut back to Rec. 709.
- 11. Look Node (Creative Color Adjustment) [16:53]
- Applies the primary creative look using a custom LUT (e.g., "Monarch") within a parallel node structure, with adjustable intensity.

The "Look" node enabled, where the primary creative color adjustments are applied [ 00:16:51 ] 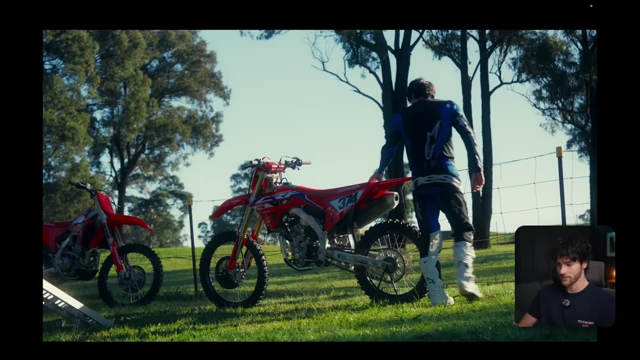
Footage after applying the main creative "look" for the desired aesthetic [ 00:17:02 ] 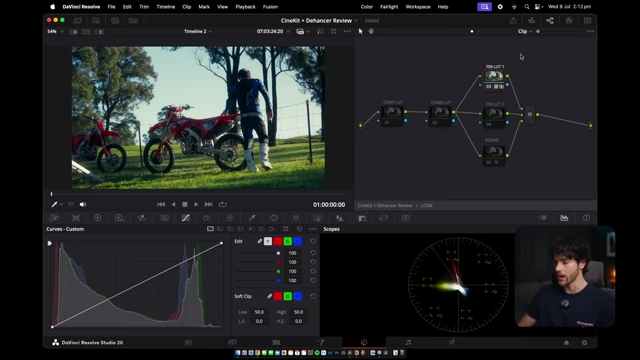
Inside the "Look" compound node, showcasing the "Monarch" LUT within a parallel node structure [ 00:17:16 ]
- Applies the primary creative look using a custom LUT (e.g., "Monarch") within a parallel node structure, with adjustable intensity.
- 12. Effects Node [17:40]
- Includes various filmic effects:
- Radial Blur: Creates an anamorphic style look on the edges.
- RGB Split: Introduces chromatic aberration.
- Halation: Emulates the glow around bright areas.
- Bloom: Softens highlights, similar to a mist filter.
- Vignette: Darkens the edges of the frame to draw attention to the center.
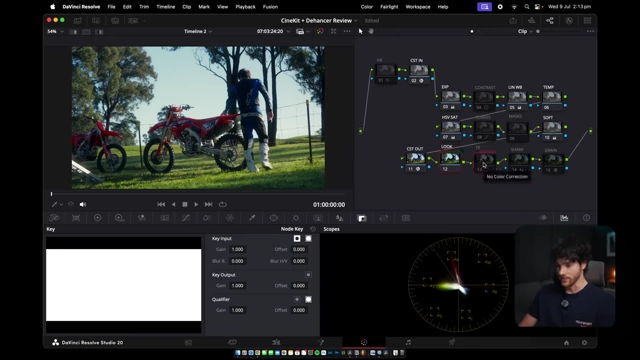
The "Effects" node enabled, containing various filmic effects like radial blur and RGB split [ 00:17:42 ] 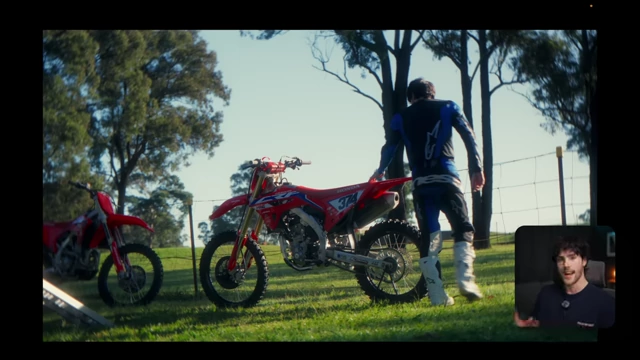
Footage with filmic effects such as radial blur, RGB split, and halation applied [ 00:17:49 ] 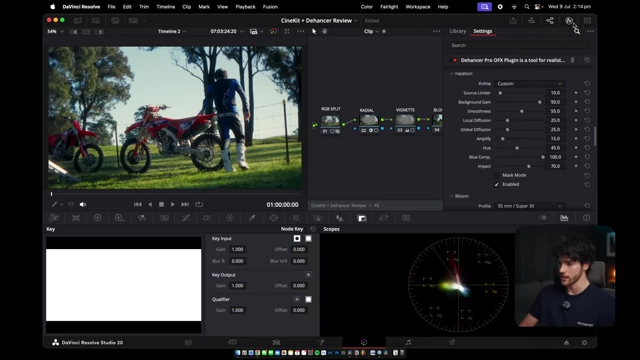
Dehancer's halation and bloom settings integrated into the CineKit effects node [ 00:18:10 ]
- Includes various filmic effects:
- 13. Sharpen Node [18:24]
- Sharpens the image if needed, especially after noise reduction or softening.
- 14. Grain Node [18:29]
- Applies realistic film grain (using Dehancer or stock plugins for the "stock" CineKit version).

The "Grain" node applying realistic film grain using custom Dehancer presets [ 00:18:33 ] 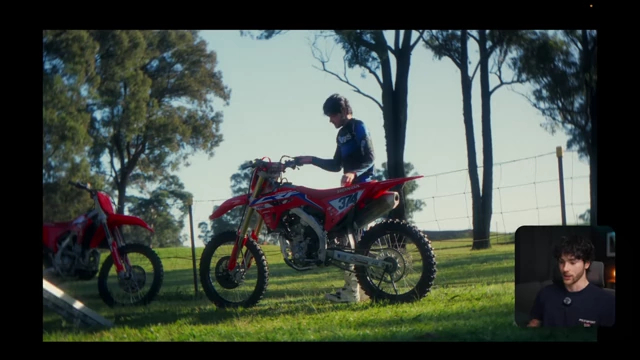
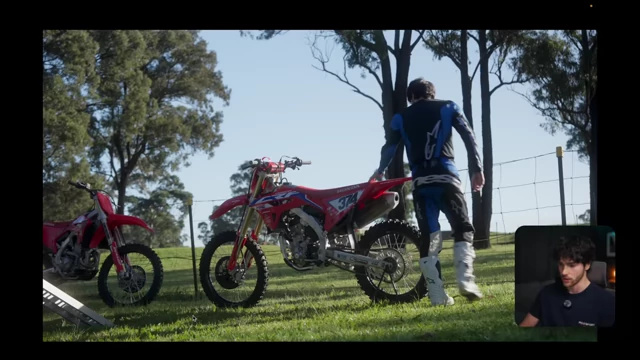
The final graded motocross footage, clean and consistent with the CineKit Powergrade [ 00:18:42 ] 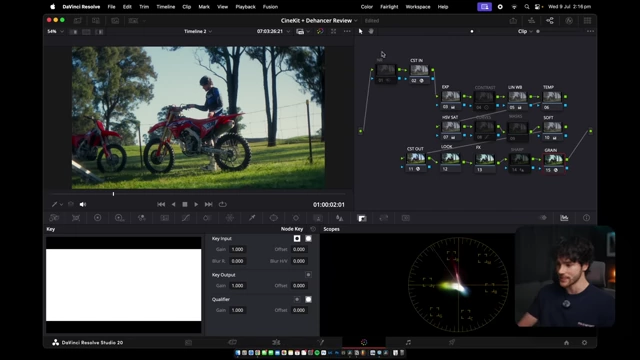
Overview of the complete CineKit Powergrade node tree after all adjustments [ 00:18:44 ]
- Applies realistic film grain (using Dehancer or stock plugins for the "stock" CineKit version).
Grading Night Footage [18:58]
- Applying CineKit: Start by applying the CineKit Powergrade and setting the CST input (e.g., Slog 3).
- Exposure & Contrast: Adjust lift, gamma, and enable the contrast node for a strong base.

Grading night footage using the CineKit Powergrade, showing contrast adjustments [ 00:19:14 ] - White Balance: Make subtle adjustments to white balance, often cooling it slightly.
- Look & Effects: Apply the "look" node, optionally pairing with other creative LUTs or film looks. Selectively enable effects like RGB split.
- Noise Reduction: Crucial for night footage, apply noise reduction early in the node tree.
- Sharpen: Re-sharpen the image after noise reduction, as noise reduction can soften details.
Grading Talking Head Shot [20:41]
- Initial Setup: Apply CineKit, set CST, then adjust exposure (lift, highlights) to manage skin brightness.
- Curves: Enable curves for highlight roll-off and to bring blacks down for more depth.
- Softness: Apply image softness.
- Look: Apply the main "look" but reduce its intensity (e.g., 0.4) and optionally pair it with other creative nodes like a "Kodak" node for an extra creative layer.
- Effects: Selectively enable effects like radial blur.
- Custom Vignette: Use a power window in the masks node to create a custom vignette, focusing attention on the subject by darkening the surroundings.

Grading a talking head shot, applying a custom vignette using a power window to emphasize the subject [ 00:21:43 ]
Sunset Grade [22:10]
- Stock CineKit Version: Demonstrates grading using the stock version of CineKit (without Dehancer).
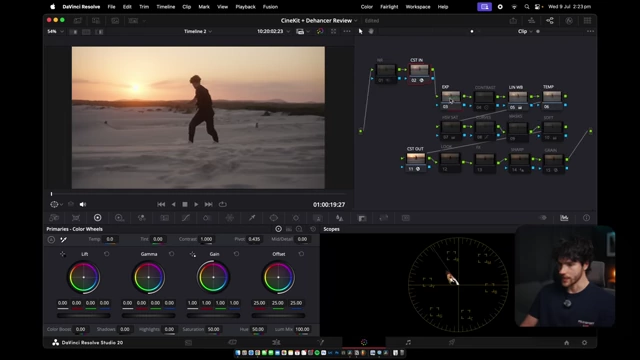
Grading a sunset shot using the stock version of CineKit Powergrade [ 00:22:12 ] - Exposure: Adjust lift, use HDR wheels for global exposure control, and slightly punch up gain.
- White Balance: Correct overly warm sunset tones by pushing cool tones into the clip.
- Saturation: Enable HSV saturation to make the sunset colors pop.
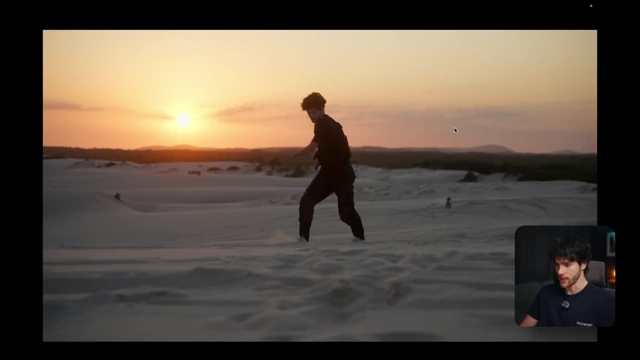
Sunset footage with HSV saturation applied to make the colors pop [ 00:22:43 ] - Curves: Apply curves for highlight roll-off and a subtle black lift for a clean S-curve.
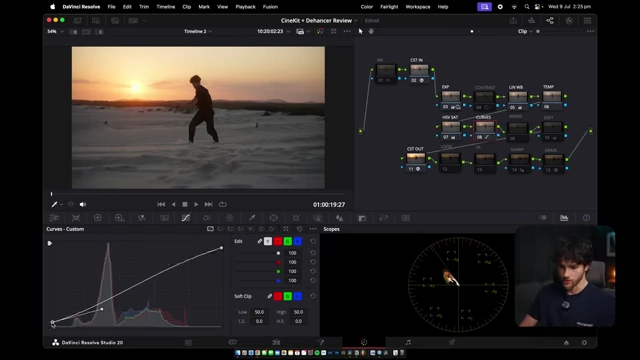
Adjusting curves for highlight roll-off and black lift for a clean S-curve in the sunset grade [ 00:22:48 ] - Softness: Apply softness, anticipating a grain application later.
- Look: Enable the main "look" node, adjusting its intensity.
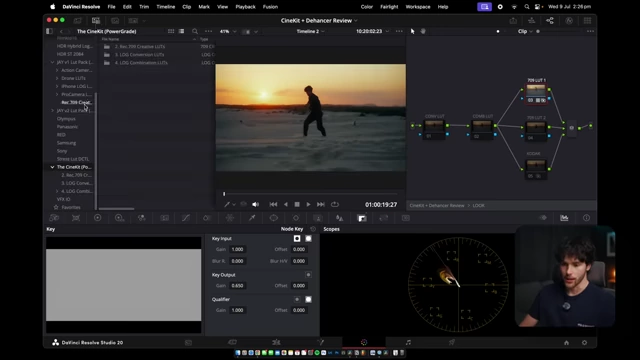
Accessing the LUT library within the "Look" compound node for various creative options [ 00:23:05 ] - Effects: Selectively apply effects like radial blur for an anamorphic style, RGB split, and halation (using stock plugins).
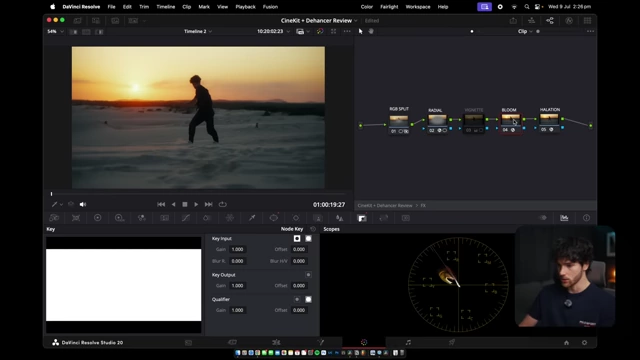
Enabling effects like radial blur and halation within the stock CineKit for the sunset grade [ 00:23:30 ] - Grain: Apply grain using stock plugins to complete the filmic aesthetic.
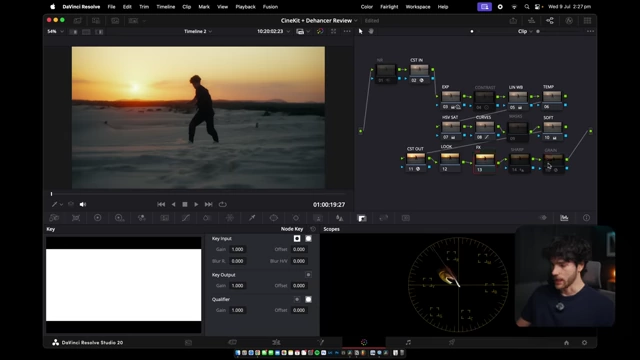
Applying film grain using stock plugins to complete the filmic aesthetic for the sunset shot [ 00:23:43 ] 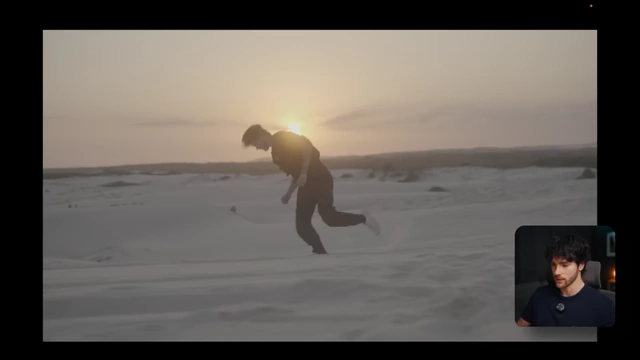
Before and after applying the CineKit Powergrade to a sunset shot, enhancing colors and filmic qualities [ 00:23:49 ]
Learn more with The CineKit tutorials [23:54]
- The CineKit includes a short course with in-depth tutorials on color grading, DaVinci Resolve project settings, and export settings.
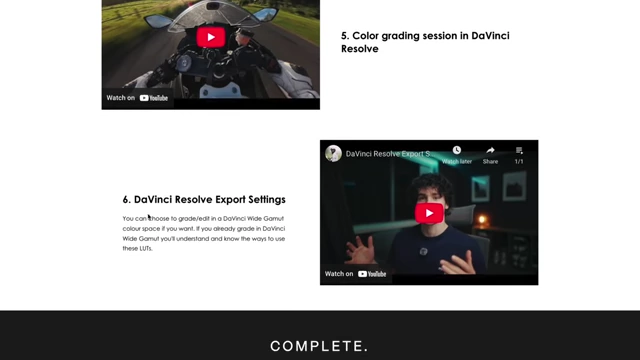
The CineKit short course curriculum, detailing topics like Powergrade usage and export settings [ 00:24:13 ] - Five (or six) sample shots are provided for practice color grading.
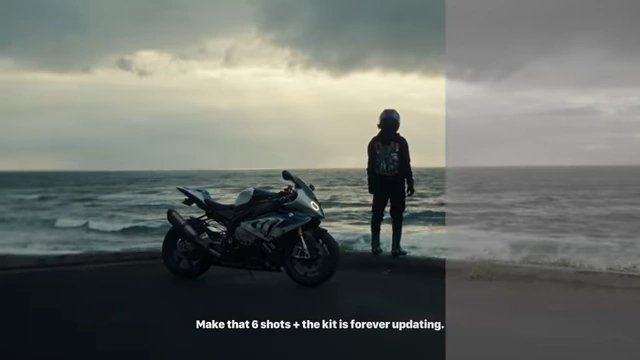
Examples of raw footage provided for practice color grading with the CineKit [ 00:24:22 ]