Mastering Cinematic Color Grading in DaVinci Resolve to Elevate Your Videos
This tutorial guides viewers through a step-by-step process for professional color grading in DaVinci Resolve to achieve a dark, moody, and cool cinematic look.
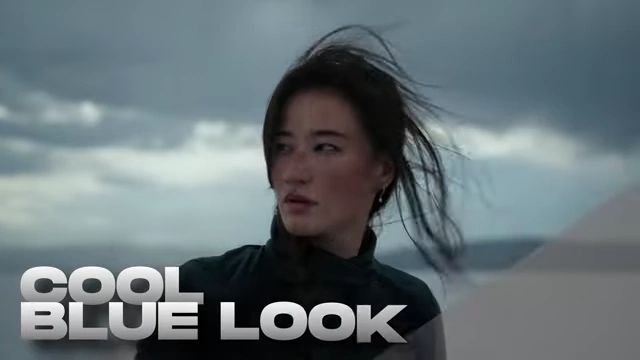
- The video begins with essential timeline and color space settings, including normalizing footage shot on Canon Log 3.
- It demonstrates how to use reference images with a split screen to accurately match desired color palettes.
- Key adjustments covered include correcting exposure, establishing white balance by pushing blue tones, and precisely managing saturation using the SSV color space.
- The process then moves to split toning to add warmth to highlights and cool tones to shadows, followed by detailed color refinements for blues and skin tones.
- Advanced techniques like creating a vignette with parallel nodes and power windows, sharpening the image, and applying a "Film Look Creator" effect with grain are also shown.
- Finally, the video explains how to save and apply the custom grade to multiple clips, making minor exposure tweaks, and how to use noise reduction for cleaner footage.
Introduction to Color Grading [00:00]
This video demonstrates a step-by-step color grading process in DaVinci Resolve, focusing on achieving a cool, blue, cinematic aesthetic.
- Learning Objectives [00:14] - Create a cool blue look. - Understand and apply split toning. - Match shots to a specific aesthetic.
Timeline and Color Space Settings [00:42]
The first step is to normalize footage within DaVinci Resolve to ensure a consistent starting point for color grading.
- Creating a New Timeline [00:42] - Select all footage and create a new timeline. - Name the timeline (e.g., "color grade"). - Set format to 1080p.
- Configuring Color Management [00:58] - Choose DaVinci YRGB color management. - For PC users, set output color space to REC 709 Gamma 2.4. - For Mac users, set output color space to Rec 709 Scene.
- Setting Input Color Space [01:21] - Select all clips in the media pool. - Right-click, navigate to "Input Color Space". - Select "Canon Log 3" to normalize Canon footage.
Utilizing Reference Images for Matching Colors [01:43]
Matching colors to a specific aesthetic is simplified by using a reference image.
- Setting Up Reference View [01:43]
- Enable nodes and the gallery in the color tab.
- Open the reference image in the gallery.
- Use the "Split Screen" option and select "Selected Still Images" to view the working clip alongside the reference.
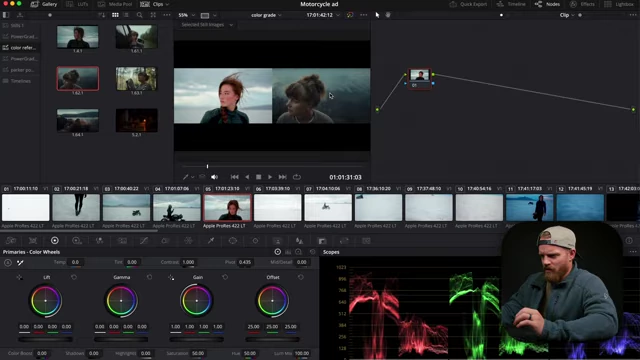
Split Screen for Color Matching in DaVinci Resolve [ 00:02:30 ] - Matching the Desired Look [02:08] - Aim to match the dark, moody, cool blue look of the reference image.
Initial Color Adjustments (Exposure, White Balance, Saturation) [02:45]
Begin by making fundamental adjustments to the image's light and color balance.
- Adjusting Exposure [02:45] - Add a new node and label it "Exposure" [03:47]. - Use the HDR wheel to bring down overexposed areas, matching the reference. - Adjust gamma, shadows, and highlights for overall balance. - Increase contrast slightly.
- Setting White Balance (WB) [03:22]
- Add another node and label it "WB" [03:53].
- Change the white balance setting to "linear" and lower the "lumix" for easier adjustment.
- Push more blue into the image using the gain wheel to achieve the desired cool tone.
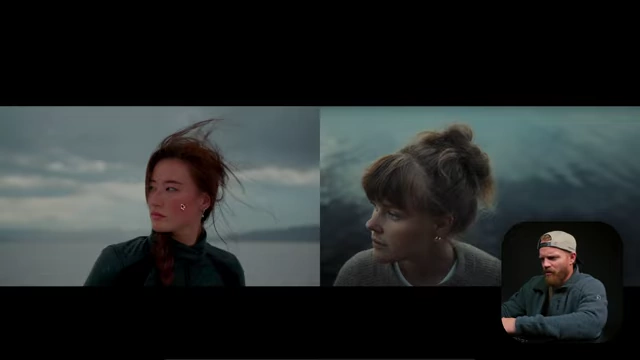
Comparison of original (left) and adjusted (right) footage after initial exposure and white balance corrections [ 00:03:17 ] - Controlling Saturation [04:00] - Add a new node and label it "Saturation" [03:57]. - Change the color space to "SSV" (Hue, Saturation, Value). - Turn off "hue" and "value" to isolate pure saturation adjustment, preventing luminance shifts. - Pull out some saturation using the gain wheel. - Slightly increase contrast.
Split Toning and Color Refinement [04:40]
Refine the color palette by applying split tones and making granular adjustments.
- Applying Split Tone Effect [04:40] - Add a new node and create a point in the splines. - Push reds and greens into the highlights for warmth. - Pull reds out of the shadows to enhance cool tones, adding "extra flavor" [05:12].
- Dialing in Specific Colors [05:19]
- Use the color splines to adjust specific hues.
- Desaturate blues and introduce a hint of teal.
- Make minor tweaks to skin tones for natural appearance.
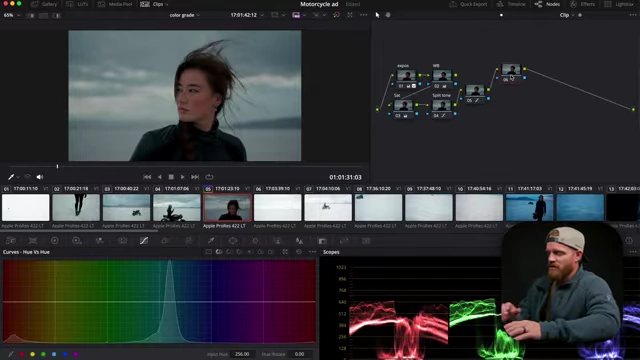
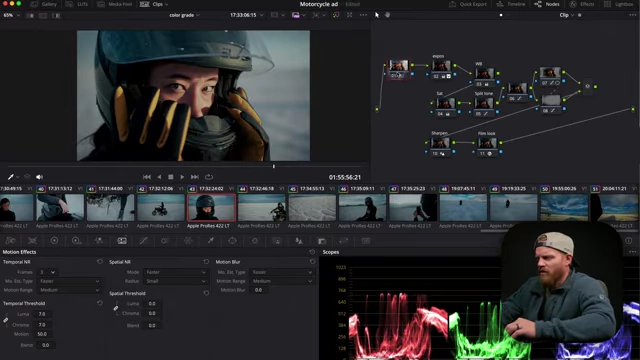
DaVinci Resolve node tree showing progression after initial adjustments and split toning [ 00:05:59 ]
Creating a Vignette with Power Windows [06:00]
A vignette helps direct the viewer's attention and adds to the cinematic feel.
- Setting Up Parallel Node for Vignette [06:00] - Create a parallel node (Option + P). - Add an elliptical power window around the subject's face. - Soften the edges of the power window significantly.
- Applying the Vignette Effect [06:15] - Connect the blue output to the alpha of the bottom channel. - Invert the mat. - In the top node, boost brightness in the central area (subject's face). - In the bottom node, decrease brightness to create a subtle dark vignette around the edges.
Sharpening and Film Look Application [06:40]
The final touches include sharpening the image and applying a filmic aesthetic.
- Sharpening the Image [06:40] - Add a node and label it "Sharpening" [06:40]. - Go to the blur icon and pull the blur down to about 48 to sharpen the image.
- Applying Film Look [07:00]
- Add a node and label it "Film Look" [06:43].
- Press Shift + Spacebar and search for "Film Look Creator."
- Apply the "Clean Slate" preset.
- Adjust the "bleach bypass" to control and modify the colors, often reducing overall color.
- Add film grain (e.g., 65mm, saturation all the way down) for a more authentic film look.
- Add another split tone node after the film look to reintroduce color, specifically pivoting towards blue to reinforce the cool aesthetic.
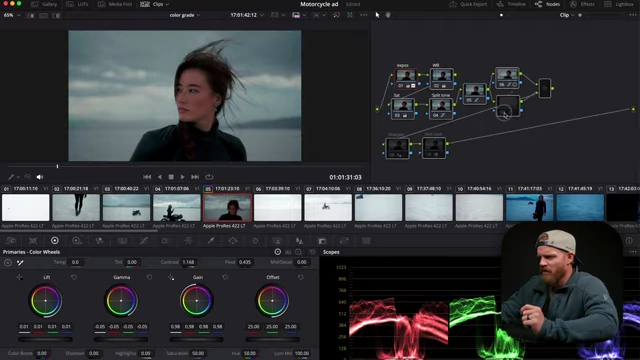
Completed Color Grading Node Tree in DaVinci Resolve [ 00:08:08 ]
Review and Applying Grade to Other Clips [08:00]
After perfecting one clip, the grade can be efficiently applied to others.
- Recap of Steps [08:00] - Exposure correction, white balance, saturation, split tone, color management, parallel node for lighting, sharpening, and film look.
- Saving and Applying Grades [08:30]
- Save the completed grade as a "still album."
- Right-click on other clips and select "Apply Grade."
- Make minor exposure and gamma adjustments as needed for individual clips that might be over/underexposed.
- For drone footage or clips needing more specific treatment, adjust the bleach bypass and potentially desaturate blues further.
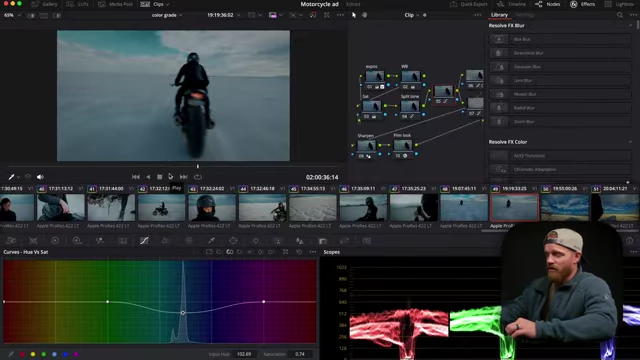
Adjusting blue saturation in curves for specific drone footage after applying the main grade [ 00:09:49 ]
Noise Reduction [10:31]
Address any digital noise present in the footage for a cleaner final output.