Cinematic Color Grading in DaVinci Resolve: Secondaries, Glow, and Tone Curves Tutorial
Summary:
This tutorial in DaVinci Resolve's free version teaches how to achieve a cinematic look through advanced color grading techniques. Key points include:
- Using secondary adjustments to isolate and modify specific areas like skies or shadows, contrasting with global primary adjustments.
- Mastering the highlights slider for precise recovery of blown-out skies and bright areas without desaturation.
- Employing the shadows slider and HDR exposure for recovering details in dark areas.
- Setting up a glow node with specific composite modes and thresholds to add a dreamy or poppy effect to highlights.
- Utilizing tone curves, starting with Hue vs. Hue to correct color casts, and then applying an S-curve for contrast, crushing whites, and lifting blacks to finalize the cinematic grade.
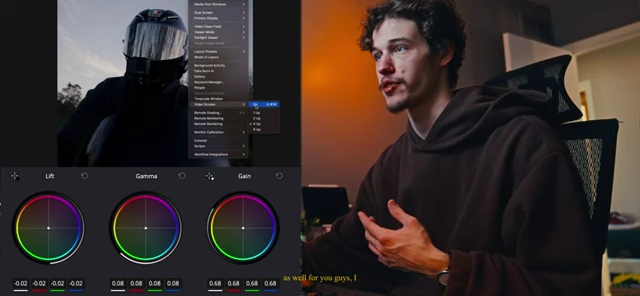
DaVinci Resolve interface showing color wheels, scopes, and a video preview for color grading [ 00:01:30 ]
Introduction [0:30]
- This is episode 2 of "Cracking the DaVinci Code" series.
- The episode covers secondary adjustments, glow effects, and tone curves to achieve professional cinematic quality footage using the free version of DaVinci Resolve.
- The video will walk through the complete workflow: isolating specific colors, adding cinematic glow, and mastering tone curves.
Secondaries [0:55]
- Understanding Secondary Adjustments [0:55]
- Secondary adjustments are specific to a certain area of the image (e.g., shadows, sky, a masked subject).
- Unlike primary adjustments that affect the entire image globally, secondaries allow targeted changes.
- The video utilizes pre-made sky and dark nodes, but users can create unlimited secondary nodes as needed.
- Keying for Highlights (Sky Recovery) [2:24]
- To key out the sky, primarily use the Luminance slider.
- Set the softness between 6 and 10 (e.g., 7) to ensure a gradual and soft transition.
- Adjust the Luminance slider to key out only the bright areas (sky), typically between 58 to 60.
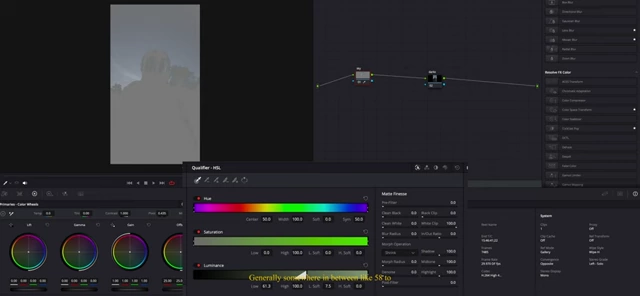
Luminance slider in DaVinci Resolve's HSL Qualifier panel used to key out bright areas for secondary adjustments. [ 00:02:46 ] - Applying a Blur Radius [7:18]
- Always apply a blur radius (e.g., 9-10) to the mask to avoid harsh edges, making the key look natural.
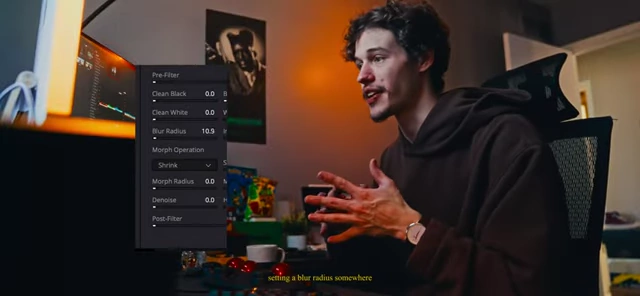
Blur Radius setting within DaVinci Resolve's qualifier panel to soften mask edges for natural transitions. [ 00:07:23 ]
- Always apply a blur radius (e.g., 9-10) to the mask to avoid harsh edges, making the key look natural.
- Methods for Highlight Recovery [3:03]
- 1. HDR Tab Exposure Slider: [3:13] This method affects the exposure metrically but might behave differently.
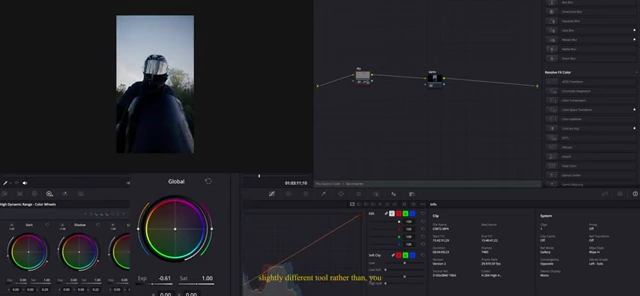
HDR tab with Exposure slider in DaVinci Resolve for photometric highlight adjustments. [ 00:05:35 ] - 2. Highlights Slider: [3:17] This is the preferred method as it precisely adjusts points on the curve for bright highlights without desaturating the image.
- Moving the highlights slider down recovers detail in blown-out skies and bright areas very effectively.
- This method works exceptionally well for cameras shooting in 10-bit, which store extensive highlight information.
- Combining Methods: [5:55] Sometimes, a combination of both the HDR exposure slider (for global brightness reduction) and the highlights slider (for precise recovery) works best.
- For instance, reduce overall exposure by a quarter stop with HDR, then use the highlights slider to recover specific detail.
- 1. HDR Tab Exposure Slider: [3:13] This method affects the exposure metrically but might behave differently.
Recovering Shadows [7:51]
- Identifying Dark Areas for Recovery [7:51]
- The example image features a subject (cyclist) and his equipment (bike, helmet) that are very dark, almost pure black.
- Keying out dark areas helps recover lost information in shadows.
- Keying for Shadows (Dark Recovery) [8:12]
- Similar to highlights, use the Luminance slider in the opposite direction.
- Set the softness around 8-10.
- Adjust the Luminance slider (e.g., up to 58) to key out only the dark areas.
- Add a blur radius for softer edges, similar to highlight keying.

Luminance slider adjusted in DaVinci Resolve's HSL Qualifier panel to isolate dark areas for shadow recovery. [ 00:08:29 ]
- Methods for Shadow Recovery [8:50]
- 1. HDR Tab Exposure Slider: [8:53] Adjusting this slider will brighten the shadows but might also lift surrounding mid-tones.
- 2. Shadows Slider: [10:30] This is the preferred method for shadows.
- It precisely adjusts the shadow points on the curve without washing out the image if kept below 25 (e.g., 20).
- This method helps lift the subject slightly and creates a more natural, well-balanced image.
- Combining Methods: [11:06] A combination can be effective; for example, using the shadows slider to lift the shadows and then a slight adjustment with the HDR tab if needed.
- The result shows significant detail recovered in the subject's hoodie and bike that were previously black.
Glow [12:05]
- Introduction to the Glow Node [12:05]
- The glow node is pre-activated with specific settings in the example powergrade.
- Many people might grade with the glow node off, but with the correct setup, it's beneficial to keep it on.
- Optimal Glow Settings [12:12]
- Composite Type: Set to Soft Light. This creates a subtle vignetting effect.
- Shine Threshold: Set to 0. This maximizes the glow and creates a very nice vignette effect in the image's edges and keys in on the middle.
- Spread: Adjust the spread slider (between 0 and 2) to control the "dreaminess" or "pop" of the effect.
- A spread of 2 (or higher) looks like real life.
- Closer to 0 makes the image more dreamy and poppy, emphasizing highlights.
- Gain: Set to 0.39.
- Gamma: Set to 0.92.
- Ensure both "Alpha Blur Light Sources" and "Gamma Curve Effect" are checked.

DaVinci Resolve's Glow node settings configured for a cinematic effect, showing composite type, shine threshold, and spread. [ 00:13:58 ]
- Importance of Correct Settings [13:47]
- It's crucial to have the correct settings for the glow node to function as intended and avoid undesirable effects.
Curves [14:25]
- 1. Hue vs. Hue Curve for Color Correction [14:27]
- The Hue vs. Hue curve is used to adjust specific color hues within the image.
- In the example, the subject (cyclist) appears slightly purple.
- Click the blue dot in the curve (representing the blue/purple range) and drag it slightly upwards or downwards to remove the unwanted purple hue.
- This creates a more neutral blue tone, effectively fixing the color cast.
- 2. Tone Curve (S-Curve for Contrast and Dynamic Range) [15:51]
- Crushing Whites (Highlights) [16:09]
- Place anchor points on the highlights and shadows in the tone curve.
- Grab the white point and bring it down to "crush" the whites, setting a limit to how bright highlights can get.
- This creates a gradual roll-off and a cinematic "faded" look in the highlights, while adding subtle pop and contrast.
- Lifting Blacks (Shadows) [16:50]
- Add two points in the shadow region of the tone curve.
- The first point on the "fourth line" from the bottom, and the second on the "second line" from the bottom.
- Lift the second point slightly to roll up the blacks, ensuring they are not completely crushed (at zero).
- This brings back information in the darkest areas, preventing pure black and giving a more cinematic lift to the shadows without looking washed out.
- The scopes will show that the blacks are no longer at the floor (zero).

Custom tone curve in DaVinci Resolve showing the histogram and curve points for fine-tuning highlights and shadows. [ 00:03:57 ]
- Crushing Whites (Highlights) [16:09]
Final Review [18:35]
- Comparison: Before vs. After Color Grade [18:35]
- Before: The original image was dark with a blown-out sky and purple cast on the subject. There was very little detail in the shadows and highlights.
- After: Secondary adjustments recovered significant detail in both the sky and the dark subject. The glow node added a desired dreaminess/pop, and the tone curves corrected color and set the overall contrast and dynamic range.
- The final image looks professional, with rich detail and a cinematic feel, taking it from an amateur look to something seen on TV.