3 Reasons to Use ACES CC for Primary Color Adjustments in DaVinci Resolve
This video highlights ACES CC as an underutilized working space for primary color adjustments in DaVinci Resolve, offering three compelling reasons to integrate it into your workflow.
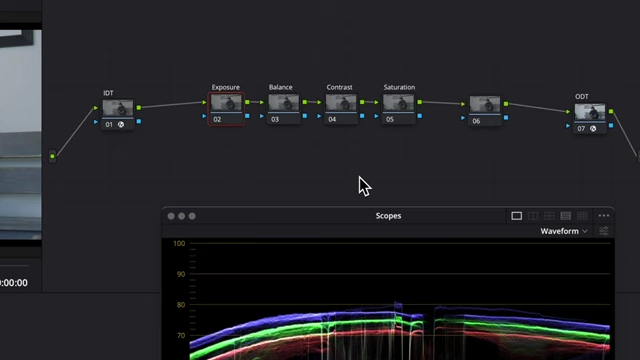
- 1. Photometrically Accurate Printer Lights: ACES CC's offset control mimics linear gain, allowing precise exposure and balance adjustments using printer light hotkeys for a clean, camera-like response.
- 2. Superior Contrast Handling: ACES CC contrast offers a smoother rolloff of shadows and highlights compared to DaVinci Intermediate, providing a more natural saturation response than the HDR contrast tool.
- 3. Streamlined Node Operations: Unlike other working spaces, ACES CC allows you to combine primary adjustments like exposure, balance, contrast, and saturation into a single node, simplifying your workflow without extra clicks.
A caveat is the potential for negative numbers when using the offset tool; however, this can be mitigated by adding a simple clamp (e.g., a pass-through Color Space Transform) after ACES CC adjustments.
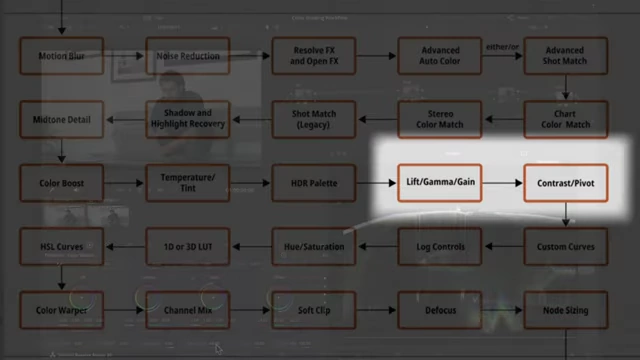
DaVinci Resolve's internal order of operations, highlighting Lift/Gamma/Gain/Offset preceding Contrast/Pivot [ 00:08:53 ]
Introduction to ACES CC for Primary Color Adjustments [00:00:08]
This video discusses ACES CC as an often-overlooked working space in DaVinci Resolve, particularly useful for primary adjustments like exposure, balance, contrast, and saturation. The speaker argues that ACES CC offers unique advantages that deserve more attention due to its helpfulness and control.
1. Photometrically Accurate Printer Lights [00:00:50]
ACES CC's offset control provides results identical to linear gain, a clean method for adjusting exposure and balance with behavior similar to in-camera adjustments.
- Linear Gain for Balancing:
- The speaker demonstrates balancing an image using linear gain by setting the gamma to linear and Lumix to zero. [00:01:16]
- The image is balanced by adjusting gain, assuming a white wall. [00:01:21]
- This method works well but isn't compatible with printer lights, which control the offset tool. [00:01:34]
- ACES CC with Printer Lights:
- ACES CC allows the use of printer lights because its offset control functions like linear gain. [00:01:40]
- Printer lights are keyboard shortcuts for the offset tool, enabling incremental adjustments to exposure and individual color channels for balancing. [00:01:48]
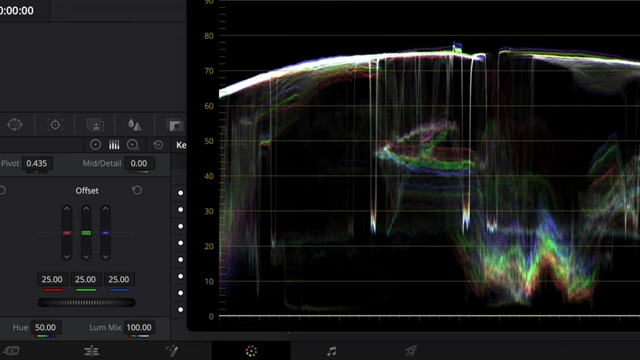
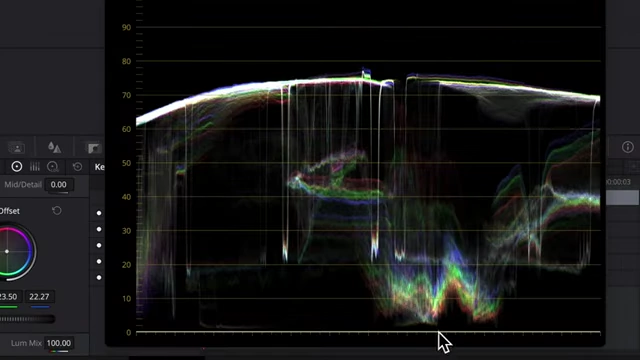
Detailed view of DaVinci Resolve's offset controls and waveform during a printer light adjustment [ 00:02:01 ] - To use them, ensure "printer light hotkeys" is selected under "Color" and customize shortcuts in DaVinci Resolve keyboard customization. [00:02:09]
- The speaker demonstrates balancing an identical clip using ACES CC and printer lights, achieving the same result as linear gain. [00:02:29]
- This also applies to exposure adjustments, offering photometrically accurate control. [00:03:09]
2. Improved Contrast Adjustments [00:04:05]
ACES CC contrast offers slightly different and often smoother results compared to DaVinci Intermediate, particularly in how it handles shadows and highlights.
- DaVinci Intermediate Contrast:
- Demonstrates adding contrast in DaVinci Intermediate (with S-curve for contrast option off), showing how shadows can "crash" through the bottom and highlights through the top. [00:04:18]
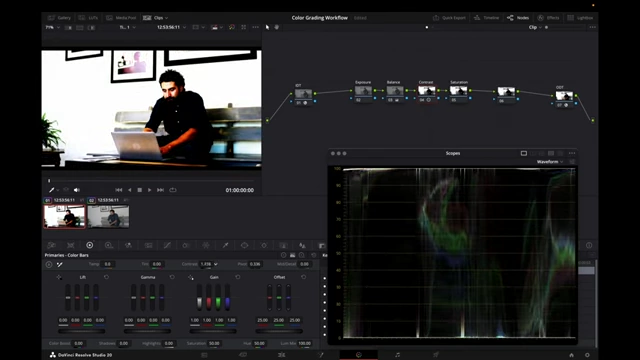
An example of aggressive contrast in DaVinci Intermediate, showing shadows 'crashing' and highlights clipping [ 00:04:37 ]
- Demonstrates adding contrast in DaVinci Intermediate (with S-curve for contrast option off), showing how shadows can "crash" through the bottom and highlights through the top. [00:04:18]
- ACES CC Contrast:
- Using a pivot of 414 (around middle gray) in ACES CC, contrast adjustments result in a smoother rolloff in both shadows and highlights. [00:04:52]
- This behavior is similar to the HDR contrast tool but provides a more natural saturation response that many users might prefer. [00:05:19]
- The HDR contrast tool, while similar in contrast, can perceptually desaturate the image, whereas ACES CC maintains saturation differently. [00:05:33]
3. Combining Node Operations Without Extra Clicks [00:06:28]
A significant advantage of ACES CC is its ability to streamline the color grading workflow by allowing multiple primary adjustments within a single node.
- Limitations of Mixed Working Spaces:
- ACES CC for Unified Operations:
- ACES CC enables combining exposure, balance, contrast, and saturation all within one node and on the same panel. [00:07:27]
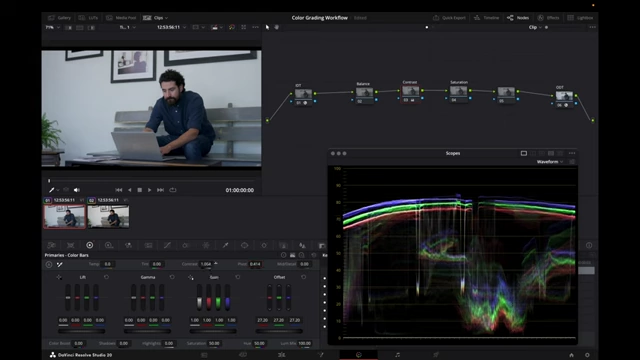
Combining exposure and contrast adjustments within a single node in ACES CC to streamline the workflow [ 00:07:50 ] - The order of operations in DaVinci Resolve's internal processing (lift/gamma/gain/offset before contrast/pivot) ensures that even in a single node, these adjustments are applied correctly. [00:08:42]
DaVinci Resolve's internal order of operations, highlighting Lift/Gamma/Gain/Offset preceding Contrast/Pivot [ 00:08:53 ]
- ACES CC enables combining exposure, balance, contrast, and saturation all within one node and on the same panel. [00:07:27]
Caveat: Potential Negative Numbers [00:09:11]
When using the offset tool in ACES CC, it is possible to create negative pixel values, which can cause issues later in the node tree.
- Prevention with Clamping:
- To prevent negative numbers, add a clamp after your ACES CC adjustments. [00:09:34]
- A pass-through Color Space Transform (CST) with tone mapping enabled can serve as an effective clamp, ensuring no other changes occur while managing pixel values. [00:09:48]

Color Space Transform (CST) settings in DaVinci Resolve with Tone Mapping enabled, used as a clamp to prevent negative pixel values [ 00:09:52 ] - For precision, specify the input/output color space and gamma in the CST and leave gamut mapping off. [00:10:06]