DaVinci Resolve Color Grading for Beginners: Project Setup, Shot Balancing & Creative Looks
This tutorial provides a beginner-friendly workflow for color grading in DaVinci Resolve, focusing on fundamental steps:
- Setting up project settings [00:00:40]: Configure DaVinci YRGB Color Managed with SDR Rec.709 output for YouTube and social media.
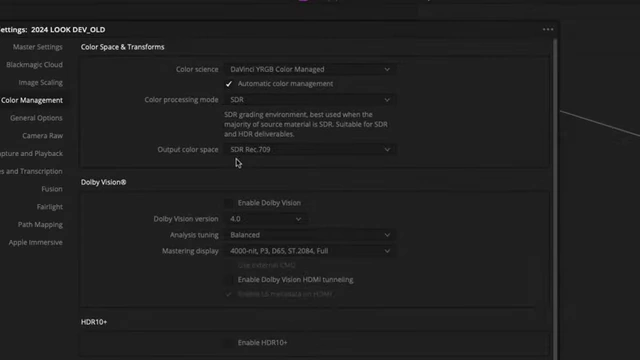
DaVinci Resolve project settings configured for DaVinci YRGB Color Managed and SDR Rec.709 output. [ 00:01:30 ] - Defining input color spaces [00:01:45]: Correctly identify and set the input color space for each clip (e.g., Sony S-Log3, Red Log3G10) to transform log footage into Rec.709.
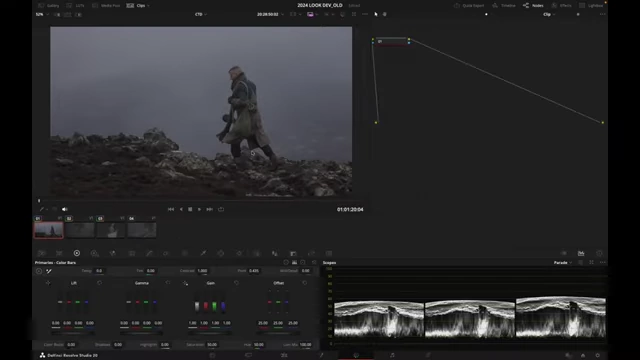
A Sony clip transformed from log to Rec.709 after setting its input color space to S-Gamma 3 Cine S-Log3. [ 00:02:05 ] - Balancing shots [00:03:41]: Utilize the HDR Color Wheels, specifically the Global slider for exposure, and the Temp/Tint controls for white balance, guided by Parade and Vectorscope monitoring.
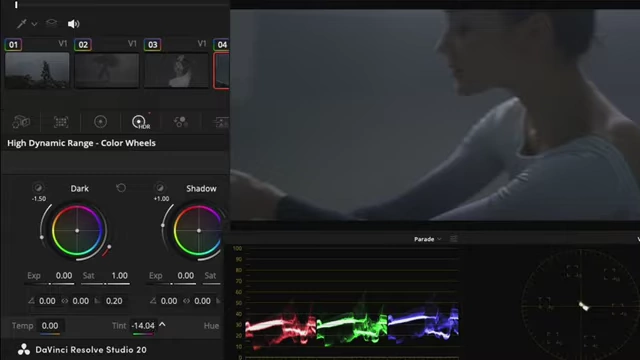
The Vectorscope trace moving towards the center after adjusting the Tint slider to neutralize a magenta cast. [ 00:07:03 ] - Creating a look [00:10:16]: Apply an S-curve using RGB curves for overall contrast, and use individual color curves (e.g., Red curve for cyan) to introduce creative color shifts and achieve a desired mood.
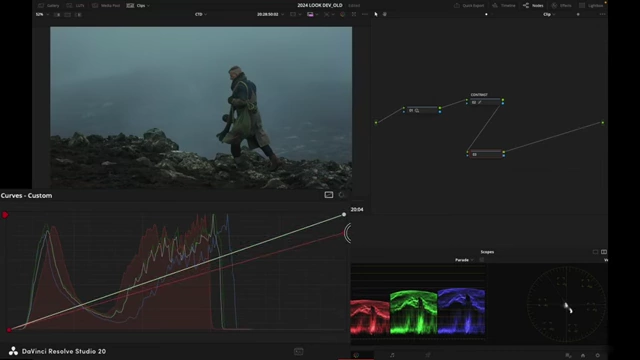
Adjusting the Red curve downwards to introduce cyan tones into the image, creating a cooler look. [ 00:10:57 ] - Efficient workflow [00:11:56]: Emphasize understanding the tools rather than relying on LUTs, making the grading process simpler and more effective for newcomers.
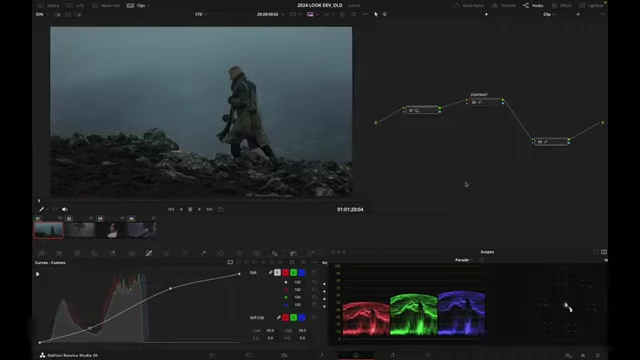
A moody cinematic look achieved with nodes for balancing, contrast, and color shifts. [ 00:11:52 ]
Introduction to Beginner Color Grading in DaVinci Resolve [00:00:00]
The video aims to simplify color grading for beginners using DaVinci Resolve, emphasizing an easy and efficient workflow to achieve professional results. The host, a colorist, shares his recommended starting points for those new to the process.
Essential Project Settings [00:00:40]
The first crucial step in color grading is setting up the project correctly to ensure accurate color representation.
- Accessing Project Settings [00:00:40]
- Click on the cog wheel icon to open the project settings window.
- Color Management Configuration [00:00:48]
- Navigate to the "Color Management" section.
- Load the "DaVinci YRGB Color Managed" preset for simplicity.
- Ensure the "Color processing mode" is set to "SDR" which is ideal for grading content for platforms like YouTube and social media.
- Confirm "Output color space" is set to "SDR Rec.709".
DaVinci Resolve project settings configured for DaVinci YRGB Color Managed and SDR Rec.709 output. [ 00:01:30 ]
- Defining Input Color Space for Clips [00:01:45]
- After saving project settings, individual clips need their specific input color space defined.
- For Sony clips: Right-click on the Sony clip, select "Input Color Space," then choose "Sony" and "S-Gamma 3 Cine S-Log3." This automatically transforms the log footage to Rec.709.
A Sony clip transformed from log to Rec.709 after setting its input color space to S-Gamma 3 Cine S-Log3. [ 00:02:05 ] - For Red clips: Select multiple Red clips, right-click, choose "Input Color Space," then "Red" and "Red Wide Gamut RGB Log 3G10." This also converts the log footage to Rec.709.
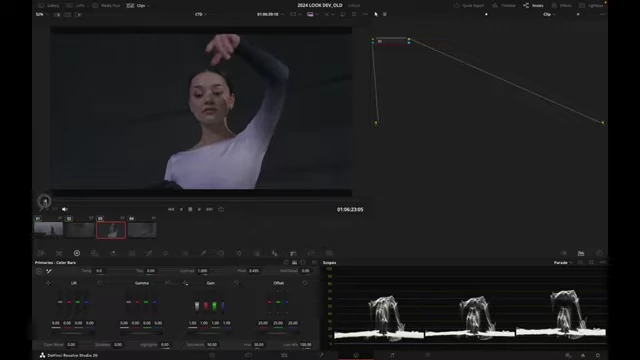
Red clips transformed from log to Rec.709 after setting their input color space to Red Wide Gamut RGB Log 3G10. [ 00:03:00 ] - Importance of this step: This is a critical first step, as it correctly interprets the raw camera footage, avoiding manual contrast and saturation adjustments that lead to inaccurate results. DaVinci Resolve's color management handles this transformation efficiently.
Balancing Shots for Neutrality [00:03:41]
After setting up the color management, the next step is to balance the individual shots to achieve a neutral baseline for color and exposure.
- Opening Scopes for Analysis [00:03:51]
- Open the scopes panel and select "Parade" to view red, green, and blue signals.
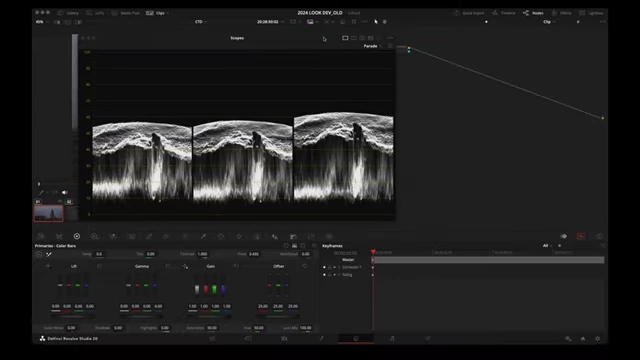
The Parade scope displaying the red, green, and blue signals of the video footage. [ 00:03:54 ] - Use the "Vectorscope" to display hue and saturation, with a "2x zoom" for a clearer trace.
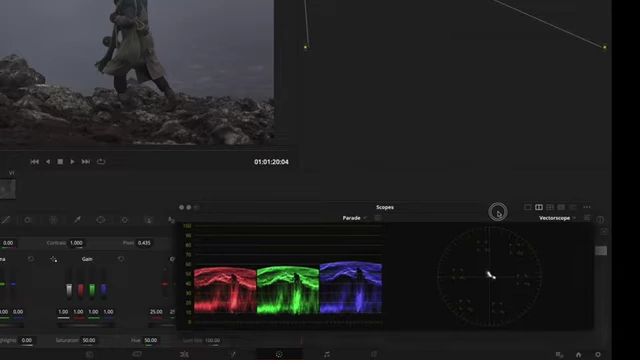
The Vectorscope displaying the hue and saturation plot of the image. [ 00:04:09 ]
- Open the scopes panel and select "Parade" to view red, green, and blue signals.
- Using HDR Color Wheels [00:04:26]
- Click on the "HDR" tab (High Dynamic Range) in the color wheels panel. This toolset is highly efficient for balancing.
- Global Exposure Adjustment: Use the "Global" slider (labeled "X") to adjust the overall exposure of the shot, similar to changing camera exposure.
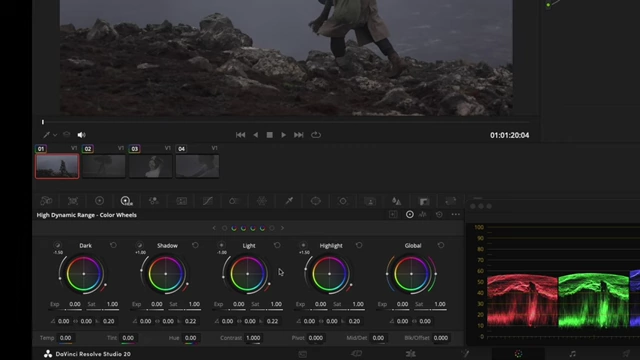
The HDR Color Wheels interface, with the 'Global' wheel highlighted for exposure adjustments. [ 00:04:44 ] - White Balance Correction (Temp and Tint):
- Observe the Vectorscope and image for color casts (e.g., magenta tint).
- Use the "Temp" slider to warm (right) or cool (left) the image.
- Use the "Tint" slider to shift between magenta (right) and green (left) to neutralize color imbalances.
The Vectorscope trace moving towards the center after adjusting the Tint slider to neutralize a magenta cast. [ 00:07:03 ]
- Applying Grades Across Shots [00:07:17]
- Once a shot is balanced, its grade can be copied and applied to other similar shots, serving as a starting point for consistency. Right-click on a graded clip and select "Apply Grade" to transfer the adjustments.
Crafting a Creative Look [00:10:16]
Once shots are balanced, you can start developing a specific creative look for your project.
- Creating Contrast with RGB Curves [00:10:27]
- Add a new node (Alt+S) after the balancing node.
- Go to the "RGB Curves" panel.
- Create a subtle "S-curve" to enhance contrast, making the image pop without being overly harsh.
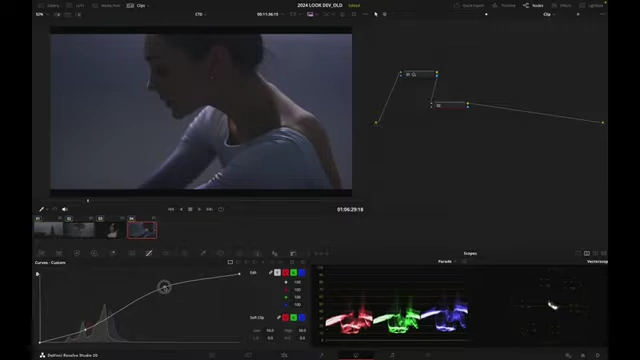
Applying an S-curve using the RGB curves to enhance contrast in the footage. [ 00:09:08 ]
- Introducing Color Shifts with Individual Curves [00:10:40]
- You can manipulate individual color channels (Red, Green, Blue) in the curves for targeted color shifts.
- By adjusting control points on these curves, you can subtly infuse colors into highlights, midtones, or shadows to achieve a desired aesthetic.
Adjusting the Red curve downwards to introduce cyan tones into the image, creating a cooler look. [ 00:10:57 ]
- Refining the Mood [00:11:17]
- Return to the contrast node and, with the chain icon linked (to manipulate all RGB channels simultaneously), further densify shadows or adjust highlights to achieve a more moody or stylized feel.
A moody cinematic look achieved with nodes for balancing, contrast, and color shifts. [ 00:11:52 ]
- Return to the contrast node and, with the chain icon linked (to manipulate all RGB channels simultaneously), further densify shadows or adjust highlights to achieve a more moody or stylized feel.
Conclusion and Workflow Summary [00:11:56]
The video concludes by reiterating the simplicity and effectiveness of this workflow for beginners.
- Key Workflow Elements: Use project settings for color management, HDR tab for global exposure and white balance, scopes for monitoring, and RGB curves for contrast and creative color adjustments.
- Understanding the Software: The host encourages learning how the software's tools fundamentally work rather than relying on pre-made LUTs, as this understanding provides more control and flexibility.