Creating a Futuristic Glitch Effect Edit in After Effects Using Reference Images
This tutorial demonstrates how to create a futuristic glitch edit in After Effects, emphasizing a creative workflow:
- The editor begins by using Pinterest as a primary source for visual references, selecting an image with a facial recognition aesthetic.
- Initial project setup involves selecting high-contrast crowd shots, applying sharp speed ramping, and setting the composition to a square aspect ratio at 18 FPS for a choppy, "screen recording" feel.
- Core effects are applied, starting with an invert effect (luminance mode) and a tri-tone to achieve the desired blueish-white color scheme, followed by a screen overlay.
- Specific elements like faces and a guitar are tracked, and effects like invert are masked to these tracked boxes, mimicking data scanning.
- Various glitch presets and one-frame effects are experimented with and adjusted to enhance movement and "glitchiness."
- Advanced distortions, such as a spinning polar coordinate warp, are incorporated to create dynamic, otherworldly visual effects.
- The process is iterative, with constant experimentation, and culminates in adding numerical overlays within the tracked boxes to complete the futuristic aesthetic.
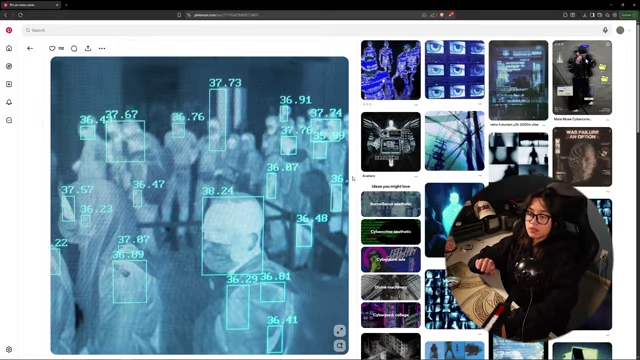
The original facial recognition system photograph used as a reference for the futuristic edit [ 00:01:53 ]
Introduction and Creative Approach [00:00:00]
The video outlines a workflow for creating a futuristic-style edit, drawing parallels to how artists create sketches. The creator emphasizes the importance of constant exploration and learning new techniques, advocating for low-commitment, experimental edits.
- Utilizing Pinterest for Inspiration [00:00:31]
- Pinterest is highlighted as an essential tool for creatives, including editors, artists, and illustrators.
- The platform's algorithm is praised for recommending similar artwork, providing a rich source of graphic design layouts and aesthetics.

Pinterest board with various graphic design inspirations and the editor's workspace [ 00:00:57 ]
- Selecting a Reference Image [00:01:33]
- A specific image with a facial recognition system aesthetic, featuring people with tracking boxes and numbers, is chosen as the primary reference.
- The creator notes the image was an actual photograph, not an artistic render, adding an eerie, realistic layer to the chosen style.
The original facial recognition system photograph used as a reference for the futuristic edit [ 00:01:53 ]
Project Setup and Initial Adjustments [00:02:06]
Due to a recording error, the video starts at the effects application stage, but the initial cutting and clip selection process is described.
- Clip Selection and Editing [00:02:19]
- Focus on crowd shots with strong contrast and centered layouts.
- Implementation of sharp speed ramping for a glitchy, dynamic feel.
- Composition Settings [00:02:38]
- The aspect ratio is set to a square, directly referencing the original image.
- The frame rate (FPS) is lowered to 18 to achieve a choppy, "screen recording" or "glitchy" aesthetic.
- Basic Color Correction [00:03:12]
- A new adjustment layer is created for basic color grading.
- Initial contrast is added to the log footage.
- Noise level and clipping are not a concern, as the footage will be heavily stylized to match the reference.
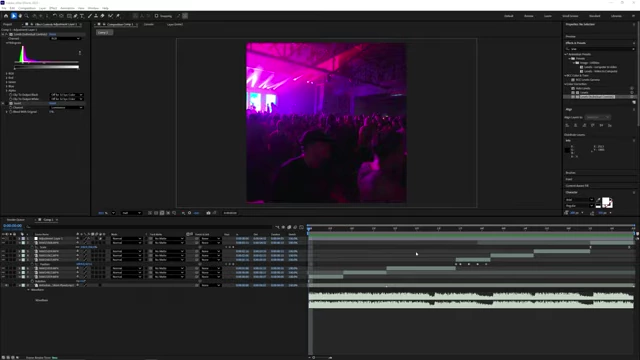
After Effects workspace showing initial log footage for a crowd shot and timeline setup [ 00:02:10 ]
Applying Core Futuristic Effects [00:03:45]
The main visual style of the reference image is recreated through several key effects.
- Invert Effect [00:03:48]
- An invert effect is applied to the adjustment layer.
- The channel mode is set to "Luminance" to avoid color shifts and maintain a grayscale inversion.
- Tri-tone Effect for Color Scheme [00:04:00]
- A tri-tone effect is added to establish the specific blueish-white color scheme of the reference.
- Highlights are adjusted to a light blue, midtones to a darker blue, and shadows are left black.
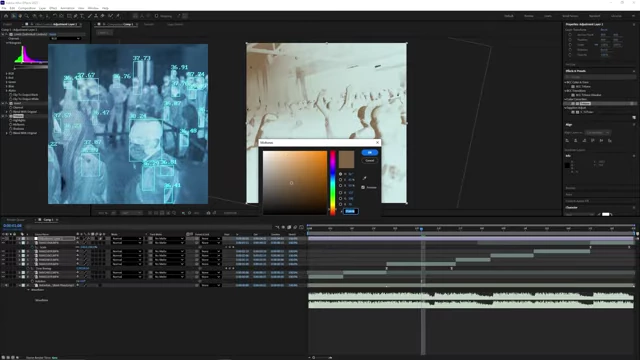
After Effects interface demonstrating the tri-tone effect applied to achieve the blueish-white color scheme [ 00:04:19 ]
- Screen Overlay for Pixelation [00:04:45]
- A "screen" effect, likely from a glitch pack, is applied to simulate visible pixels and enhance the screen-recording look.
- Experimentation with blending modes, specifically "Color Dodge," is used to integrate the screen effect more effectively and create a visually appealing result.
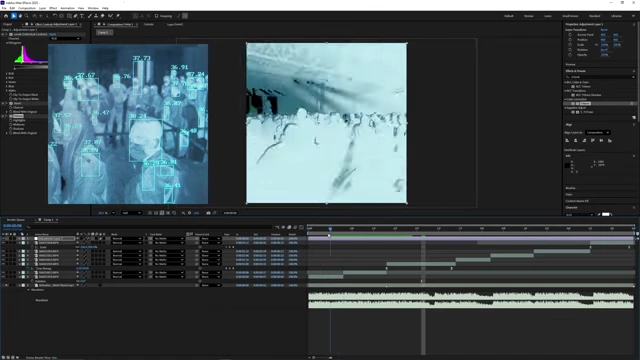
Comparison in After Effects showing the inverted and tri-toned clip alongside the original reference image [ 00:04:30 ]
Tracking and Masking Specific Elements [00:05:48]
To mimic the facial recognition aspect of the reference, individual elements within the footage are tracked and masked.
- Creating Tracked Boxes [00:05:52]
- Rectangular masks are manually drawn and tracked onto prominent elements like people's heads or a guitar.
- This process involves keyframing the mask position to follow the movement of the chosen elements throughout the clip.
- Applying Effects within Masks [00:08:04]
- The invert effect, previously applied globally, is selectively masked to appear only within these tracked rectangles.
- This creates a dynamic visual where only specific "scanned" areas are inverted, enhancing the futuristic surveillance aesthetic.

After Effects showing tracked rectangular masks applied to a performer and guitar, with inverted effects visible within the masks [ 00:08:00 ]
Experimenting with Glitch Presets and Transitions [00:09:45]
The editor dives into various glitch effects and transitions to add dynamic movement and visual interest.
- Trying Different Presets [00:09:45]
- The editor experiments with various glitch presets from a personal pack.
- This iterative process involves applying presets, previewing them, and deciding whether to keep, adjust, or discard them based on visual appeal and timing.
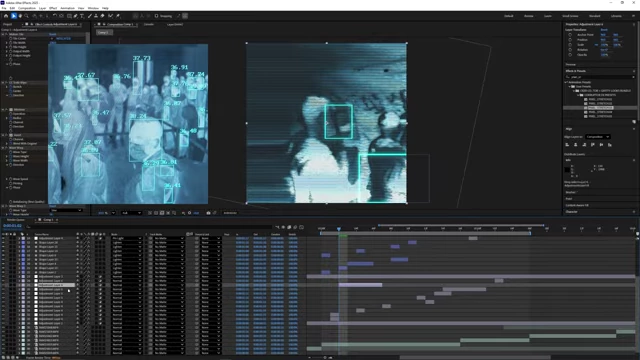
After Effects timeline and effects panel displaying various glitch presets being experimented with on a clip [ 00:11:18 ]
- Adjusting Keyframes and Timing [00:10:52]
- Keyframes of the applied effects are adjusted to control the speed and intensity of the glitches, ensuring they synchronize with the desired feel.
- For example, a "scale wipe" preset is explored, and its duration and direction are fine-tuned.
- Incorporating Flashes [00:15:30]
- Quick "flash" effects are added to certain segments to create sudden, impactful visual changes, breaking up the continuous flow.
Advanced Visual Distortions [00:20:00]
More complex effects are introduced to further enhance the futuristic and distorted visual style.
- Polar Coordinates Warp [00:20:00]
- A "polar coordinates" warp effect is applied to a large crowd shot.
- The effect is keyframed to start with high convergence, creating a tight, compressed circle, and then gradually expand, resembling a spinning, distorted globe.
- The angle of the warp is also keyframed to create a rotational movement.
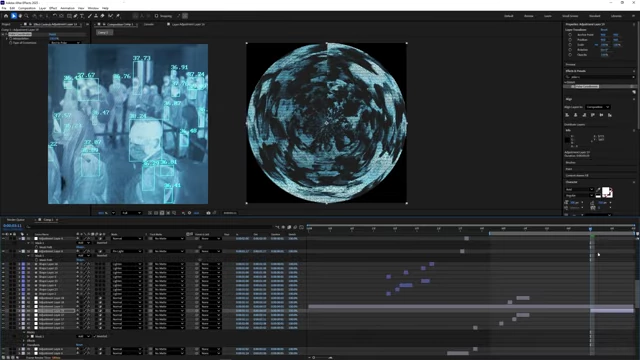
After Effects interface with a polar coordinates warp applied, distorting a crowd shot into a circular, spinning visual [ 00:20:18 ]
- Combining Effects [00:23:46]
- The polar coordinates warp is combined with glitch presets, leading to complex and visually striking distortions.
- This combination requires significant processing power, causing After Effects to lag, but yields unique results.
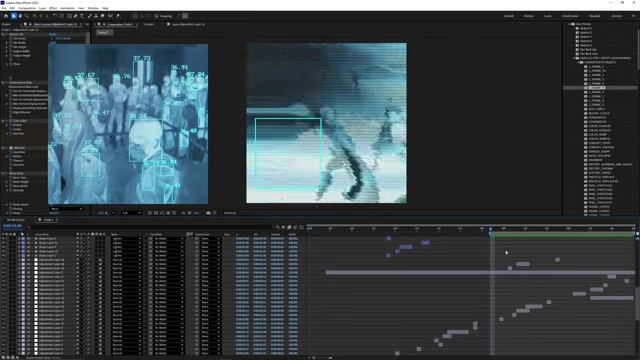
After Effects showing a complex visual distortion combining the polar coordinates warp with additional glitch effects [ 00:24:08 ]
Refinement and Final Touches [00:24:47]
The editing process concludes with minor adjustments and the addition of specific graphic elements.
- Iterative Process for Refinement [00:13:27]
- The editor highlights that much of the process involves asking "what if" and trying various effects and settings.
- This iterative approach means constantly evaluating if an effect "looks cool" or "needs more."
- Adding Numerical Overlays [00:25:27]
- To complete the facial recognition aesthetic, numbers are added and positioned within the tracked square masks.
- These numbers dynamically follow the tracked elements, reinforcing the futuristic data-scanning look.

After Effects displaying tracked boxes with numerical overlays added to the clip, mimicking a facial recognition display [ 00:25:38 ]
Key Takeaways for Editors [00:26:39]
The video concludes with valuable advice for aspiring and current video editors.
- Importance of Reference and Personalization [00:26:52]
- Concepts don't have to be original; the key is to find good references and then personalize them with unique effects, transitions, footage, and individual style.
- Embracing Presets and Efficiency [00:26:45]
- While the video heavily uses presets, the focus is on how they contribute to achieving a desired look efficiently, rather than animating everything by hand.
- Continuous Learning and "Sketching" [00:27:19]
- The creator plans to continue making more "sketch" videos, encouraging viewers to maintain a mindset of creative exploration and experimentation.