Seamless Sony RAW Photo and Video Color Matching Workflow in DaVinci Resolve
This video demonstrates how to use DaVinci Resolve to achieve consistent color grading between Sony RAW photos and S-Log3/S-Gamut3.Cine video footage, addressing common issues faced in Lightroom. The workflow covers:
- Proper project and color management setup in DaVinci Resolve, including specific settings for Mac users.
- Importing and organizing Sony RAW (.ARW) photos into separate portrait and landscape timelines with custom resolutions.
- Two methods for grading Sony RAW photos: utilizing the Color Space Transform (CST) node for a neutral look, and the Film Look Creator for quick aesthetic application.
- A technique for matching photo grades to existing video grades by grabbing and applying stills, with minor adjustments.
- An efficient batch export process for multiple graded photos, ensuring they retain the desired look.
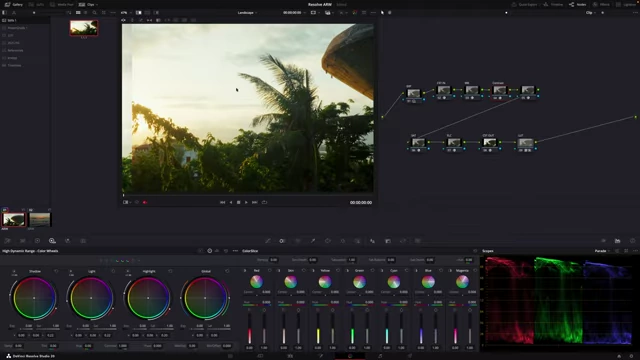
Comparison of a graded video still and a color-matched photo in Resolve [ 00:07:55 ]
Introduction and Lightroom's Limitations [0:00]
The speaker often struggles with achieving good colors, especially skin tones, for Sony RAW photos in Lightroom, noting that his DaVinci Resolve-graded videos look great while stills appear inconsistent. This video explores using DaVinci Resolve's native Sony RAW support (introduced in version 20.2) to overcome this color-matching problem.
Project Setup & Importing Photos [0:40]
Initial Project Settings for Video [0:40]
- The project resolution is set to Ultra HD (16x9 aspect ratio) for video content.
- Color management is configured with:
- DaVinci YRGB as the timeline color space.
- DaVinci Wide Gamut Intermediate for a broad working color space.
- Rec.709A as the output color space (specifically for Mac users, though DaVinci Resolve has recently improved this).
- The "Use Mac color display profile for viewers" option is enabled to ensure the viewer accurately matches exported results.
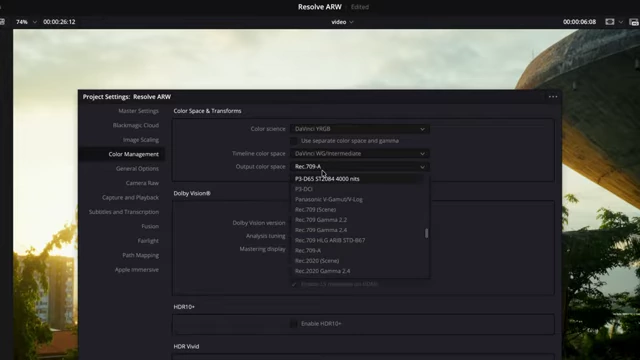
DaVinci Resolve Project Settings showing Color Management for video [ 00:01:15 ]
Importing Sony RAW Photos [1:44]
- Sony RAW (.ARW) photos are easily imported by dragging them directly into the media pool since DaVinci Resolve now supports them natively.
- To organize:
- Switch to list view in the media pool and sort photos by resolution to group portrait and landscape orientations.
- Create two separate timelines: one for portrait and one for landscape photos.
Custom Timeline Settings for Photos [2:36]
- Determine photo resolution: Check the info panel of a photo (e.g., 4240x2832 for landscape) to find its exact dimensions.
- Adjust landscape timeline settings:
- Right-click the "landscape" timeline, go to "Timeline Settings," and deselect "Use Project Settings."
- Manually input the photo's resolution (e.g., 4240x2832).
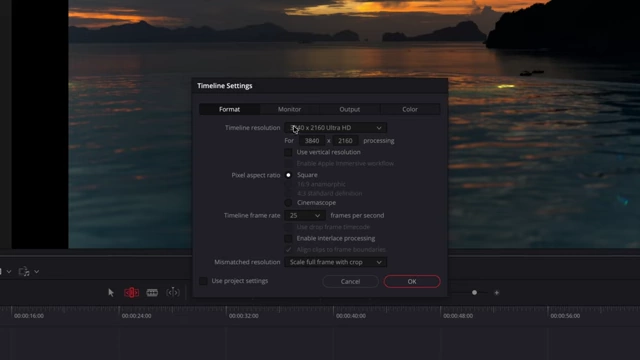
Timeline Settings - Format tab showing custom resolution for landscape photos [ 00:03:15 ] - Under the "Color" tab, change the Output Color Space from Rec.709 to sRGB, as photos are typically read as sRGB.
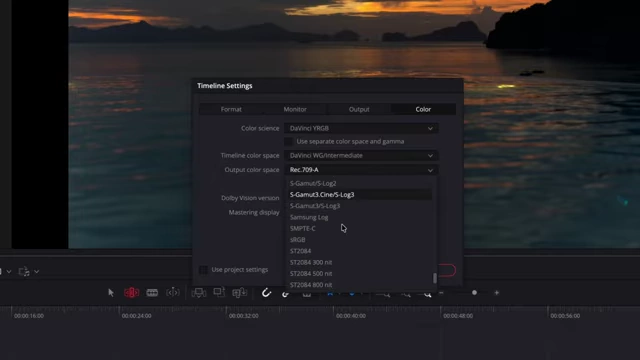
Timeline Settings - Color tab showing sRGB selected as the Output Color Space [ 00:03:35 ] - Save these settings.
- Adjust portrait timeline settings:
- Duplicate the landscape timeline.
- Rename the duplicated timeline to "portrait."
- In its timeline settings, enable the "Use vertical resolution" checkbox to automatically flip the dimensions for portrait orientation.
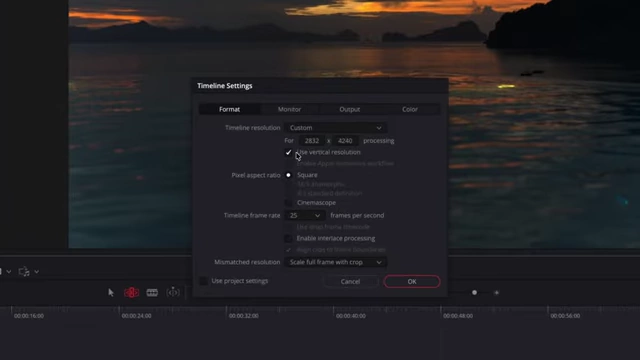
Timeline Settings - Format tab with "Use vertical resolution" checkbox enabled for portrait photos [ 00:04:00 ]
Grading Sony RAW Photos (S-Log3 / S-Gamut3.Cine) [4:14]
Setting Camera RAW Parameters [4:21]
- Upon initial viewing on the color page, Sony RAW photos might appear contrasty, not log. This is because Resolve automatically applies a default color space transform.
- In the "Camera RAW" panel, change the "Decode Using" option from "Camera Metadata" to "Clip."
- Set the Color Space to S-Gamut3.Cine and Gamma to S-Log3 to interpret the RAW data correctly, providing a flat, log-like image similar to video footage.
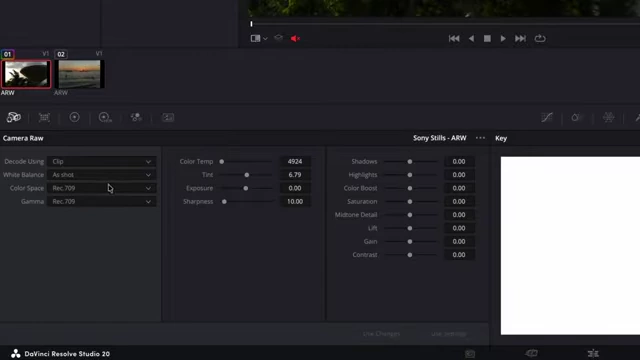
Camera RAW settings showing 'Decode Using Clip' with Color Space S-Gamut3.Cine and Gamma S-Log3 selected [ 00:04:50 ]
Two Grading Workflows for Photos
- Using Color Space Transform (CST) Node [5:06]
- Add a "Color Space Transform" node to convert the S-Log3/S-Gamut3.Cine input to a standard output like Rec.709.
- Use HDR wheels to fine-tune exposure and white balance for a neutral base grade.
- Adjust contrast and saturation as desired to create a quick, neutral look.
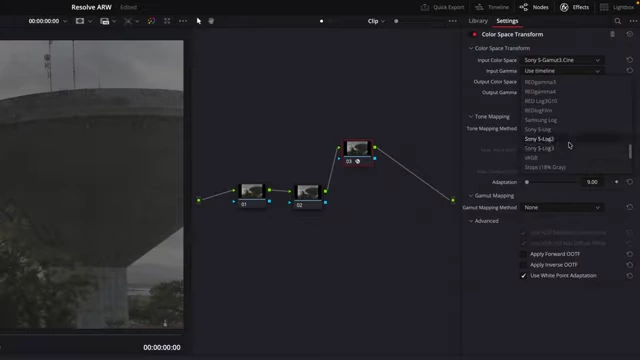
Color Space Transform node settings converting S-Log3/S-Gamut3.Cine to Rec.709 [ 00:05:15 ]
- Using Film Look Creator Node (Single Node) [6:01]
- Reset the grade and apply a "Film Look Creator" node.
- Set the input Color Space to S-Log3/S-Gamut3.Cine and the output to Rec.709.
- Adjust exposure and saturation within this single node for a quick stylistic look.
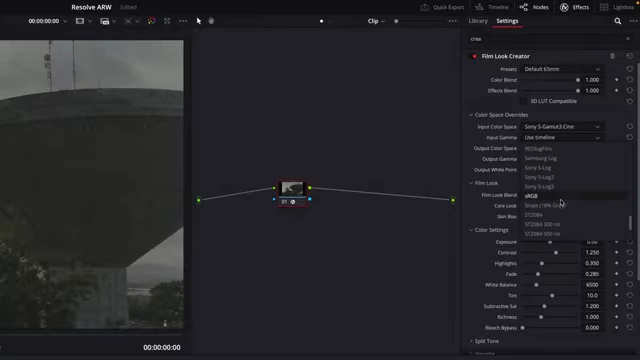
Film Look Creator node settings with input S-Gamut3.Cine/S-Log3 and output Rec.709 [ 00:06:15 ]
Matching Photo Grade to Video Grade [7:00]
- Switch to the video timeline and grab a still from a graded video clip to save its look to the stills gallery.
- Switch back to the photo timeline.
- Reset the photo's grade.
- Apply the saved video grade to the photo by middle-mouse clicking or right-clicking and selecting "Apply Grade."
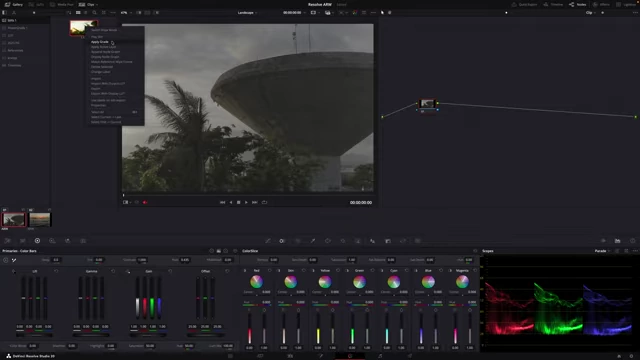
Right-click context menu on a photo in the color page, showing the "Apply Grade" option [ 00:07:32 ] - Make slight adjustments to the photo's exposure and contrast to perfectly match the video's aesthetic.
Side-by-side comparison of a video still and a photo after applying the video grade in Resolve [ 00:07:55 ] - This process also works for portrait photos, ensuring consistent branding across all media.
Exporting Photos Properly [8:50]
Inefficient Export Method (Single Image) [9:04]
- The "File > Export > Export Frame as Still" function allows exporting one JPEG at a time.
- A keyboard shortcut can be assigned for this function.
- This method is time-consuming for multiple photos.
Efficient Batch Export Workflow [9:51]
- On the Color page, create a new still album (e.g., "Photos").
- Select all the photos on your timeline that you wish to export.
- Right-click on the viewer and select "Grab all stills" (first frame or middle frame doesn't matter as they are single frames).
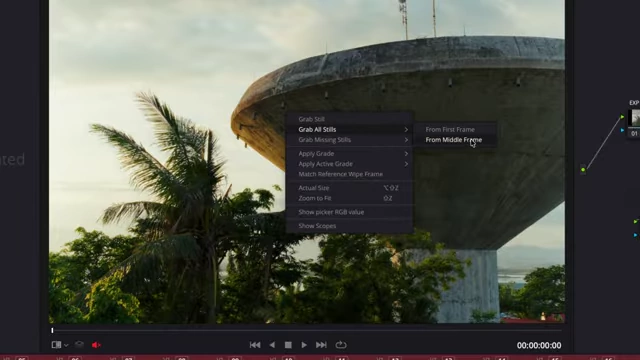
Context menu showing the "Grab All Stills" option to add multiple photos to the stills gallery [ 00:10:15 ] - In the stills gallery, select all the newly grabbed stills.
- Right-click on the selected stills and choose "Export."
- Select a destination folder and choose JPEG as the output format.
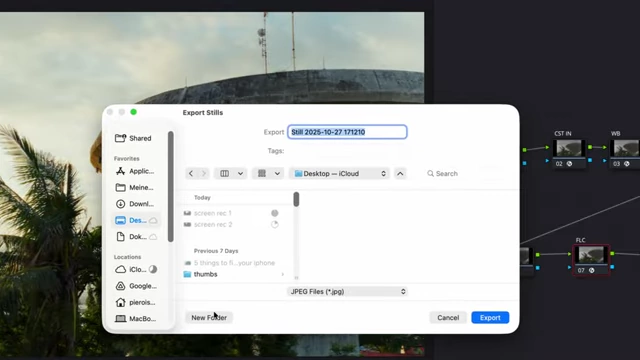
Export Stills dialogue box with JPEG Files (*.jpg) selected as the output format [ 00:10:35 ] - Click "Export" to save all the graded photos.
- Navigate to the export folder, sort by file type, and delete any unwanted DRX files, leaving only the JPEGs.
Conclusion [11:04]
DaVinci Resolve serves as an excellent tool for hybrid shooters to achieve precise color matching between their Sony RAW photos and video footage, offering a more integrated workflow than using separate software like Lightroom for stills. The speaker emphasizes that this workflow is about matching looks, not necessarily replacing Lightroom for other photo editing tasks.